"Unlocking Continuous Integration and Deployment with Jenkins: Streamlining Your Software Development Workflow"
"A comprehensive guide to implementing Jenkins for Continuous Integration and Deployment (CI/CD) to revolutionize your software development process."


Introduction:
In the fast-paced world of software development, efficiency and reliability are paramount. Continuous Integration and Deployment (CI/CD) has emerged as a game-changing approach, enabling teams to streamline their development workflow and deliver high-quality software at an accelerated pace. Jenkins, an open-source automation server, plays a pivotal role in making CI/CD a reality. In this blog, we'll explore how Jenkins empowers developers to build, test, and deploy applications with ease, and showcase a practical project that demonstrates its immense capabilities.
Section 1: Understanding CI/CD and Its Significance
Unveiling the core concepts of Continuous Integration (CI) and Continuous Deployment (CD):
In the fast-paced world of software development, it's crucial to stay ahead of the curve. This is where Continuous Integration (CI) and Continuous Deployment (CD) come into play. CI involves the practice of frequently merging code changes from multiple developers into a shared repository. It ensures that conflicts are detected early, promoting collaboration and reducing integration headaches down the line. CD, on the other hand, focuses on automating the release and deployment of software, making the entire process faster and more reliable.
Exploring the benefits of CI/CD for modern software development teams:
CI/CD offers a plethora of benefits that can truly transform your software development process. First and foremost, it enhances the overall quality of your software by catching bugs and issues early on. By continuously integrating code changes and running automated tests, you can identify and fix problems swiftly, ensuring a stable and reliable application.
Additionally, CI/CD promotes collaboration among team members. With frequent code integration and automated testing, developers can work in parallel and resolve conflicts quickly, saving valuable time and fostering a more efficient workflow. This collaborative environment leads to improved productivity and smoother teamwork.
Moreover, CI/CD significantly reduces the risk associated with software releases. By automating the deployment process, you eliminate manual errors and ensure consistency across different environments. This means that you can confidently and reliably deploy new features and updates to your users, without the fear of breaking things or causing downtime.
Highlighting the role of automation in driving efficient software delivery:
Automation lies at the heart of CI/CD and is the driving force behind its success. By automating tasks such as building, testing, and deployment, you free up valuable time for developers to focus on more critical aspects of development, such as adding new features and improving user experience.
Automation also reduces the likelihood of human errors that often creep in during manual processes. With consistent and repeatable automated workflows, you can ensure that every release follows the same steps, eliminating the chance of missed configurations or oversights.
Furthermore, automation enables rapid feedback loops. With each code change triggering an automated build and test cycle, developers receive prompt feedback on the impact of their changes. This empowers them to iterate and improve code quality quickly, fostering a culture of continuous improvement.
In conclusion, CI/CD, driven by automation, brings immense benefits to modern software development teams. By embracing these practices, you can enhance software quality, promote collaboration, reduce risks during deployments, and accelerate your software delivery cycle. So, let's dive deeper into the world of Jenkins and uncover how it can help you unlock the full potential of CI/CD.
Section 2: Introducing Jenkins: The Swiss Army Knife of CI/CD
Jenkins is the ultimate powerhouse when it comes to Continuous Integration and Deployment (CI/CD). It's like having a Swiss Army knife in your development toolkit, ready to tackle any automation challenge. Let's take a closer look at Jenkins and discover why it's the go-to tool for thousands of developers worldwide.
An Overview of Jenkins and its key features:
Jenkins is an open-source automation server that acts as the backbone of your CI/CD pipeline. It provides a centralized platform for automating the entire software development process, from building and testing to deploying applications. With Jenkins, you can wave goodbye to manual and error-prone tasks, and say hello to a streamlined and efficient workflow.
What sets Jenkins apart are its impressive features. It offers robust support for various programming languages, version control systems, and build tools. Whether you're working with Java, Python, or any other language, Jenkins has got you covered. It seamlessly integrates with popular version control systems like Git, enabling smooth code management. Plus, it supports a wide array of build tools like Maven and Gradle, making it incredibly flexible for your project needs.
Understanding the architecture of Jenkins and its extensibility:
To grasp the true power of Jenkins, it's essential to understand its architecture. Jenkins follows a master-agent architecture, where the master acts as the central control hub, and agents are the worker nodes that execute tasks. This distributed setup allows for scalability and efficient resource utilization.
The extensibility of Jenkins is another feather in its cap. You can extend its functionality through plugins, which are like magical add-ons that enhance its capabilities. Jenkins boasts an extensive plugin ecosystem, offering thousands of plugins to choose from. Whether you need integrations with cloud platforms, testing frameworks, or notification systems, there's a plugin for almost everything. With plugins, you can customize Jenkins to fit your unique requirements and build a tailored CI/CD environment.
Exploring the vast plugin ecosystem to customize Jenkins for your needs:
The plugin ecosystem of Jenkins is a treasure trove for developers. It's like a candy store where you can find plugins for every development need you can imagine. Need to deploy your application to the cloud? There are plugins for AWS, Azure, and Google Cloud. Looking to integrate Jenkins with your favorite testing framework? There are plugins for JUnit, Selenium, and many more.
But it doesn't stop there. You can find plugins for code quality analysis, security scanning, artifact management, and even chatbot notifications. These plugins seamlessly integrate with Jenkins, expanding its functionality and empowering you to craft a CI/CD environment that aligns perfectly with your project requirements.
With Jenkins and its vast plugin ecosystem, the possibilities are endless. You have the freedom to customize and extend Jenkins to suit your development workflow, enabling you to deliver software faster, with higher quality, and with less effort.
Conclusion: Jenkins is not just another automation tool; it's a game-changer for developers looking to embrace the power of CI/CD. With its robust features, scalable architecture, and extensive plugin ecosystem, Jenkins empowers you to automate your software development process and optimize your workflow. So, why wait? Dive into the world of Jenkins, explore its key features, understand its architecture, and leverage the vast plugin ecosystem to unlock a new level of productivity and efficiency in your development journey.
Section 3: Setting Up Jenkins for CI/CD Success
Step-by-step instructions to install Jenkins on different platforms:
One of the first steps towards unlocking the power of Jenkins for CI/CD success is setting it up correctly in your development environment. In this section, we will guide you through the process with step-by-step instructions on how to install Jenkins on different platforms, configure it to match your project requirements, and seamlessly integrate it with version control systems for efficient code management.
Step 1: Installing Jenkins
Installing Jenkins is a breeze, regardless of your platform. Here's how you can get started:
For Linux:
Open your terminal and run the following commands:
 sudo apt update
 sudo apt install openjdk-11-jdk
 wget -q -O - https://pkg.jenkins.io/debian/jenkins.io.key | sudo apt-key add -
 sudo sh -c 'echo deb http://pkg.jenkins.io/debian-stable binary/ > /etc/apt/sources.list.d/jenkins.list'
 sudo apt update
 sudo apt install jenkins
Jenkins should now be installed on your Linux machine.
For macOS:
Follow these steps to install Jenkins on macOS:
Download the Jenkins macOS installer package from the official website.
Double-click the downloaded package to start the installation.
Follow the on-screen instructions, and Jenkins will be installed on your macOS system.
For Windows:
To install Jenkins on Windows, follow these steps:
Download the Jenkins Windows installer package from the official website.
Double-click the downloaded installer file to start the installation wizard.
Follow the on-screen instructions, specifying the installation path and other preferences.
Once the installation is complete, Jenkins will be up and running on your Windows machine.
Configuring Jenkins for your development environment and project requirements:
After installing Jenkins, it's essential to configure it according to your development environment and project requirements. Here's how you can do it:
Open your web browser and navigate to
http://localhost:8080. This will take you to the Jenkins dashboard.You'll be prompted to unlock Jenkins by entering an automatically generated initial administrator password. To retrieve this password, run the following command in your terminal:
sudo cat /var/lib/jenkins/secrets/initialAdminPassword
Copy the password and paste it into the Jenkins dashboard.
Next, you'll be asked to customize Jenkins. You can choose to install recommended plugins or select specific plugins based on your project needs. After making your selection, the installation process will begin.
Once the plugins are installed, you'll be prompted to create an admin user and provide the necessary details.
Finally, you can set the URL for Jenkins and complete the configuration process.
Integrating Jenkins with version control systems for seamless code management:
Seamless code management is crucial for effective CI/CD. Jenkins offers seamless integration with popular version control systems like Git. Here's how you can integrate Jenkins with your version control system:
Install the necessary plugins for your version control system. For Git integration, you can install the "Git Plugin" from the Jenkins Plugin Manager.
In your Jenkins dashboard, navigate to the project's configuration page.
Under the "Source Code Management" section, select "Git" as the repository type.
Provide the repository URL and credentials if required. You can also specify the branch to build and other advanced Git configurations.
Save the configuration, and Jenkins will now be integrated with your version control system.
With Jenkins properly installed, configured, and integrated with your version control system, you are now ready to embark on your CI/CD journey. The foundation has been laid for automating your builds, testing your code, and achieving efficient software delivery. In the next sections, we will delve deeper into utilizing Jenkins for CI/CD success and explore advanced techniques to maximize its potential. Stay tuned!
Note: The installation and configuration steps provided here are generic. It's always recommended to refer to the official Jenkins documentation for platform-specific instructions and the latest updates.
Section 4: Building and Testing with Jenkins
Building and testing are crucial aspects of software development that can be time-consuming and error-prone if done manually. Fortunately, Jenkins comes to the rescue with its powerful automation capabilities, allowing you to streamline the build process and implement effective testing strategies. In this section, we'll explore how you can leverage Jenkins to automate builds, implement testing frameworks, and ensure top-notch code quality through automated test pipelines. Let's dive in!
Leveraging Jenkins to automate the build process for your projects:
The build process involves compiling source code, resolving dependencies, and creating deployable artifacts. Jenkins simplifies this process by automating it, saving you valuable time and effort. Here's how you can do it:
Step 1: Configure Jenkins to fetch your source code from the version control system. Use the following command to create a new Jenkins job:
$ jenkins-cli create-job <job_name> <config.xmlStep 2: Set up build triggers to automatically initiate the build process whenever changes are detected in the repository. You can use the following command to configure a build trigger:
$ jenkins-cli set-build-trigger <job_name> <trigger_option>Step 3: Define the build steps, such as compiling code, running unit tests, and packaging artifacts. Jenkins provides a wide range of plugins and integrations with build tools like Maven or Gradle, enabling seamless execution of these steps.
Step 4: Execute the build using Jenkins by running the following command:
$ jenkins-cli build <job_name>Implementing Effective Testing Strategies:
Testing is crucial for ensuring the quality and reliability of your software. With Jenkins, you can integrate popular testing frameworks like JUnit or Selenium to automate your testing process. Here's how you can do it:
Step 1: Install the necessary plugins for the testing frameworks you wish to use. Jenkins has a vast plugin ecosystem that supports various testing tools.
Step 2: Configure the testing environment by specifying the target platform, browser configurations, or any other required settings.
Step 3: Create a new testing job in Jenkins using the following command:
$ jenkins-cli create-job <job_name> <config.xmlStep 4: Define the test cases or suites you want to execute, specifying the corresponding test framework commands or scripts.
Step 5: Trigger the testing process manually or configure Jenkins to execute tests automatically after a successful build.
Harnessing the power of automated test pipelines to ensure code quality:
Automated test pipelines enable you to execute tests in a systematic and repeatable manner, ensuring consistent code quality. Jenkins facilitates the creation and management of test pipelines. Here's how you can harness this power:
Step 1: Install the Jenkins Pipeline plugin to enable pipeline functionality.
Step 2: Define a Jenkins pipeline script that includes stages for building, testing, and other relevant tasks. Use the declarative or scripted syntax based on your preference.
Step 3: Configure the pipeline to trigger automatically whenever a build is successful or on a specific schedule.
Step 4: Visualize the progress and results of your test pipeline using the Jenkins dashboard or other monitoring tools.
By automating the build process, implementing effective testing strategies, and harnessing the power of automated test pipelines, Jenkins empowers you to maintain high code quality and streamline your software development workflow. With just a few commands and configurations, you can leverage the full potential of Jenkins to achieve reliable and efficient software delivery.
Section 5: Continuous Deployment Made Easy with Jenkins
Automation is the key to achieving rapid and reliable deployment in your software development lifecycle. With Jenkins, you can leverage powerful pipelines to automate the entire deployment process, ensuring smooth and efficient delivery of your applications. In this section, we'll explore how to configure deployment stages, set up different environments, and integrate Jenkins with Docker for efficient deployment. Let's dive in!
Automating the deployment process with Jenkins pipelines:
Jenkins pipelines provide a declarative and script-based approach to defining your entire deployment workflow. Here's how you can get started:
Create a Jenkins pipeline:
In your Jenkins project, navigate to the pipeline configuration and define a new pipeline script. You can either write the script directly in the Jenkins interface or store it in a version control repository.
Define stages:
Break down your deployment process into stages. Each stage represents a logical step, such as building, testing, and deploying your application. Use the stage directive to define stages in your pipeline script.
Execute steps:
Within each stage, you can define multiple steps that Jenkins will execute. Steps can include actions like checking out the source code, running tests, or packaging your application. Use the steps directive to define steps in your pipeline script.
Utilize plugins:
Jenkins offers a wide range of plugins to extend the functionality of your deployment pipeline. You can leverage plugins for integration with cloud platforms, notification systems, or any other custom requirements. Install and configure the required plugins to enhance your pipeline capabilities.
Configuring deployment stages and environments for different deployment scenarios:
Different deployment scenarios often require specific configurations and environments. With Jenkins, you can easily configure multiple deployment stages and define environments to suit your needs. Here's how:
Define stages:
In your Jenkins pipeline script, create separate stages for each deployment scenario, such as staging, production, or testing.
Set up environments:
For each deployment stage, define the environment-specific variables, such as server addresses, credentials, or configuration files. Jenkins allows you to store these variables securely as environment variables or in a credentials store.
Configure stage-specific actions:
Customize the actions performed within each deployment stage based on your requirements. For example, you might want to run additional tests in the staging environment or trigger specific notifications in the production environment.
Integrating Jenkins with containerization tools like Docker for efficient deployment:
Containerization has revolutionized software deployment by providing lightweight and isolated environments. Jenkins seamlessly integrates with Docker, allowing you to leverage its benefits for efficient and consistent deployments. Here's how to integrate Jenkins with Docker:
Install Docker on your Jenkins server:
Ensure that Docker is installed and properly configured on the machine running Jenkins. You can follow the official Docker documentation for installation instructions.
Configure Jenkins to use Docker:
In the Jenkins configuration, navigate to the Docker plugin settings and specify the Docker daemon connection details. This enables Jenkins to interact with Docker and build or deploy containerized applications.
Build and deploy Docker containers:
Within your Jenkins pipeline, utilize Docker commands to build, push, and deploy your application containers. You can define Dockerfiles, specify container configurations, and execute Docker commands as part of your pipeline steps.
By integrating Jenkins with Docker, you can achieve consistent deployments across different environments, eliminate dependency issues, and ensure reproducibility in your application releases.
Conclusion:
In this section, we explored the power of Jenkins pipelines in automating the deployment process. We learned how to configure deployment stages and set up different environments to cater to specific deployment scenarios. Additionally, we saw how Jenkins seamlessly integrates with Docker, enabling efficient deployment through containerization. By harnessing these capabilities, you can streamline your deployment workflow, improve reliability, and achieve faster time-to-market for your applications. So, start automating your deployments with Jenkins today and unlock the true potential of continuous deployment!
Section 6: Realizing CI/CD in Action: Project Showcase
In this section, we will delve into a practical project that showcases the power of Jenkins in implementing an end-to-end CI/CD process using an AWS EC2 instance. By following along with this project, you'll gain hands-on experience in setting up your own Jenkins pipelines, automating builds, conducting tests, and deploying your application with confidence on AWS. Let's dive in!
Project Setup on AWS EC2:
To begin, provision an EC2 instance on AWS and ensure that Jenkins is installed and running on it. Follow these steps:
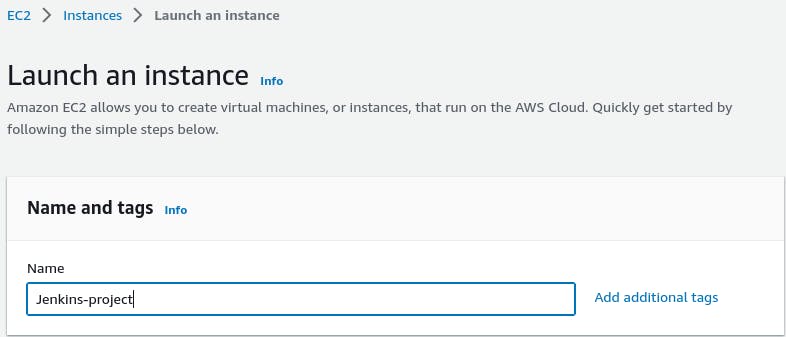
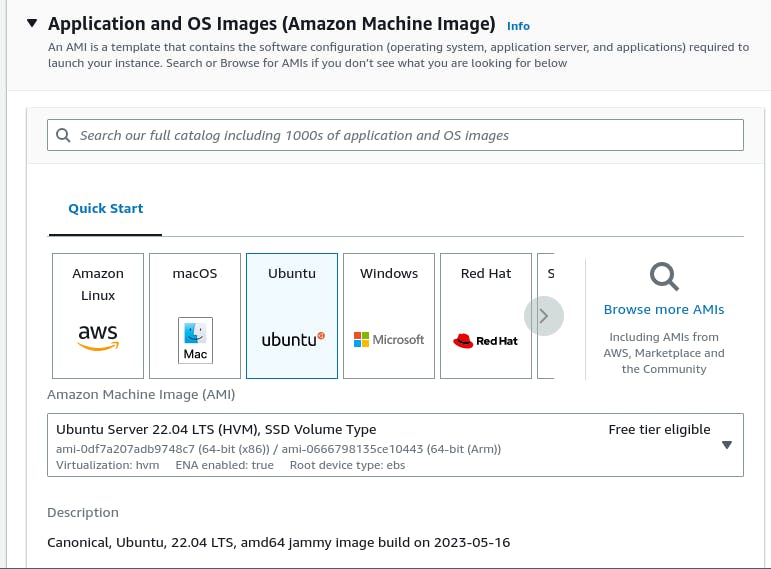
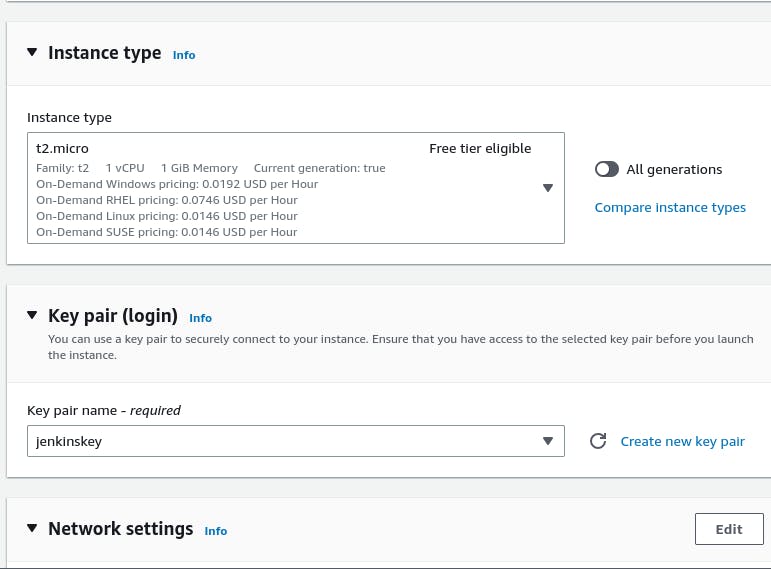
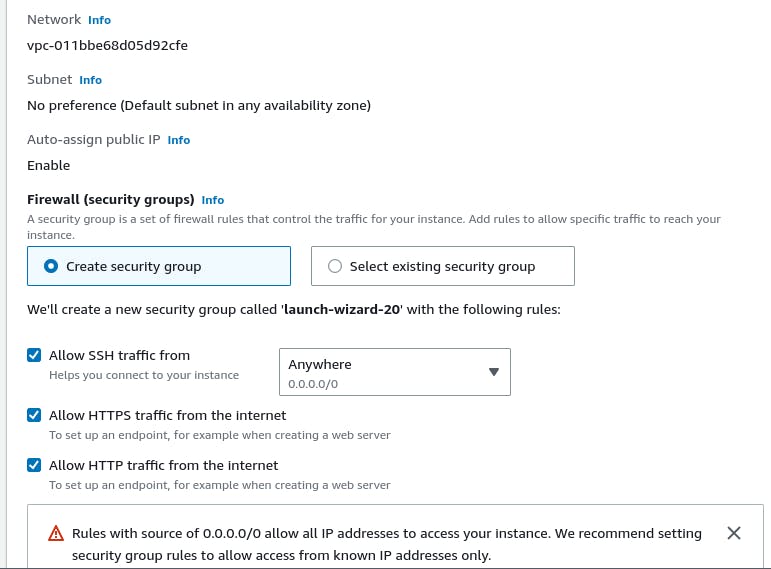
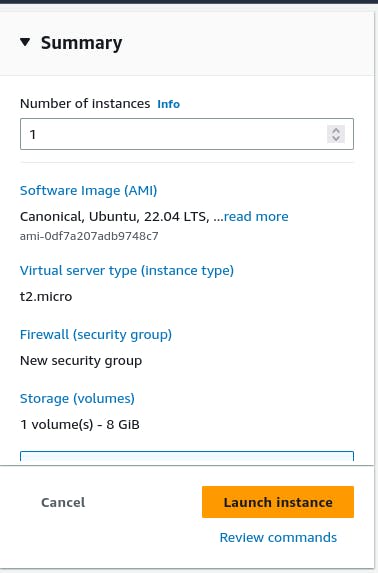
Launch an EC2 instance with the desired operating system.

Connect to the instance using SSH.


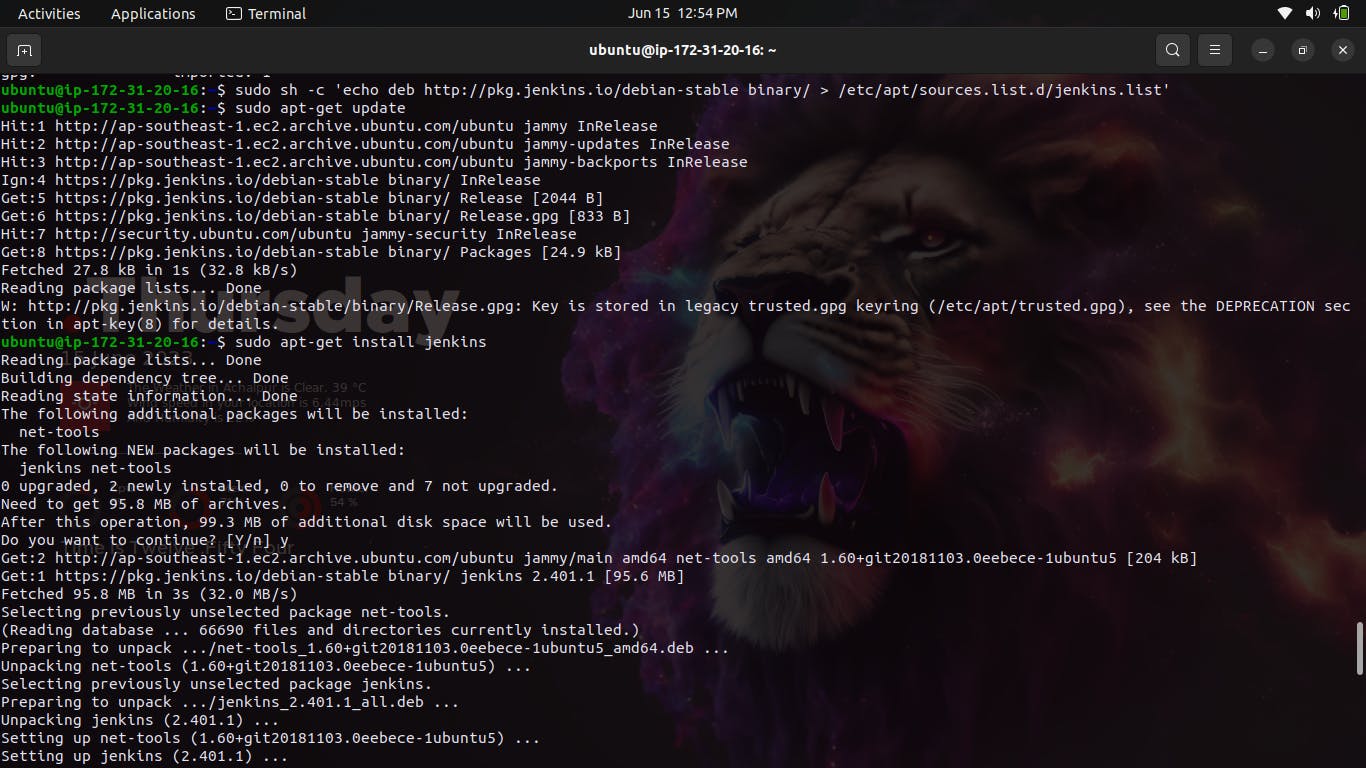
Install Jenkins on the EC2 instance with the following commands:
    sudo apt update
    sudo apt install openjdk-11-jdk
    wget -q -O - https://pkg.jenkins.io/debian/jenkins.io.key | sudo apt-key add -
    sudo sh -c 'echo deb http://pkg.jenkins.io/debian-stable binary/ > /etc/apt/sources.list.d/jenkins.list'
    sudo apt update
    sudo apt install jenkins
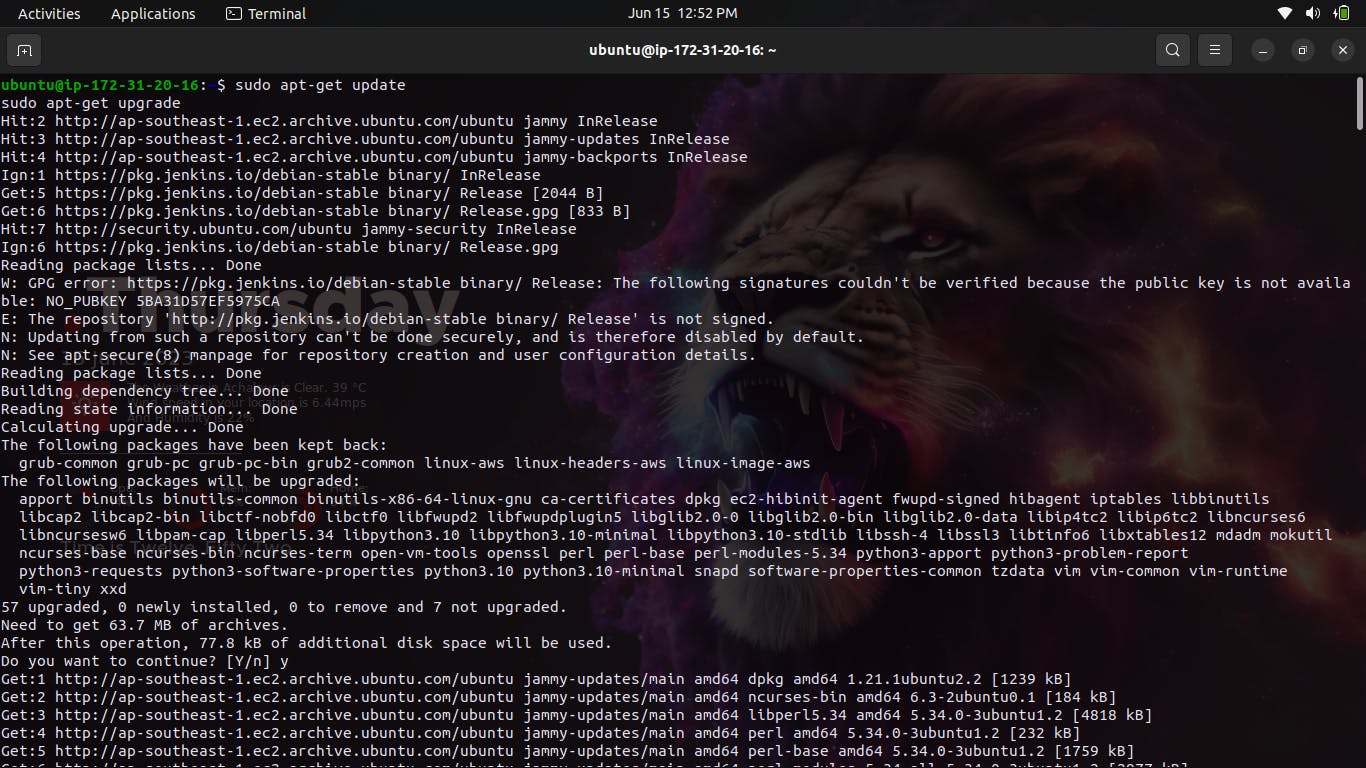
If you encounter any error by these processes you can also follow the following steps:
# Update and upgrade the system
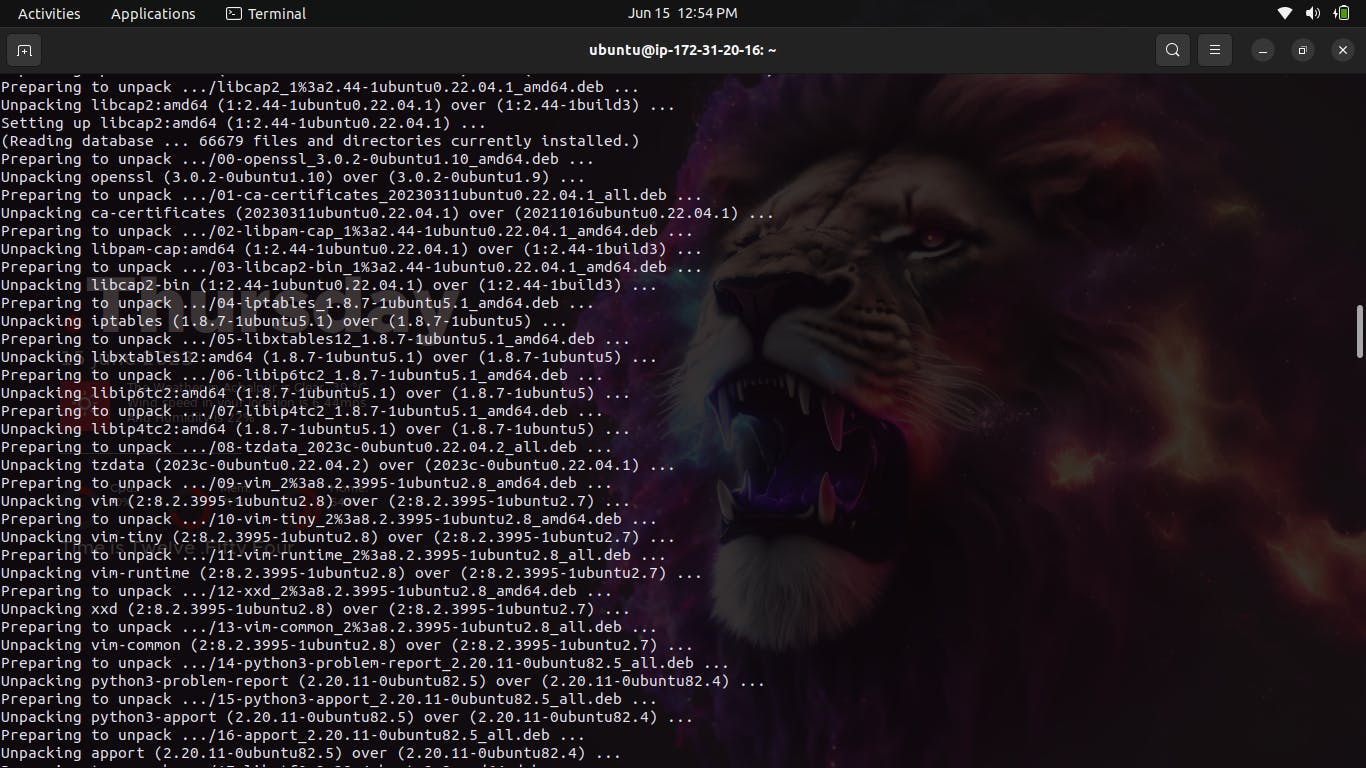
sudo apt-get update
sudo apt-get upgrade -y
# Import the Jenkins repository key
sudo apt-key adv --keyserver keyserver.ubuntu.com --recv-keys 5BA31D57EF5975CA
# Add the Jenkins repository to sources.list
echo "deb http://pkg.jenkins.io/debian-stable binary/" | sudo tee /etc/apt/sources.list.d/jenkins.list
# Update the package lists
sudo apt-get update
# Install Jenkins
sudo apt-get install -y jenkins
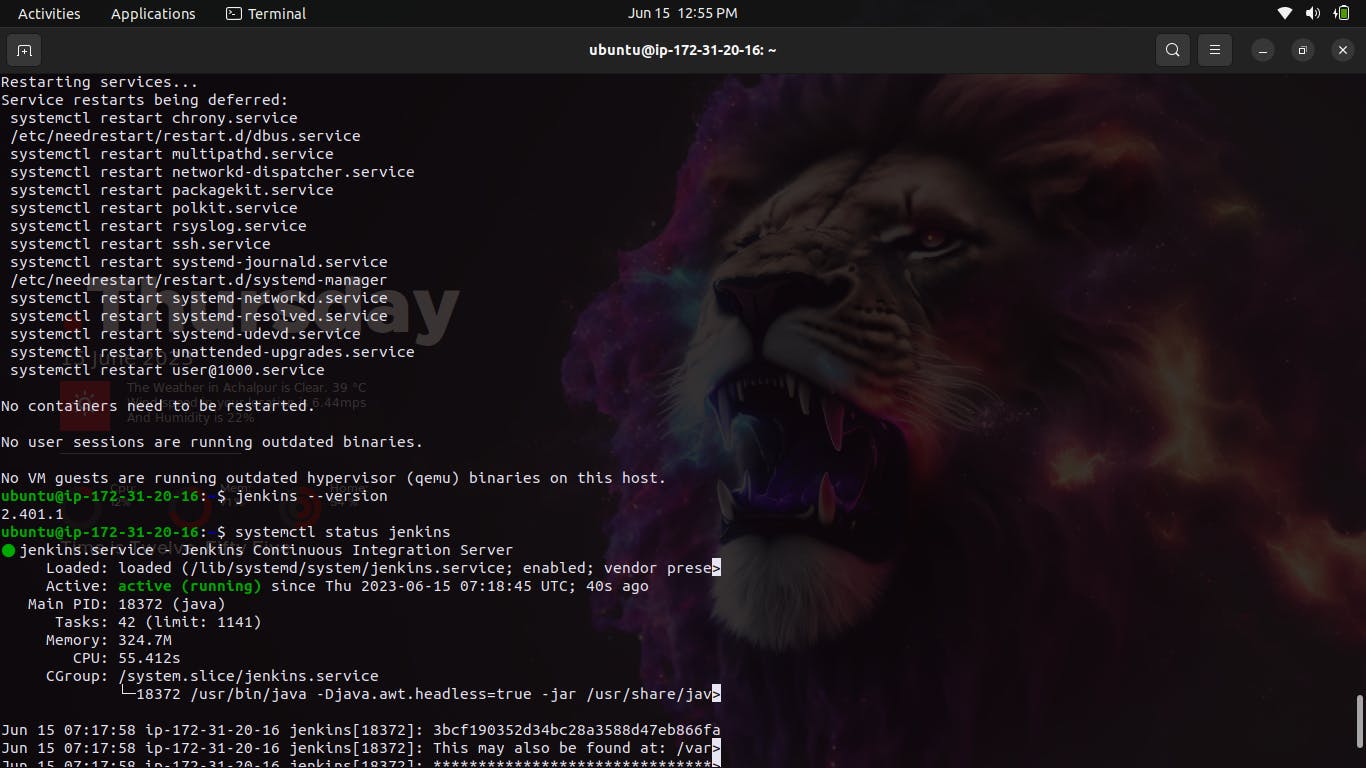
# Start Jenkins service
sudo systemctl start jenkins
# Enable Jenkins service to start on boot
sudo systemctl enable jenkins


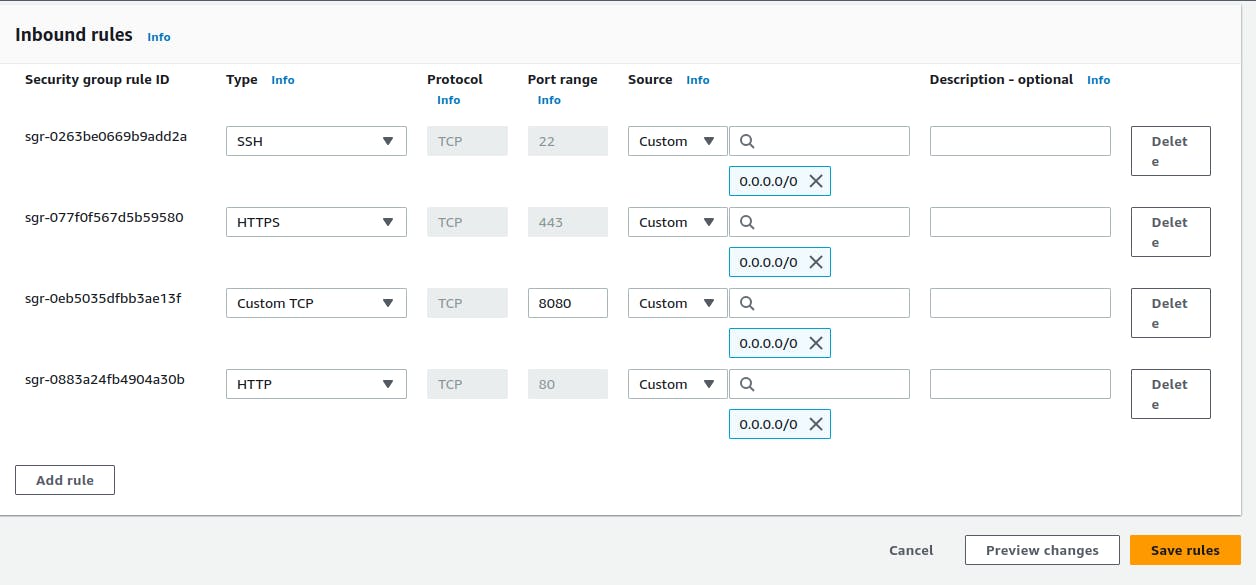
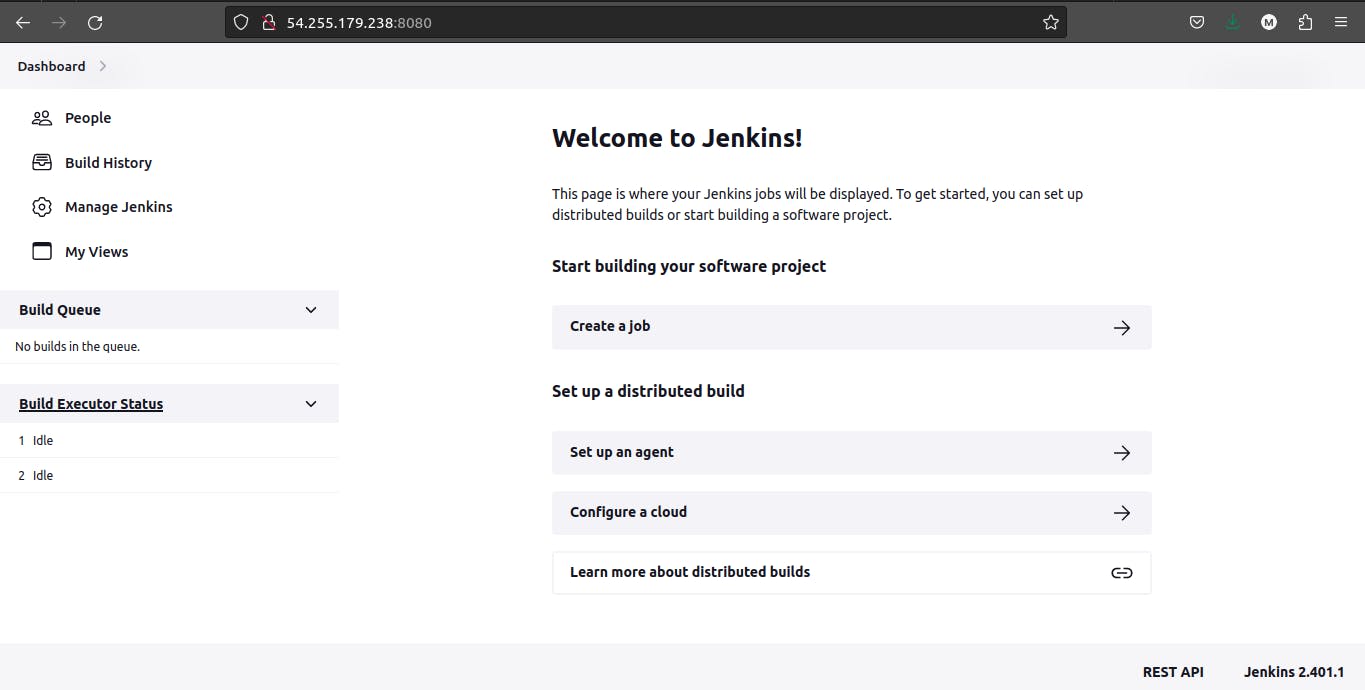
Access the Jenkins web interface by opening your browser and navigating to http://<EC2_Instance_Public_IP>:8080.
Note:- Always Remember to open the port from the Inbound settings.
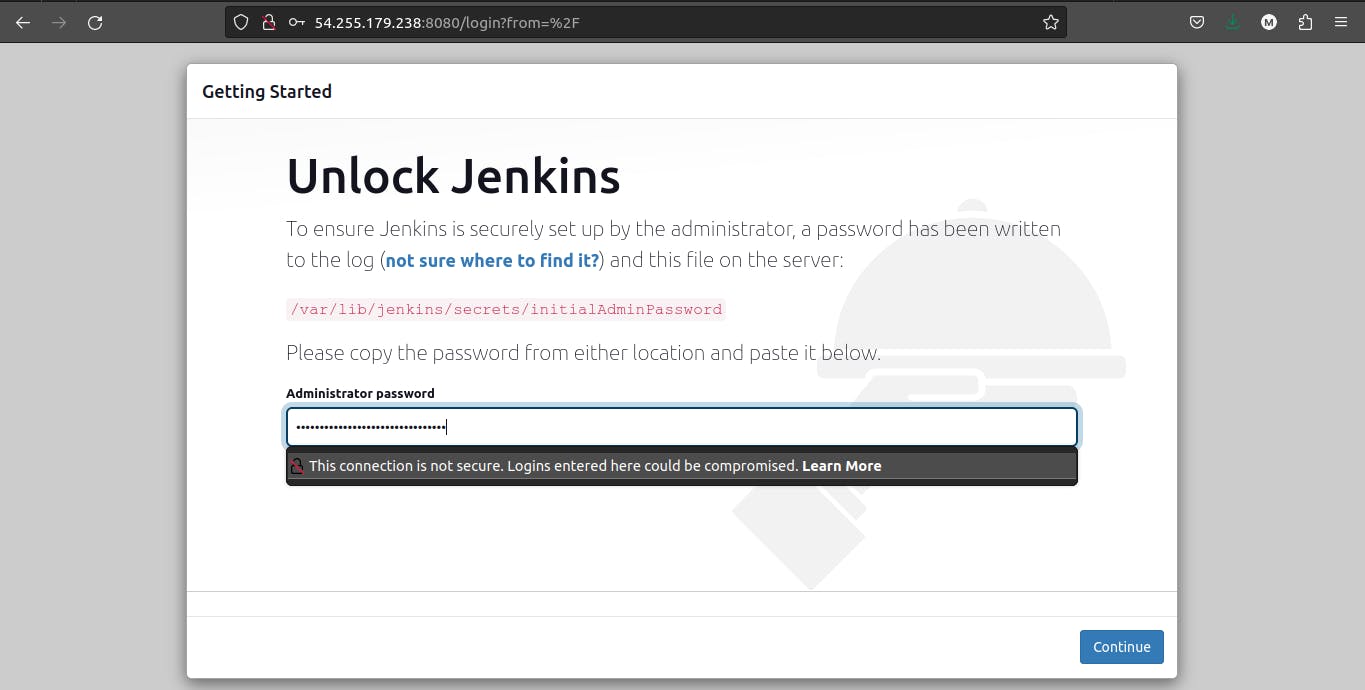
If you are successfully able to open the Jenkins then you can see the following thing on your screen:

Now to Unlock Jenkins we need the Administrative Password, and to find that password we need to copy and open the given path in our terminal with the cat command.

Now copy and paste the given password in Jenkins and click on continue.
Now you will see the two options, you just have to continue with the Install Plugins things.
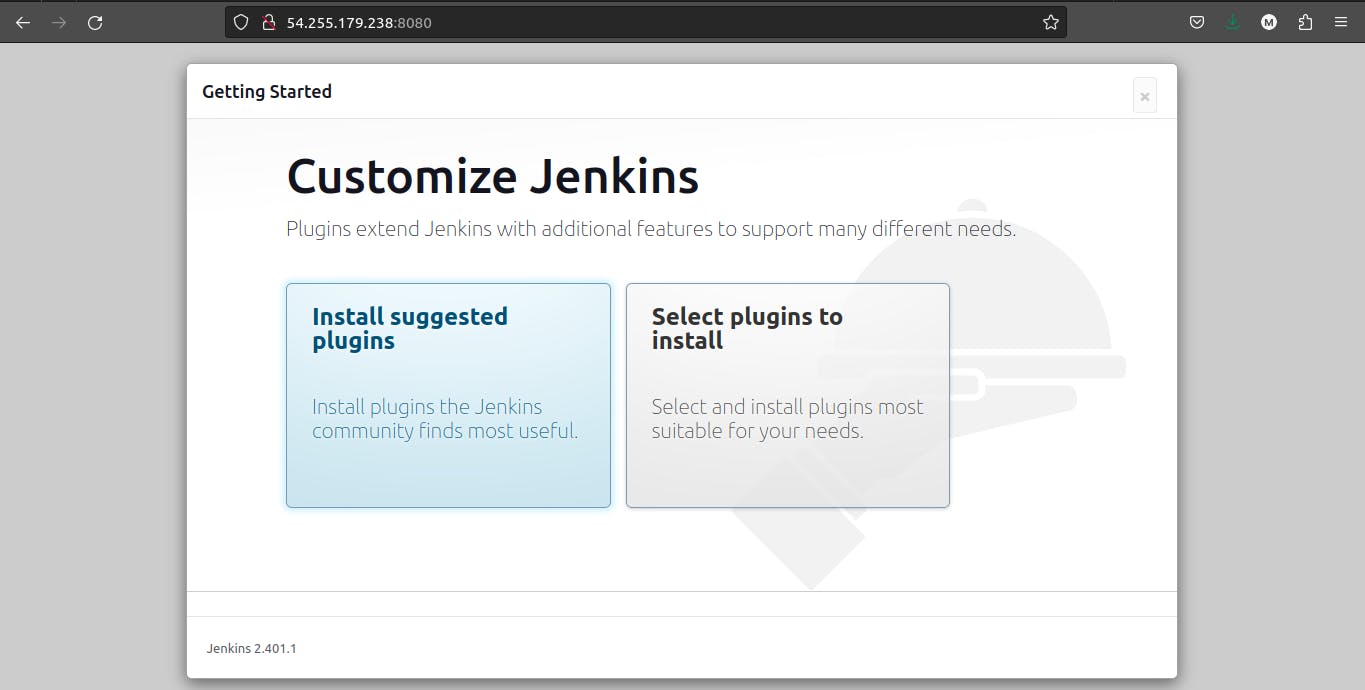
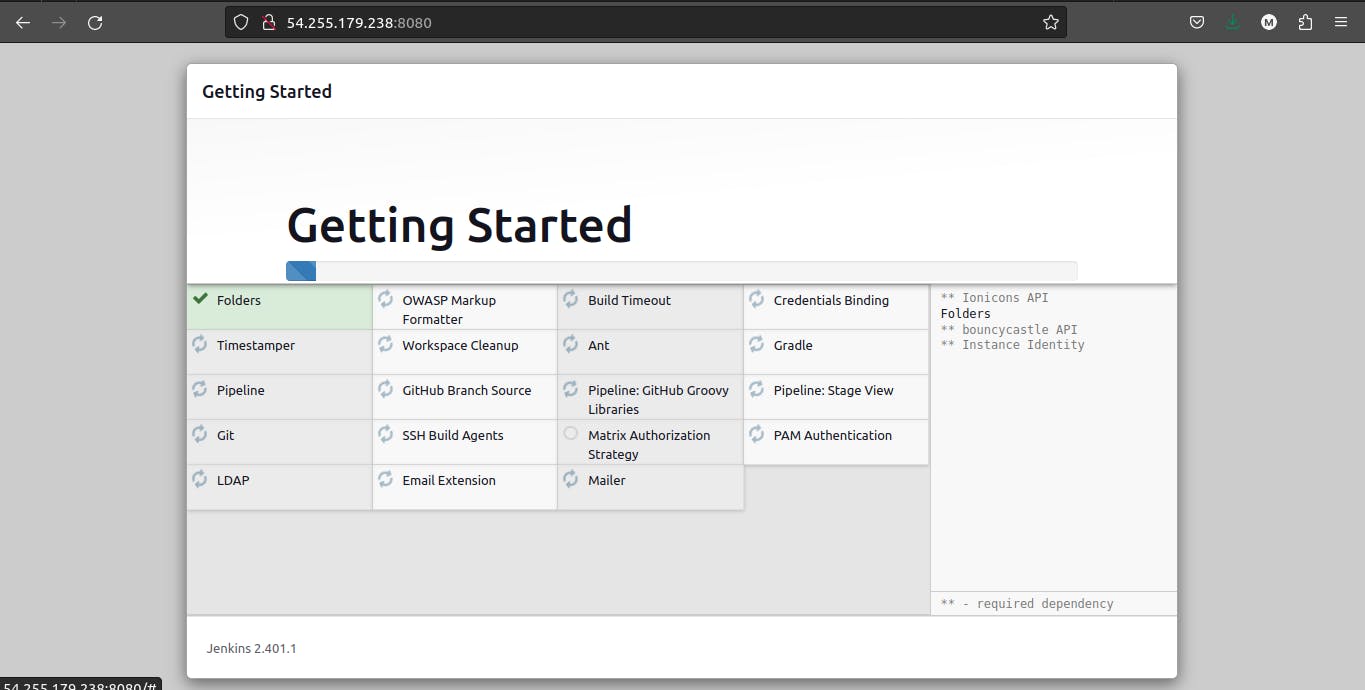
Once the Installation is completed you will see the registration page, just by putting your details you can continue in it...
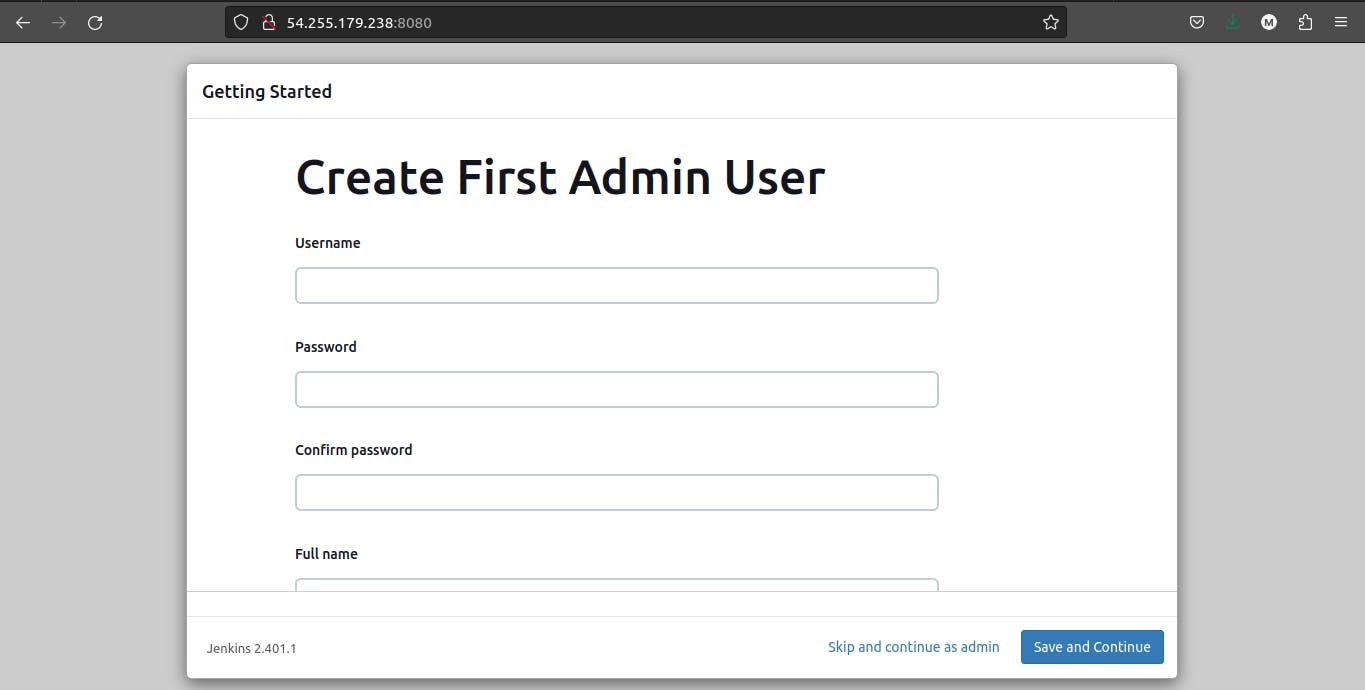
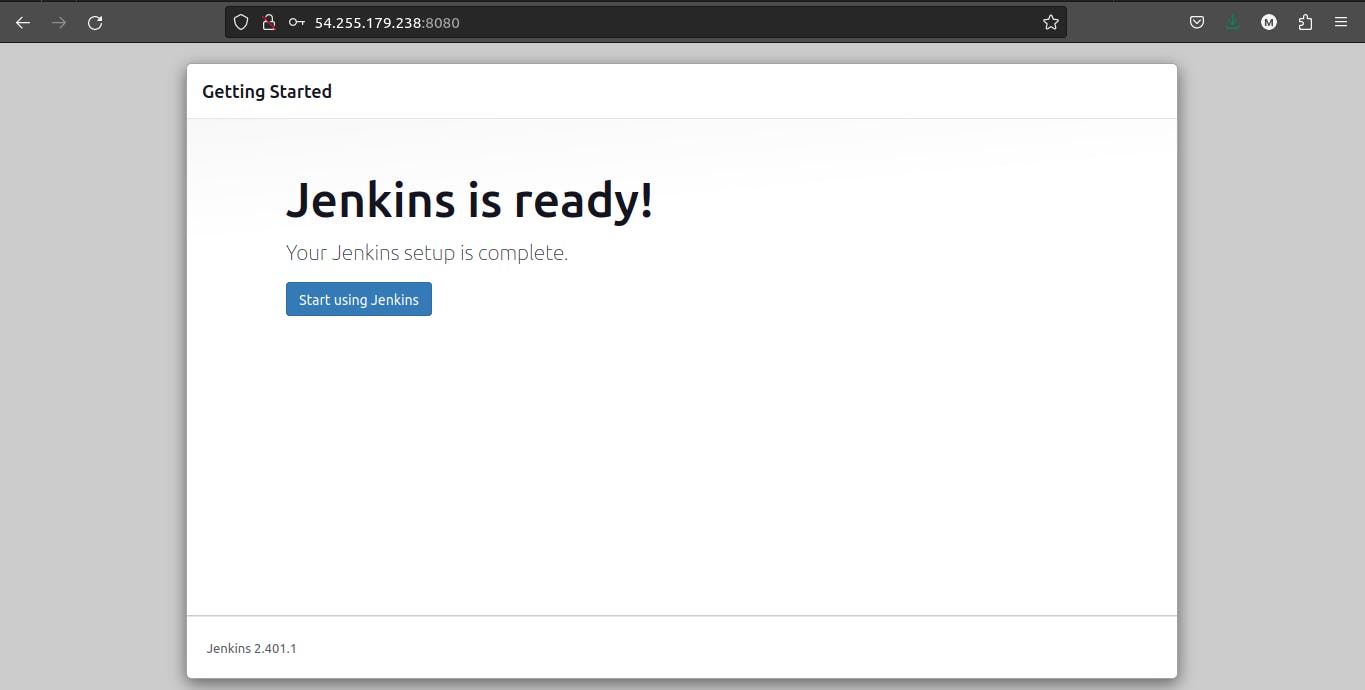
After Successfully Registration, you can now continue to work on it.
Conclusion:
Jenkins has revolutionized the world of CI/CD, empowering developers to streamline their software development workflows and achieve rapid and reliable software delivery. In this blog, we've explored the ins and outs of Jenkins, from its core features to practical implementation strategies. By harnessing the power of Jenkins and adopting CI/CD principles, you can supercharge your software development process and take your projects to new heights of efficiency and quality. So, let's embark on this exciting journey of Jenkins and CI/CD to transform the way you build and deploy software.