Supercharge Your Project with Docker: Unleashing the Potential of Containerization for Seamless Development and Deployment
Boost Efficiency, Collaboration, and Scalability with Docker's Revolutionary Approach to Software Packaging and Deployment


Introduction: In the world of software development, there's a need to package and deploy applications consistently and reliably. Docker is a popular tool that makes this process easier and more efficient. In this article, we'll explore Docker and understand how it works using simple language.
What is Docker? Docker is an open-source platform that allows you to automate the deployment of applications inside lightweight, portable containers. These containers package the application code along with its dependencies, libraries, and other required components. It ensures that the application runs smoothly on any machine, regardless of its environment.
How does Docker work?
Containers: Think of a container as a lightweight and isolated virtual machine (VM). Unlike a traditional VM, which requires a separate operating system, a Docker container shares the host system's OS. Containers are isolated from one another, making them secure and independent.
Docker Image: The foundation of Docker is an image. An image is a read-only template that contains the application code, runtime, libraries, tools, and settings required to run the application. It's like a snapshot of a container's filesystem at a specific point in time.
Dockerfile: To create an image, you use a text file called a Dockerfile. It defines the steps to build the image and specifies the dependencies and configurations needed. A Dockerfile can be compared to a recipe that guides Docker on how to assemble the image.
Building an Image: Once you have a Dockerfile, you can build an image using the Docker CLI (Command-Line Interface). The CLI reads the Dockerfile and executes the instructions inside it, fetching the necessary components and creating the image.
Docker Registry: Docker images can be stored in a centralized location called a registry. Docker Hub is a popular public registry, but you can also set up your private registry. Images in the registry can be shared, pulled, and reused by others.
Running Containers: To run an application, you create a container from an image. You can run multiple containers from the same image, each with its isolated environment. The container runs in an isolated process, making it independent of other containers.
Container Orchestration: When working with a large number of containers, Docker provides tools like Docker Swarm and Kubernetes for container orchestration. These tools help manage and scale containers across multiple machines, ensuring high availability and reliability.
Advantages of Docker:
Portability: Docker containers are platform-independent and can run on any machine with Docker installed, eliminating compatibility issues.
Efficiency: Containers are lightweight and share the host system's resources, allowing efficient resource utilization and faster startup times.
Isolation: Containers provide a secure and isolated environment, preventing one application from affecting others.
Scalability: Docker's container orchestration tools enable easy scaling of applications, allowing them to handle increased traffic and demand.
Conclusion: Docker simplifies the process of packaging and deploying applications by encapsulating them in portable and lightweight containers. With Docker, developers can focus on building applications without worrying about differences in environments. Its ease of use, portability, and scalability make it a valuable tool in modern software development.
Why Do We Use Docker?
Simplifying Software Installation Across Platforms
Introduction: Docker is a powerful tool that simplifies the process of installing and managing software across different platforms. Whether you're using Ubuntu, macOS, or Windows, Docker provides a consistent and streamlined approach to software installation. In this article, we'll explore why Docker is so widely used and how it makes installing applications like MySQL on various platforms much easier.
Eliminating Platform Dependencies: One of the main challenges in software installation is dealing with platform dependencies. Different operating systems have their requirenments, configurations, and package managers. Docker addresses this issue by encapsulating applications and their dependencies into lightweight containers. These containers can be run on any machine that has Docker installed, regardless of the underlying operating system. This means you can install and run applications like MySQL using Docker with the same ease and consistency across Ubuntu, macOS, or Windows.
Reproducible Environments: Another advantage of using Docker is the ability to create reproducible environments. With traditional installations, it can be challenging to ensure that all the required dependencies are installed correctly and in the right versions. Docker allows you to define the exact environment and dependencies needed for an application using a Dockerfile. This file contains all the instructions to build an image, including the base operating system, libraries, and configuration files. By sharing the Dockerfile, you can ensure that others can replicate the same environment and easily set up the application without any guesswork or compatibility issues.
Simplified Installation Steps: Installing complex software like MySQL often involves multiple steps, including downloading the installer, configuring settings, and resolving dependencies. With Docker, these steps are simplified and consolidated. By leveraging pre-built Docker images from trusted sources or creating your own, you can skip the tedious installation process and have a fully functional application up and running in minutes. Docker images are portable and self-contained, encapsulating everything needed to run the application, including the software itself and its dependencies.
Isolation and Security: Docker provides an isolated and secure environment for running applications. Each container runs as an isolated process, ensuring that the application and its dependencies do not interfere with the host system or other containers. This isolation enhances security by minimizing the potential impact of any vulnerabilities in the application or its dependencies. Additionally, Docker allows you to define fine-grained access controls, network configurations, and resource limits for each container, further enhancing the overall security of the system.
Conclusion: Docker simplifies software installation across different platforms by eliminating platform dependencies, providing reproducible environments, and streamlining installation steps. With Docker, installing complex applications like MySQL becomes a breeze, allowing developers and system administrators to focus on their core tasks rather than wrestling with intricate installation processes. Embracing Docker not only saves time and effort but also ensures consistent and reliable application deployment in any environment.
Project Title: Building and Running Your Application with Docker
Introduction: In this project, we will explore how to use Docker to build and run your application in a containerized environment. Docker simplifies the deployment process and ensures consistent execution across different machines. Let's dive into the steps required to set up your application using Docker.
Step 1: Set Up Docker on AWS EC2 Instance To use Docker on an AWS EC2 instance via SSH, follow these steps:
- Launch an EC2 instance: Go to the AWS Management Console, navigate to EC2, and launch a new instance. Choose an appropriate instance type and ensure that the security group associated with the instance allows SSH access.
Let's See in real real-time example:-
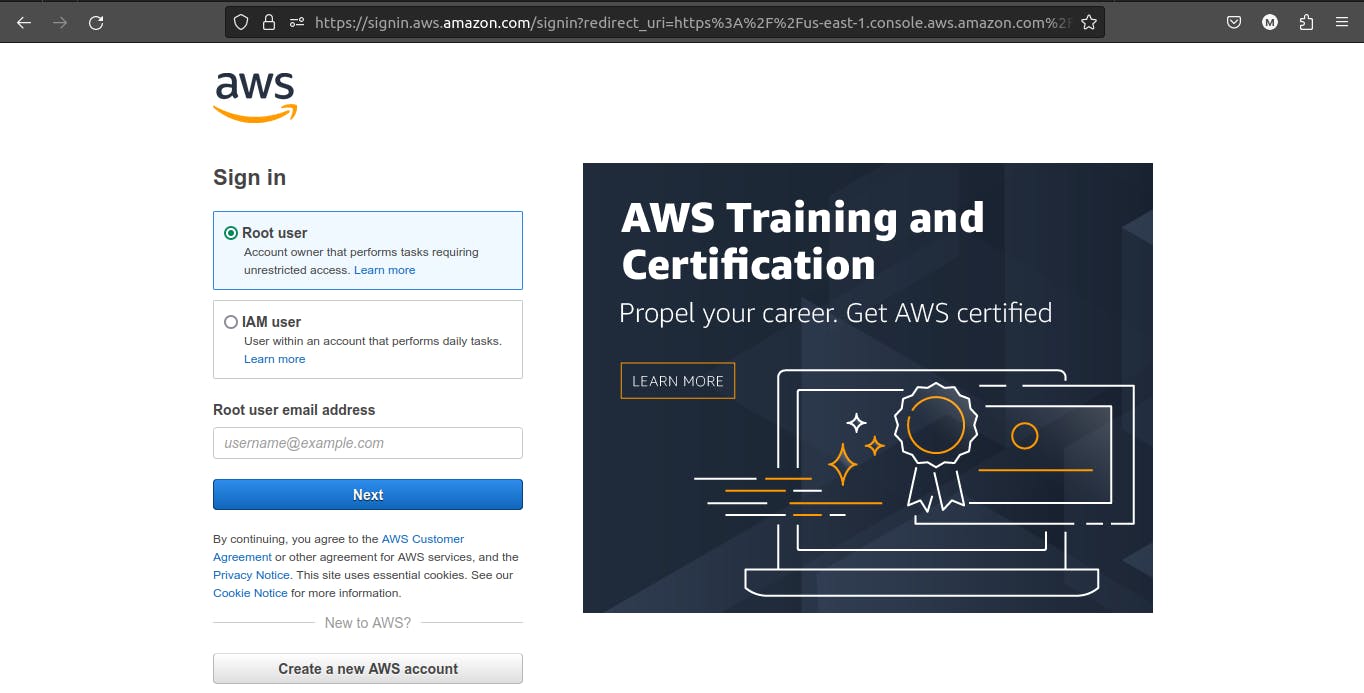
i) Open The AWS Console and log in, I am assuming that You all know how to register on AWS if not then please learn that first.
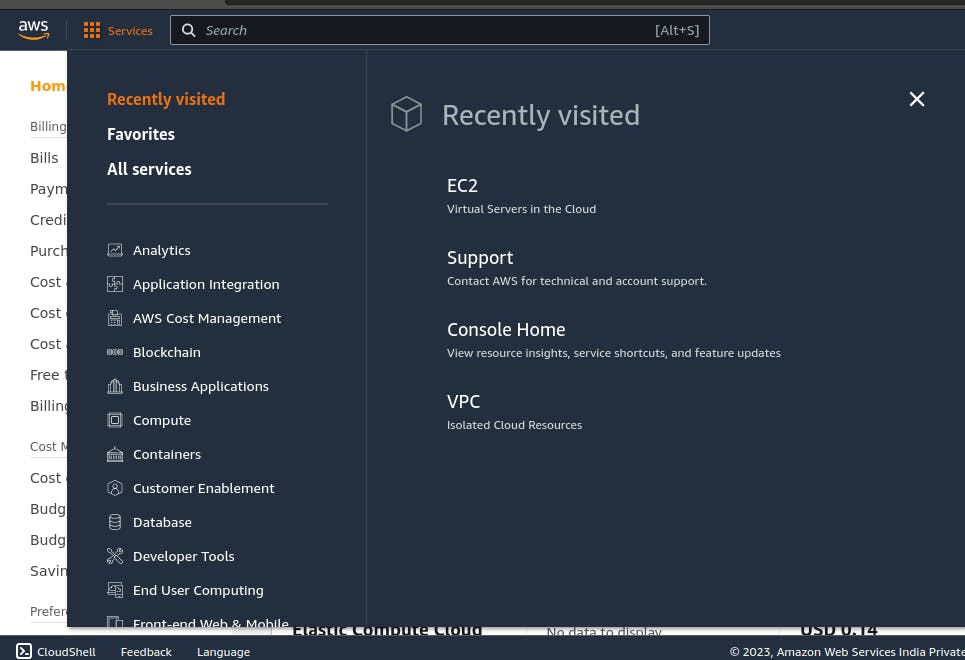
ii) After Logging in Open the EC2 service.
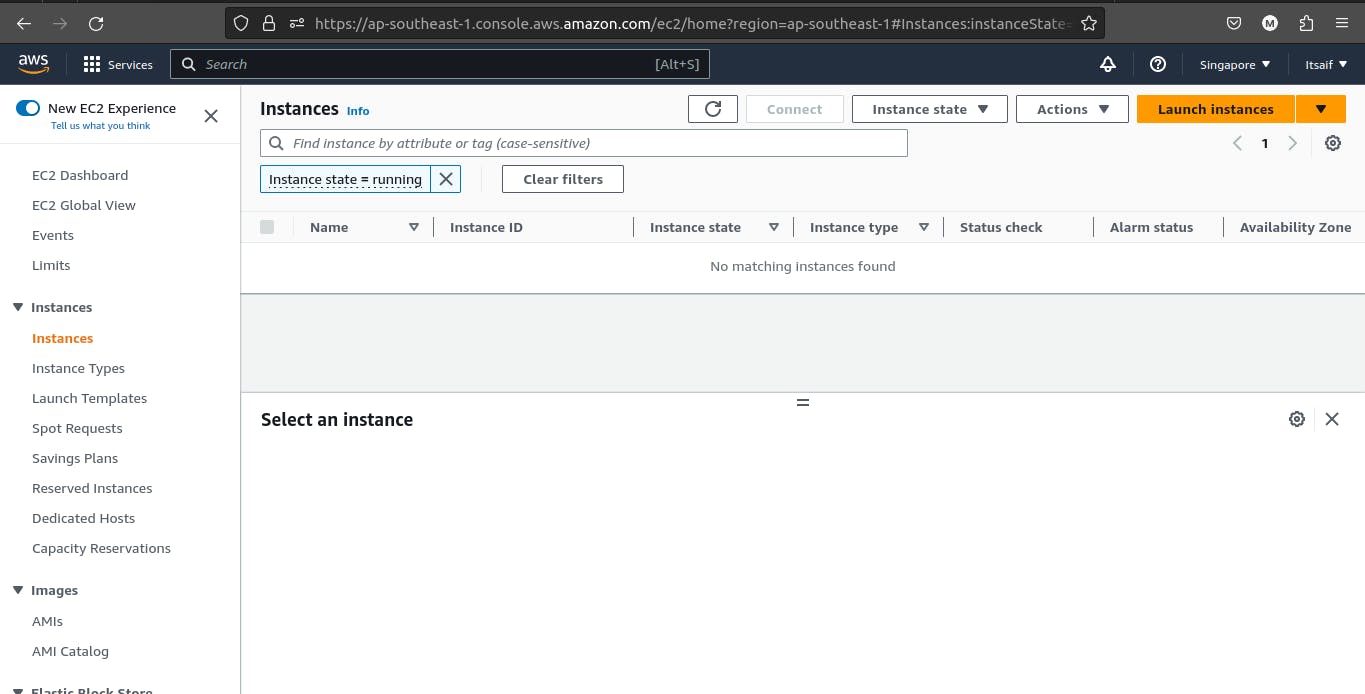
iii) Select the Instance and open it.
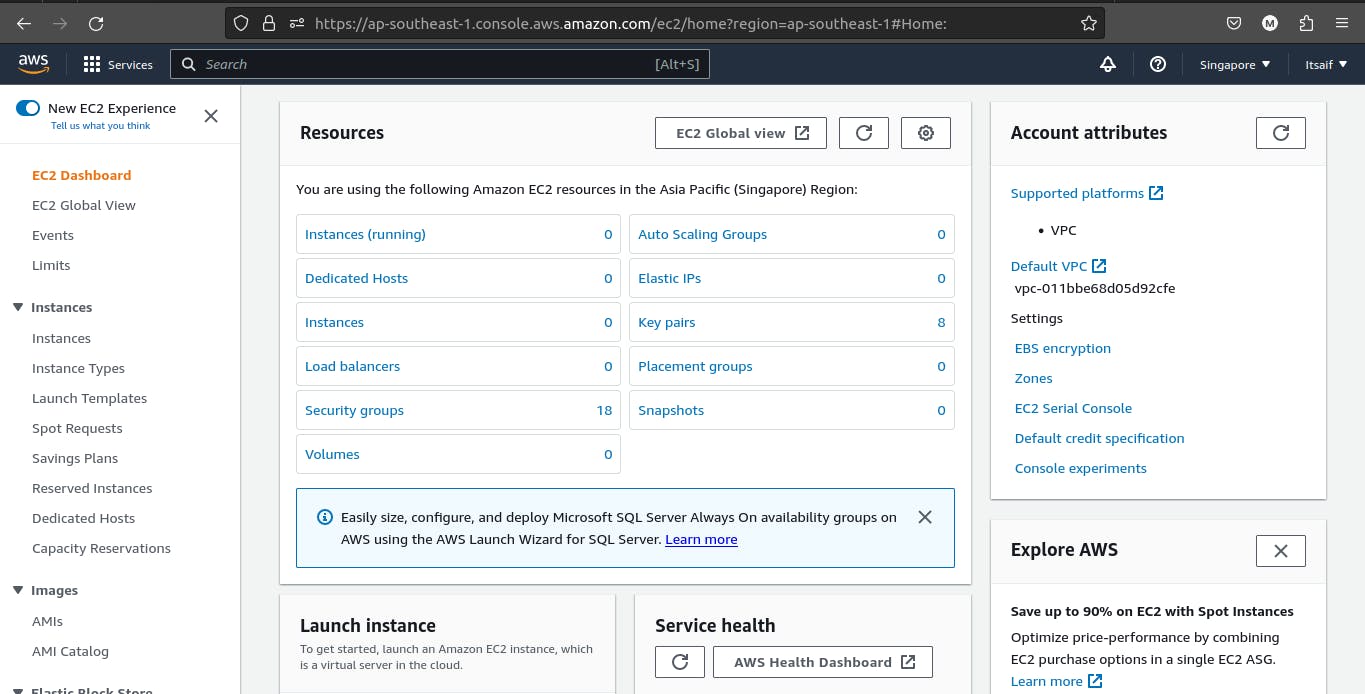
iv) After that make an instance by clicking on Launch Instances Button.
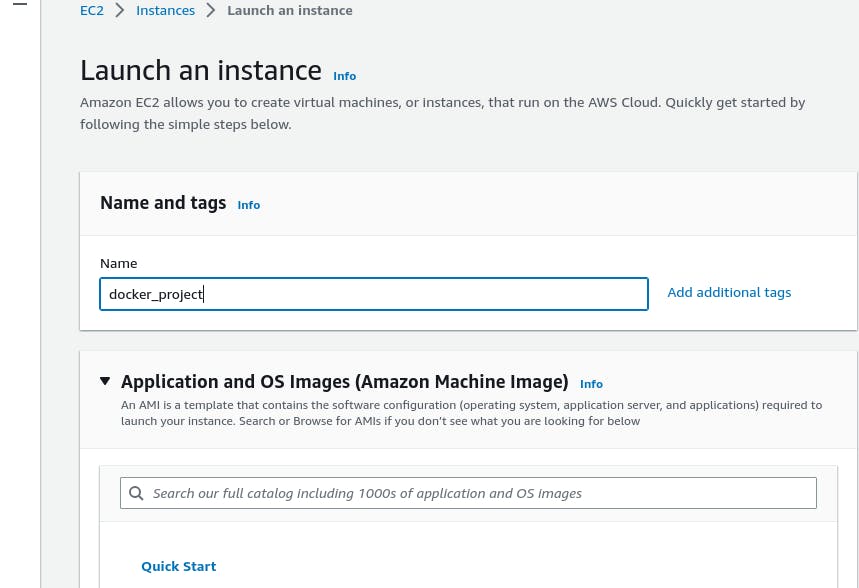
v) Name the instance as per your desire.
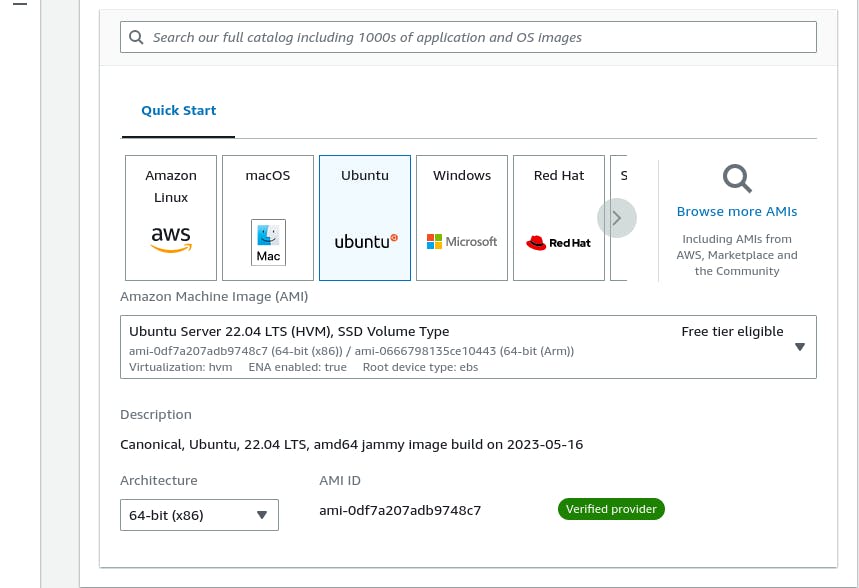
vi) Select the system which you wanna run, Make sure to select the Free tier eligible system, if you are doing it for learning purposes.
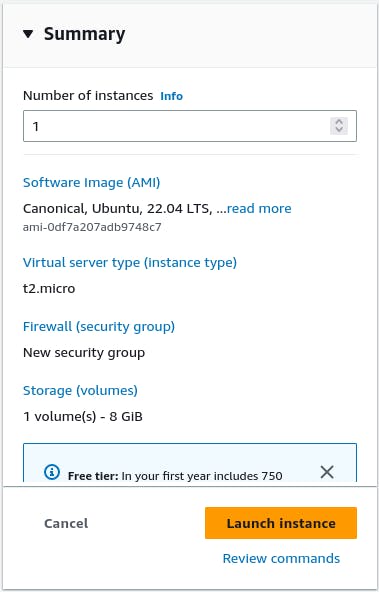
vii) Select/create the key pair.

viii) After that now finally launch the instances, By clicking on the Launch Instance Button.
ix) Now select your Launched Instance, and click on connect Button, Make sure to check the "RUNNING" thing in the Instance state before connecting.

x) Now your machine is ready click on the SSH option and copy the SSH key from the "Example" given interface, for further...
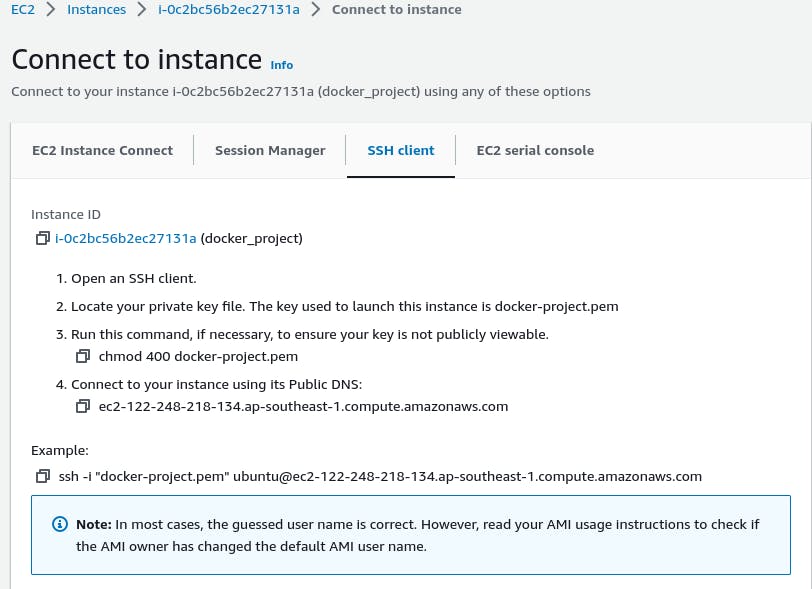
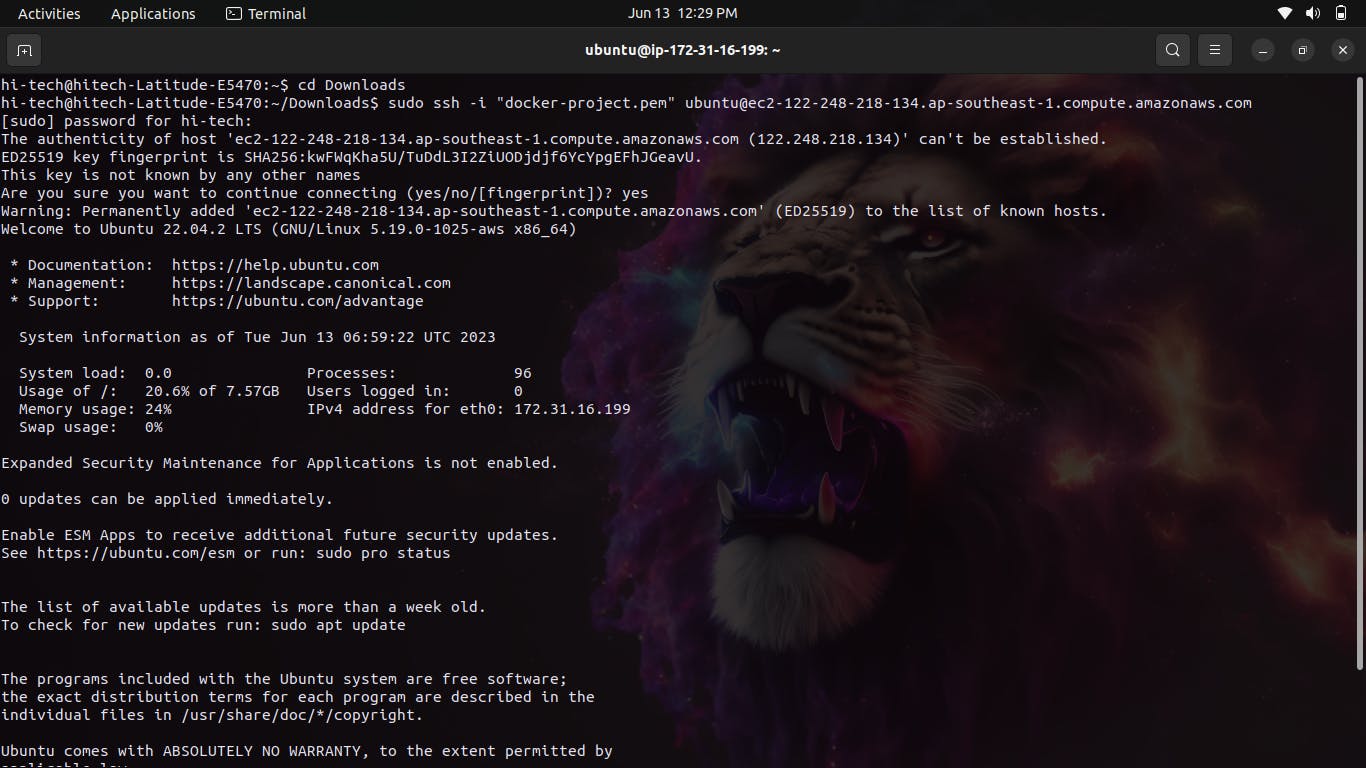
- Connect to the EC2 instance: Once the instance is running, use an SSH client (e.g., PuTTY, Terminal) to connect to the instance. Make sure you have the private key associated with the instance.
For example, using the Terminal on macOS/Linux, run the following command:

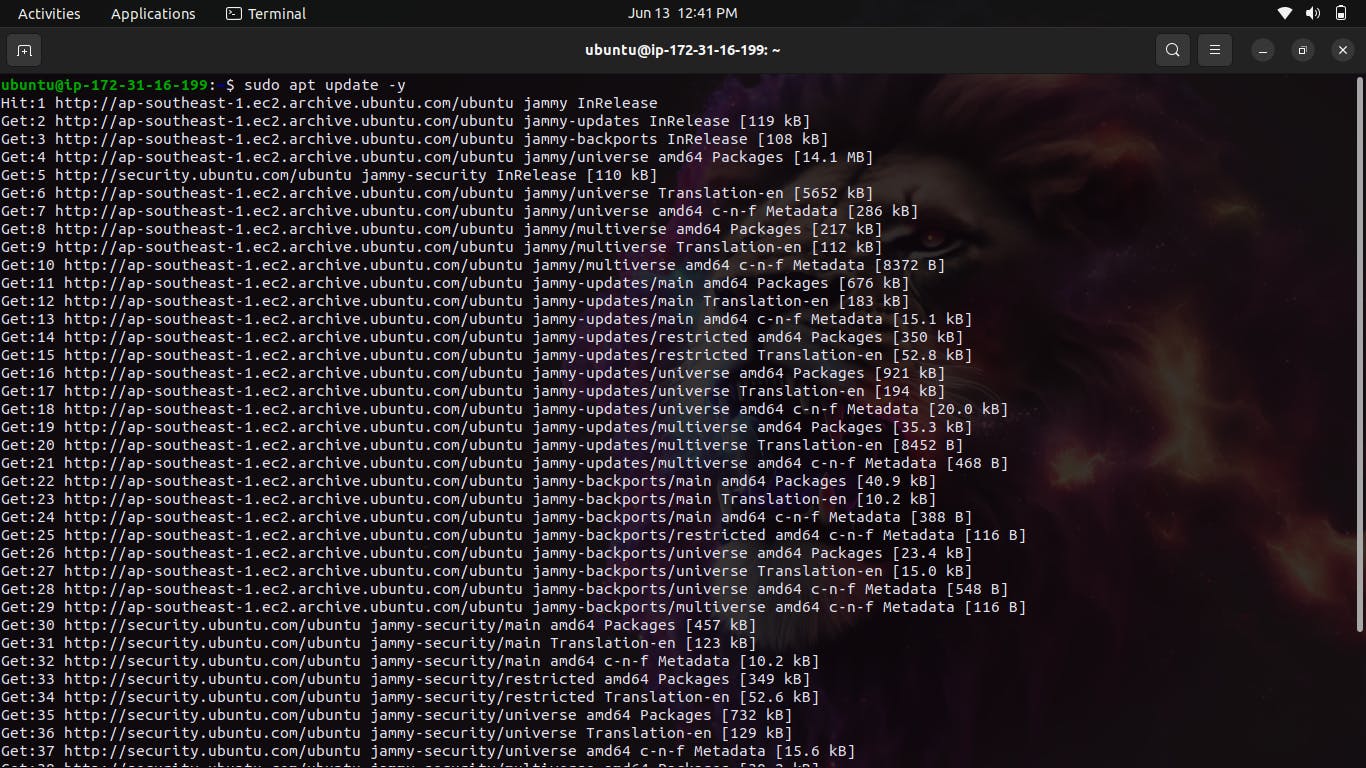
Update the instance: Once connected to the instance, update the system packages by running the following command:
sudo apt update -yFor ex:-

Install Docker: Install Docker on the EC2 instance by executing the following commands:
 sudo apt install docker.io -y
 sudo systemctl start docker
 sudo systemctl enable docker
 sudo usermod -aG docker ubuntu
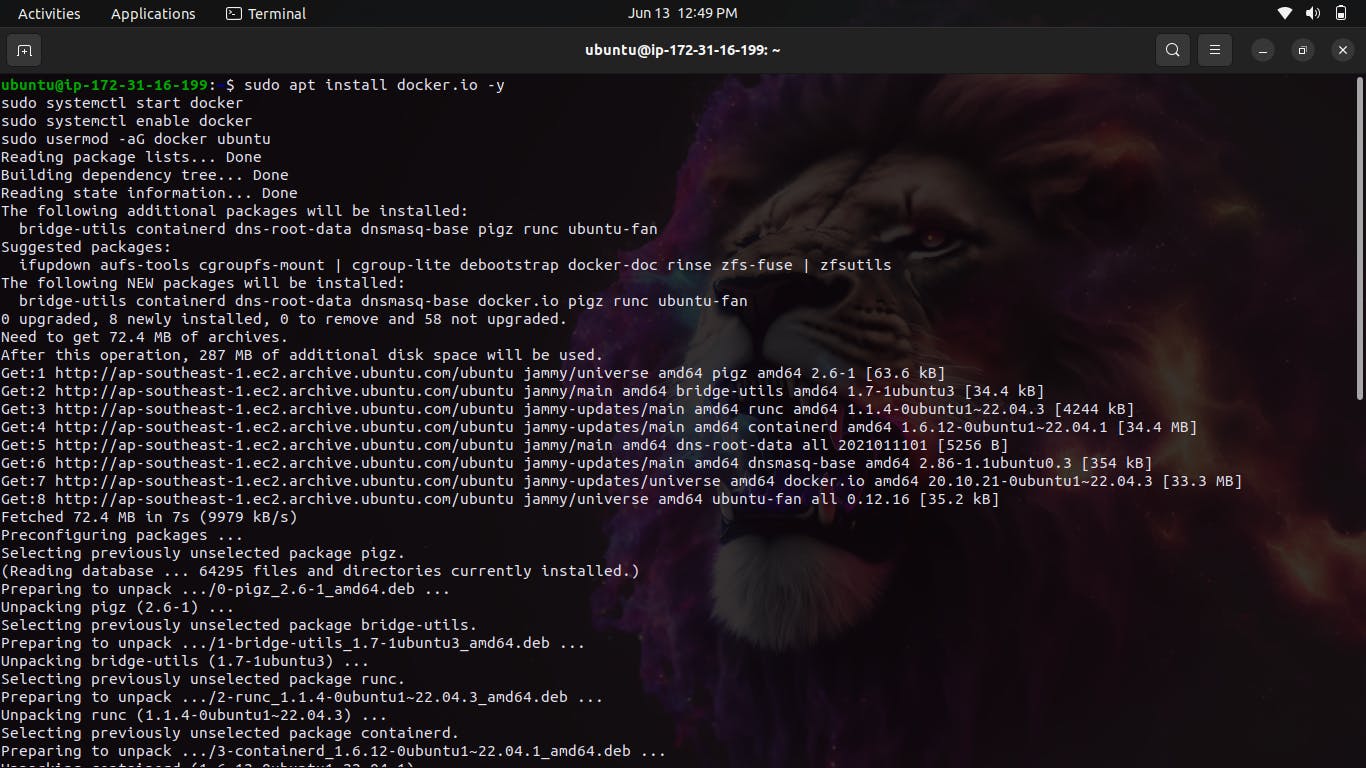
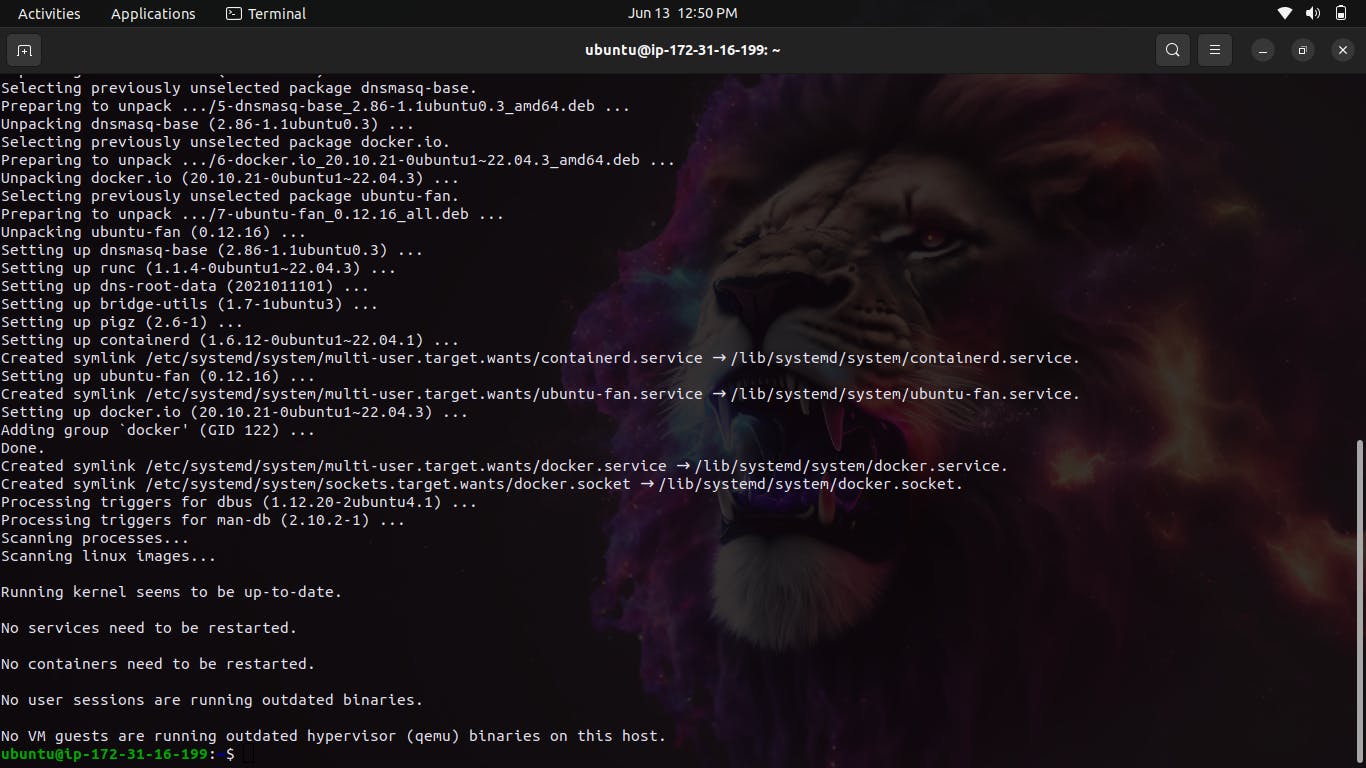
These commands install Docker and start the Docker service. The last command adds the "ubuntu" user to the "docker" group, allowing the user to run Docker commands without using sudo.
Verify Docker installation: Check if Docker is installed and running correctly by executing the following command:
docker --version

You should see the Docker version information if it is installed correctly.
Now that Docker is set up on your AWS Ubuntu instance, you can proceed with the remaining steps mentioned in the previous Docker project tutorial to create a Dockerfile, build an image, and run a container.
Note: Ensure that you have the necessary permissions and security measures in place to protect your AWS resources and the EC2 instance.
Starting some Hands-On Projects
Lets start by adding NGNIX with docker in your terminal:-
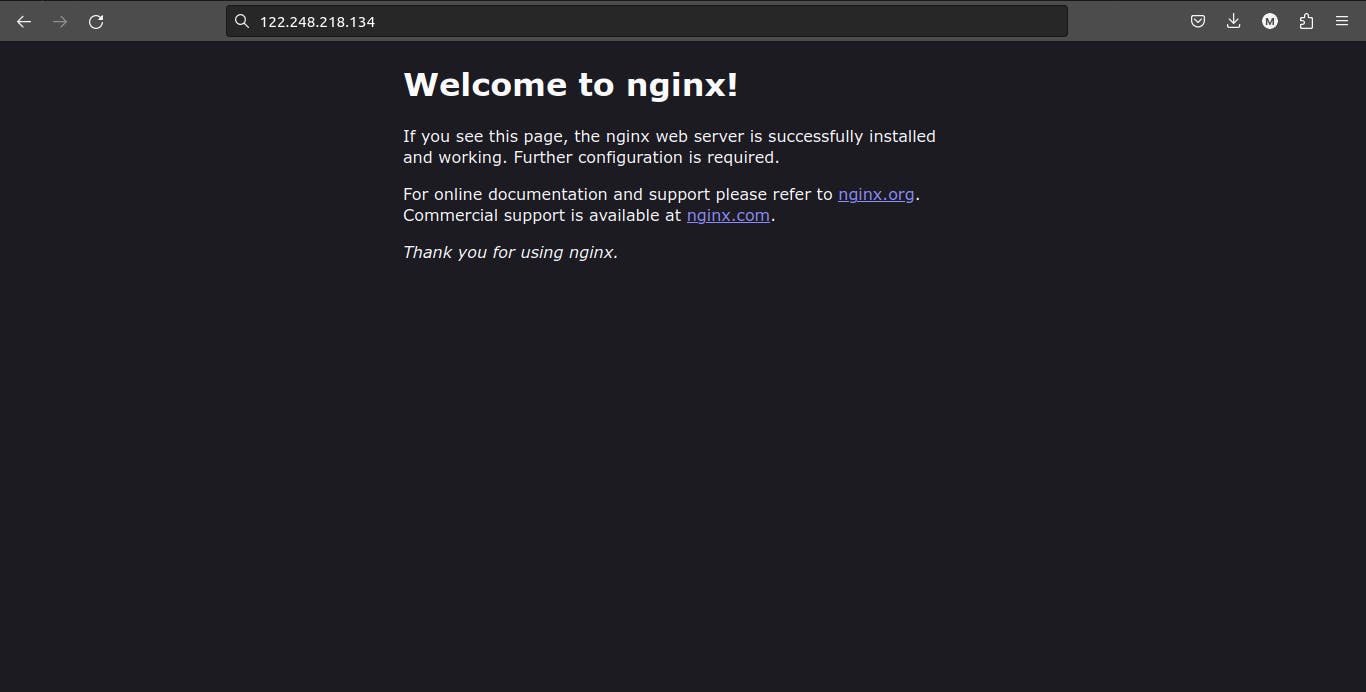
NGINX is a lightweight and high-performance web server and reverse proxy server. It excels in handling high-traffic loads efficiently and is commonly used for serving static files, load balancing, caching, content delivery, and enhancing security. NGINX's event-driven architecture ensures optimal resource utilization and fast response times, making it a popular choice in modern web architectures.
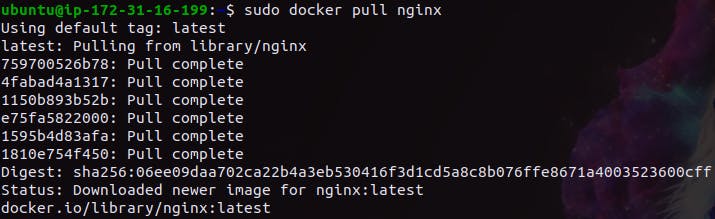
i) To Add NGINX there is a command sudo docker pull ngnix
ii) After that to run the nginx with docker the command is docker run -d nginx:latest

iii) Now bind the ports of host and the nginx

iv) Now go to your AWS instance server copy the public ip from it...

v) Now paste it into the browser and press enter then you can see that the NGINX is Successfully running.
Main Project:-
Title: Running a Django App with Docker: Simplified Deployment and Scalability
Introduction: In this project, we will explore how to use Docker to run a Django application, simplifying the deployment process and enabling scalability. Docker allows you to package your Django app, its dependencies, and its configuration into a container, ensuring consistent execution across different environments. Let's dive into the steps required to set up and run your Django app using Docker.
Make the Directory in your local terminal for the Projects to make it easier, after making it go to that directory and then clone the app from the git with the help of
git clonecommand.To clone the app you need to know the address of the git repo in which the application is stored.
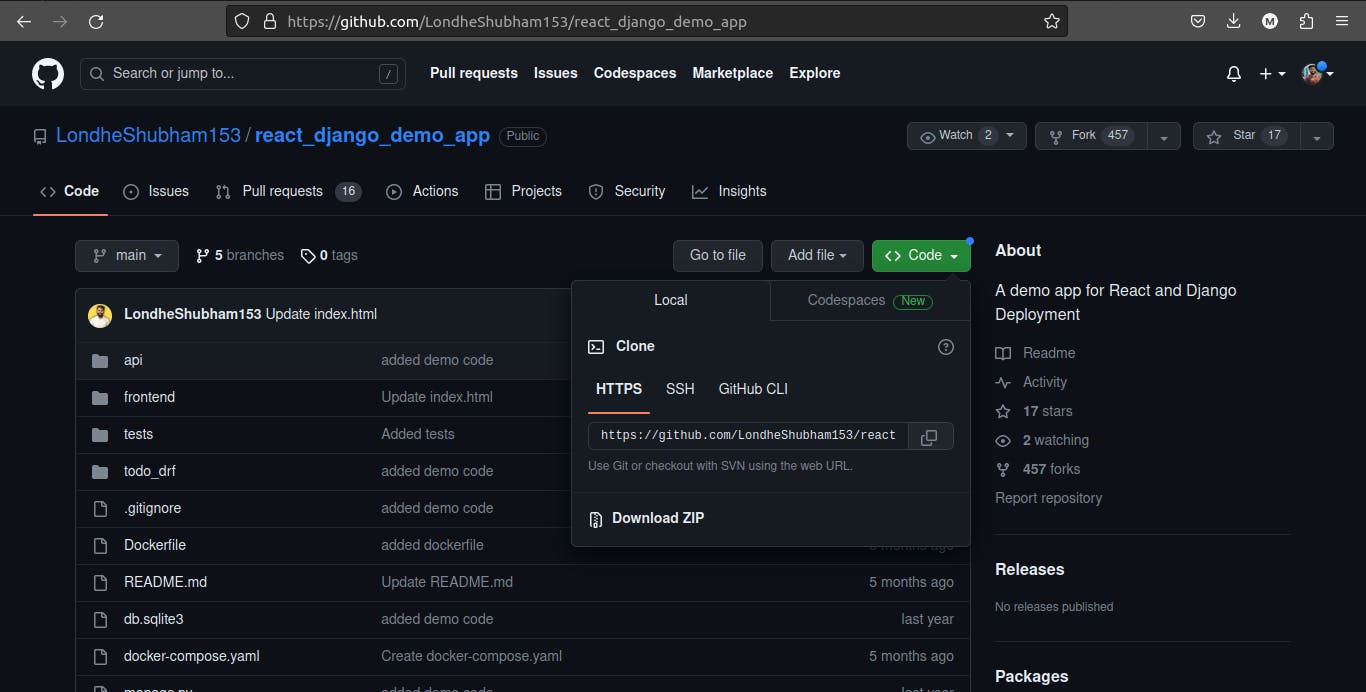
After copying the link paste it in the directory which you made for the projects with the
git clonecommand.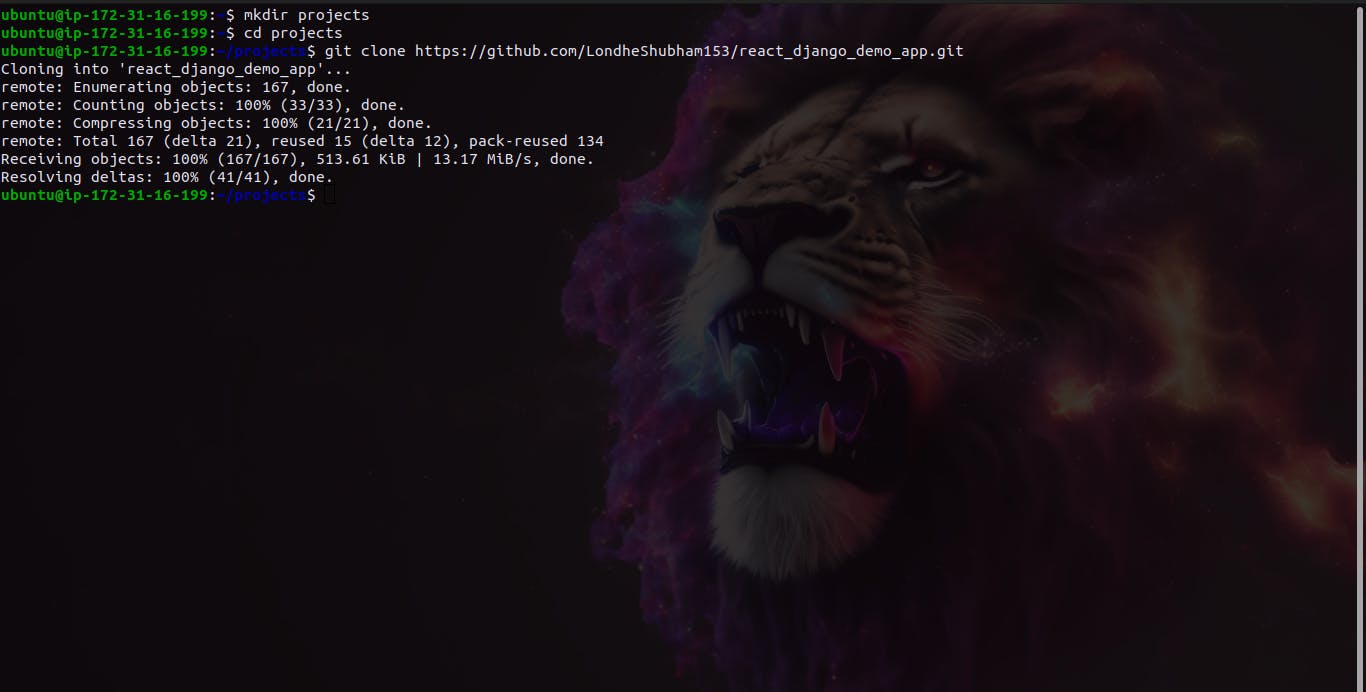
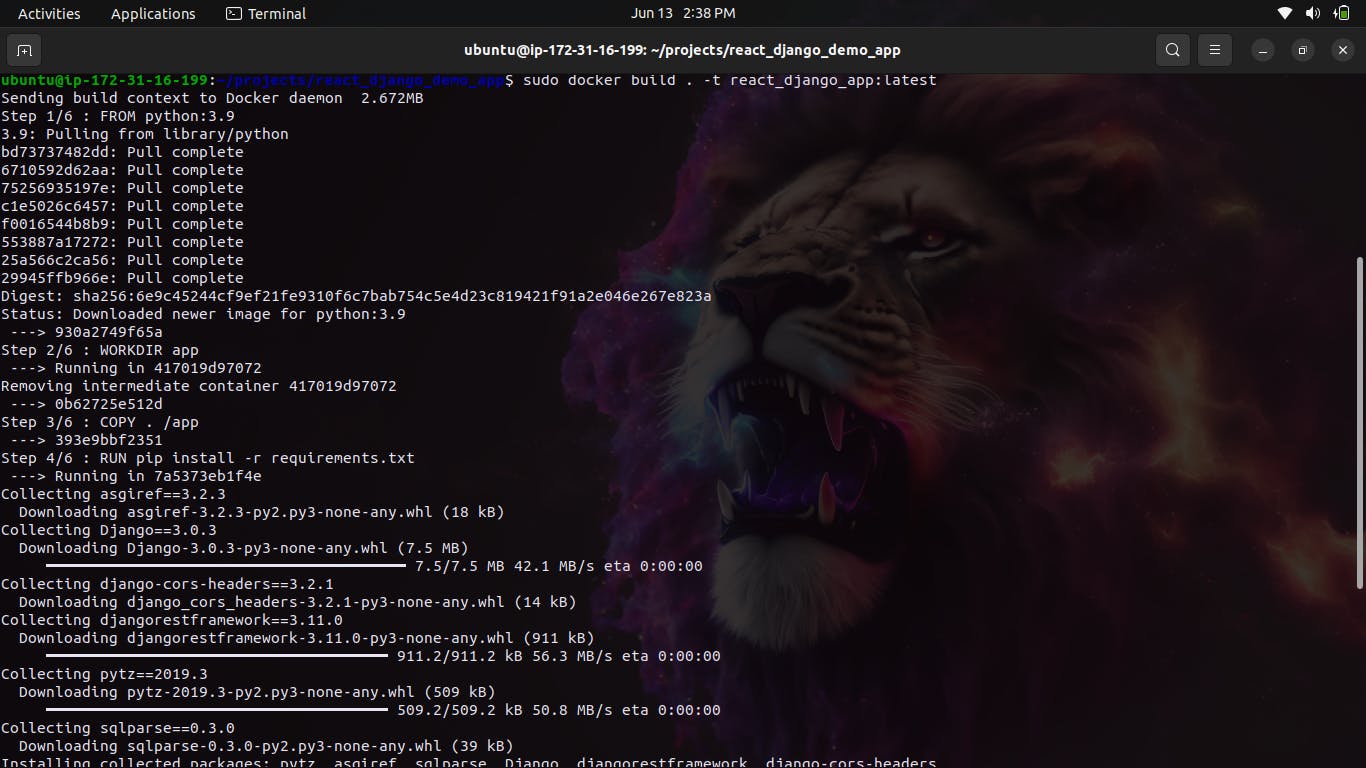
Now we have to go further in the search for Dockerfile, if the Dockerfile is present then we don't need to make it again, and if it is not present then we have to work on it, now let's see what we got.

As you see if we got the Dockerfile here then we don't have to make it further, then we just have to make the docker image.
By running the command sudo docker build . -t where. stands for "here" and "-t" stands for token.
Now we have to make a docker container from the docker Image and for that, there is a command
sudo docker -d -p 8000:8000 <app_name>:tokenHere 8000:8000 stands for the port of the host and the server...
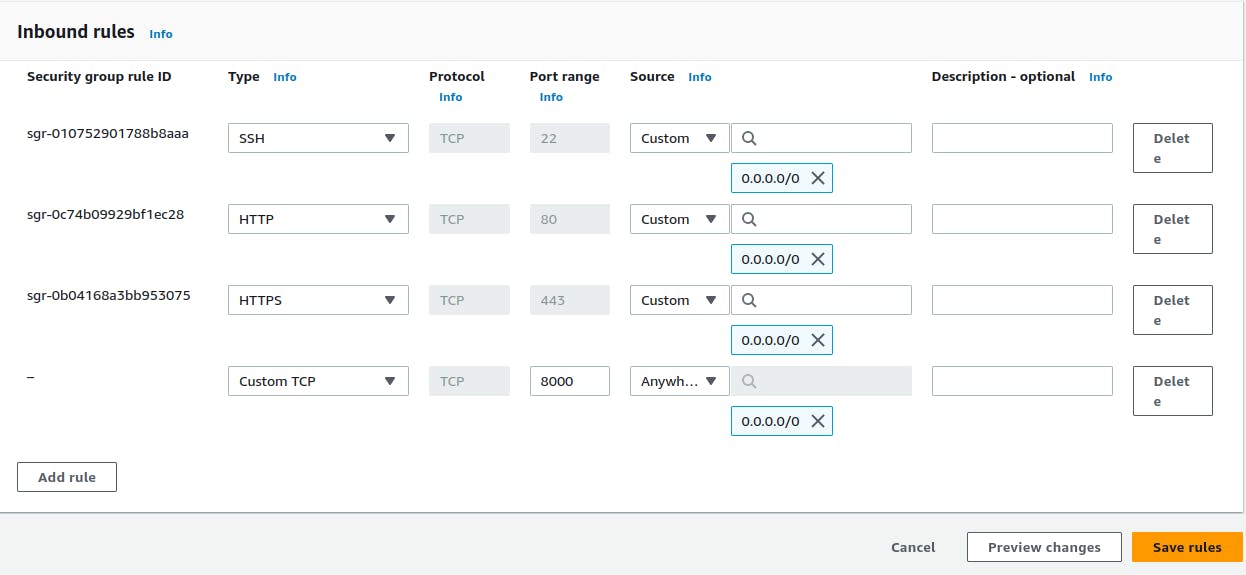
Now to run the App in real-time we have to edit the inbound rules of the AWS EC2 instance and make open the 8000 port from there
Title: "Mastering Docker: Unleashing the Power of Volume, Networking, Compose, and Swarm"
Subtitle: "A Comprehensive Guide to Unlocking Advanced Docker Capabilities for Seamless Containerization"
Introduction: Docker has revolutionized the world of containerization, allowing developers to build, deploy, and manage applications with unprecedented ease and efficiency. While beginners often start with basic Docker concepts, such as creating containers and running images, there is a whole world of advanced Docker features waiting to be explored. In this blog post, we will dive deep into Docker's volume management, networking capabilities, Docker Compose, and Docker Swarm, enabling you to take your containerization skills to the next level.
Harnessing the Power of Volumes: Volumes are an essential feature of Docker, enabling data persistence and seamless data sharing between containers. We'll explore the different types of volumes, including host-mounted volumes, named volumes, and anonymous volumes, and understand how they can be used to store and share data between containers. Additionally, we'll delve into advanced volume management techniques, such as data backups, restoration, and synchronization across container clusters.
Networking in Docker: Containerized applications often require communication and connectivity, and Docker provides robust networking capabilities to facilitate this. We'll uncover Docker's networking models, including bridge networks, overlay networks, and host networks, and learn how to create, manage, and secure networks for seamless communication between containers. Moreover, we'll explore advanced networking features, such as DNS resolution, load balancing, and container-to-container encryption.
Orchestrating with Docker Compose: Managing complex multi-container applications can be a daunting task, but Docker Compose simplifies the process by allowing you to define and manage multi-service applications using a YAML file. We'll dive into the syntax and configuration options of Docker Compose, exploring how to define services, networks, and volumes. With practical examples, we'll guide you through deploying, scaling, and managing multi-container applications effortlessly.
Scaling and Orchestration with Docker Swarm: When your containerized applications demand high availability and scalability, Docker Swarm comes to the rescue. We'll explore Docker Swarm, a native Docker clustering and orchestration solution, and learn how to create a swarm, deploy services, and scale applications horizontally. Furthermore, we'll delve into swarm management, rolling updates, service discovery, and load balancing, empowering you to build resilient, scalable container clusters.
Conclusion: By exploring the advanced features of Docker, such as volume management, networking, Docker Compose, and Docker Swarm, you've taken a significant step toward mastering containerization. Embracing these advanced capabilities empowers you to build robust, scalable, and fault-tolerant containerized applications. Whether you're a developer, DevOps engineer, or simply an enthusiast, expanding your Docker skills with these advanced concepts opens up a world of possibilities in the era of modern application deployment.
Remember, this is just the beginning of your Docker journey. Continue to explore and experiment with Docker's ever-evolving ecosystem, and unlock even more powerful features to streamline your development and deployment workflows. Happy containerizing!