Project Blog: Taskmaster App - An Enchanting AWS Serverless Project 🧙♂️🚀


Table of contents
- Introduction 🌟
- Chapter 1: 🚀 Setting Up Serverless Framework Account
- Onboard using the Serverless Framework
- Conclusion: Embrace the Magic of Serverless Framework 🔮
- Chapter 2: 📦 Fetching the Magic: Cloning Taskmaster App from GitHub
- 2.1 Introducing Taskmaster App: Your Enchanting Project 🏰
- 2.2 Setting Up Git: Your Version Control Spell 🪄
- 2.3 Cloning Taskmaster App Repository: Fetching the Enchantment 🔮
- 2.4 Exploring the Taskmaster App Code: Unveiling the Enchantment 🌟
- Conclusion: The Enchantment Begins 🔮
- Chapter 3: ⚡ Unleashing the Spells: Running Taskmaster App with Serverless Framework
- 3.1 The Magic of Serverless Framework: A Quick Recap 🌟
- 3.2 Installing Dependencies: Preparing Your Enchanted Environment 🧙♂️
- 3.3 Serverless Framework Configuration: Unlocking the Serverless Spell Book 📚
- 3.4 Deploying the Enchantment: A Single Command Away 🔮
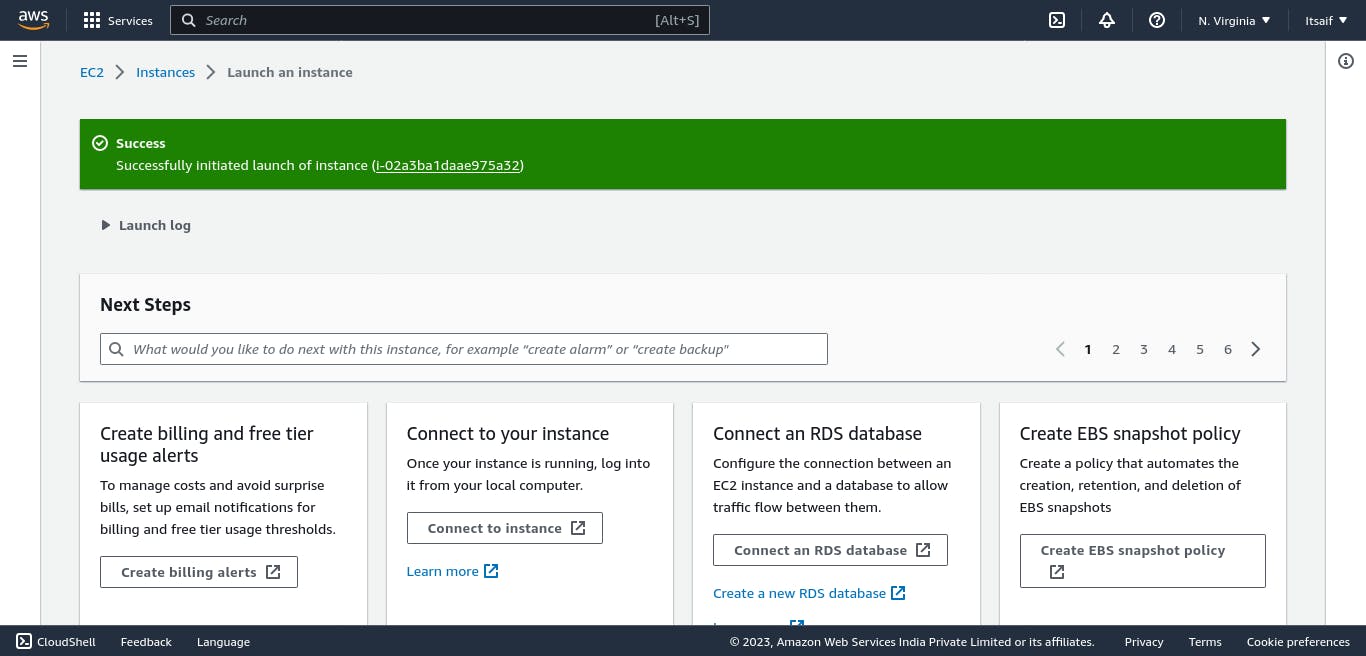
- Congratulations! 🎉 Your Application Is Successfully deployed. 🚀
- Chapter 4: 🧪 Testing the Enchantment: Postman Meets Taskmaster App
Introduction 🌟
Welcome to the magical world of the Taskmaster App! In this project blog, we will embark on a wondrous journey to create an enchanting AWS Serverless application using the Serverless Framework. Taskmaster App is a mystical tool for task management and organization that harnesses the powers of Node.js and the AWS cloud. Prepare to be spellbound as we delve into the art of CloudFormation sorcery, GitHub code fetching, Lambda mystique, and much more! Let's begin our adventure of crafting a truly extraordinary application. 🧙♂️🔮
Chapter 1: 🚀 Setting Up Serverless Framework Account
In this chapter, we'll begin our journey into the world of serverless development by setting up your Serverless Framework account on serverless.com. By creating an account, you'll unlock a plethora of magical features and services to aid you in crafting Taskmaster App.

1.1 Introducing Serverless Framework: Your Gateway to Serverless Magic 🌟
Welcome to the enchanting realm of Serverless Framework! As you embark on your serverless development journey, Serverless Framework will serve as your trusted guide and companion. This magical tool will transform the way you build, deploy, and manage serverless applications, empowering you to focus on crafting exceptional code and bringing your ideas to life.
🚀 Easy Deployment: Unleash Your Creations Swiftly
With Serverless Framework, the deployment of your serverless applications becomes a seamless and swift process. Say goodbye to the complexities of manual configuration and resource provisioning. Serverless Framework abstracts away the intricacies of cloud infrastructure management, allowing you to deploy your serverless spells with a single command. Embrace the joy of rapid deployment and witness your code come to life in the AWS cloud in moments.
🌌 Streamlined Configuration: Simplify Your Sorcery
Gone are the days of convoluted cloud configuration files. Serverless Framework offers an intuitive and expressive YAML-based syntax to define your serverless architecture and AWS resources. Say hello to concise and readable code that encapsulates the magic of your application. The declarative nature of the Serverless Framework empowers you to craft complex applications with ease, simplifying the deployment of Lambda functions, API Gateways, DynamoDB tables, and more.
🔑 Cross-Cloud Compatibility: Unlock the Freedom of Choice
Serverless Framework embraces a polyglot cloud philosophy, granting you the freedom to choose your cloud provider. Whether you prefer the AWS cloud, Azure, Google Cloud Platform, or others, Serverless Framework ensures your spells can be wielded across multiple clouds. Embrace the flexibility of cross-cloud compatibility and avoid being bound to a single cloud vendor.
🪄 Rich Plugin Ecosystem: Customize Your Enchantment
Enter the world of endless possibilities with Serverless Framework's vast plugin ecosystem. Customize your development experience with plugins tailored to your needs. From monitoring and debugging tools to authentication and deployment enhancements, the plugin ecosystem enriches your serverless spells, adding new dimensions to your projects.
🌟 Active Community: Join the Serverless Circle
Befriend like-minded wizards and witches in the Serverless Framework community. A supportive and active community of developers awaits, ready to share their knowledge and help you on your serverless journey. Engage in discussions, attend events, and contribute to the open-source magic that is Serverless Framework.
1.2 Steps to Set Up Your Serverless Framework Account 🔑
Let's dive into the steps to create and set up your Serverless Framework account:
Open your web browser and navigate to serverless.com, the magical gateway to the Serverless Framework.
Step 2: Sign Up
Click on the "Sign Up" or "Get Started for Free" button to initiate the account creation process.
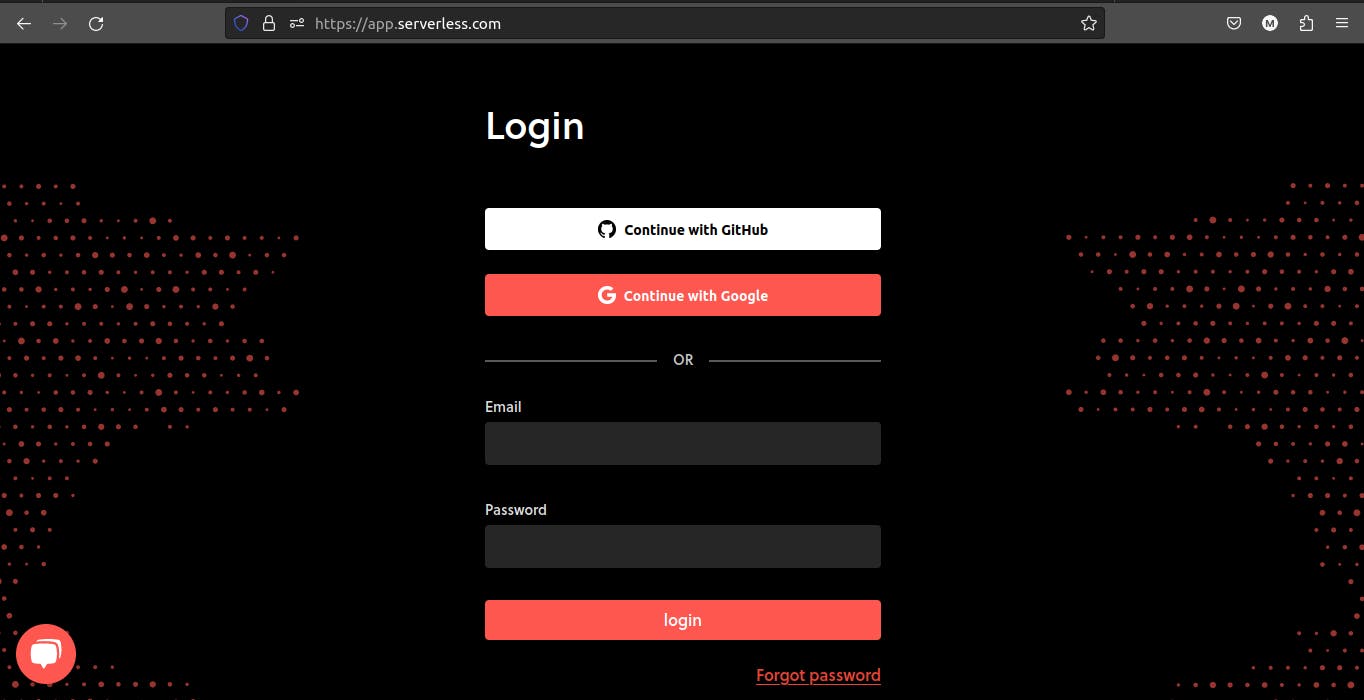
Step 3: Provide Your Email and Password
- Enter your email address and choose a secure password to create your account.
Step 4: Verify Your Email
- Check your email inbox for a verification link from Serverless Framework. Click the link to confirm your email address and complete the account verification process.
Step 5: Choose a Plan (Optional)
- Select the plan that best suits your needs. Serverless Framework offers free and paid plans with varying features.
Step 6: Complete the Account Setup
- Fill in any additional information required to set up your account.
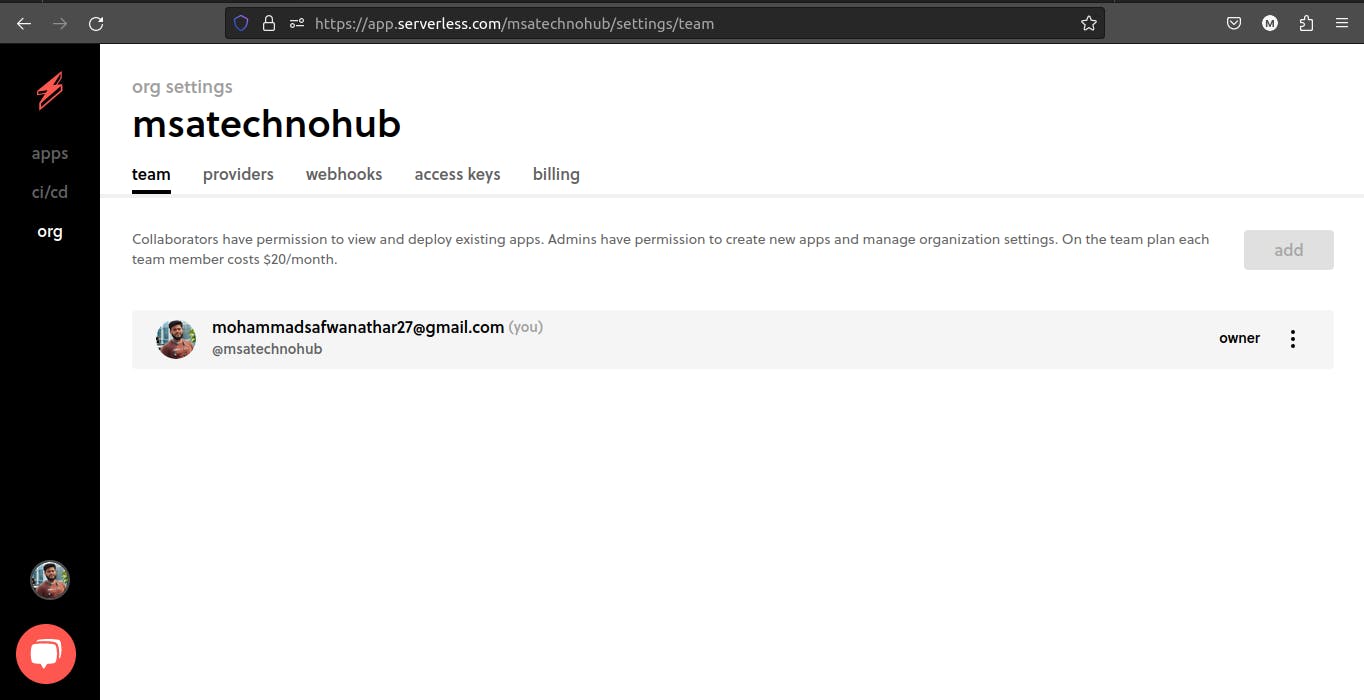
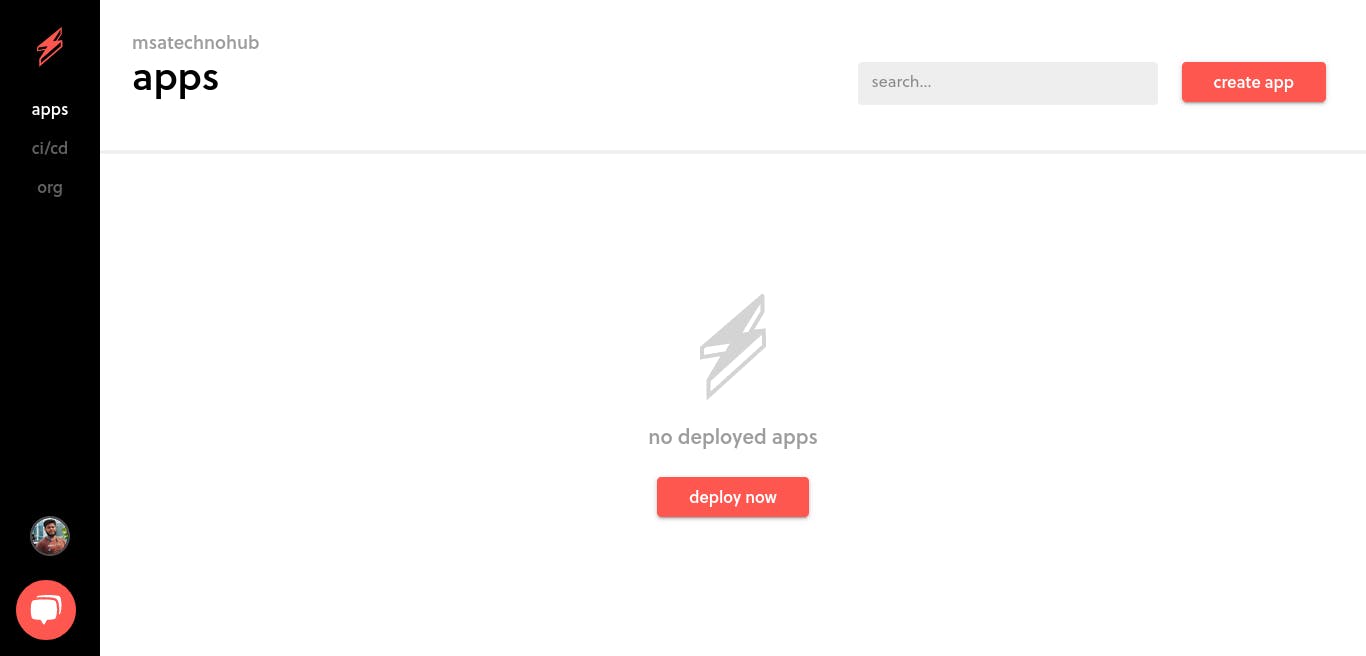
Step 7: Access the Serverless Dashboard
Once your account setup is complete, you'll gain access to the Serverless Dashboard, your magical command center for managing serverless projects.
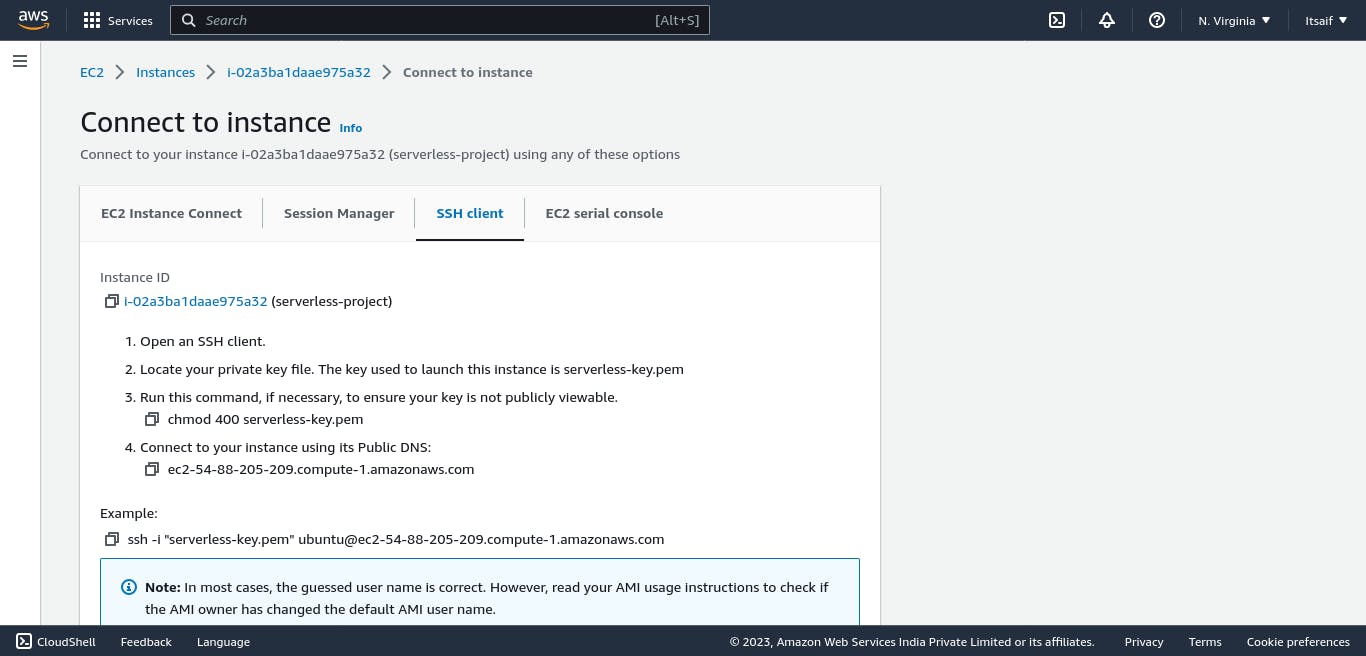
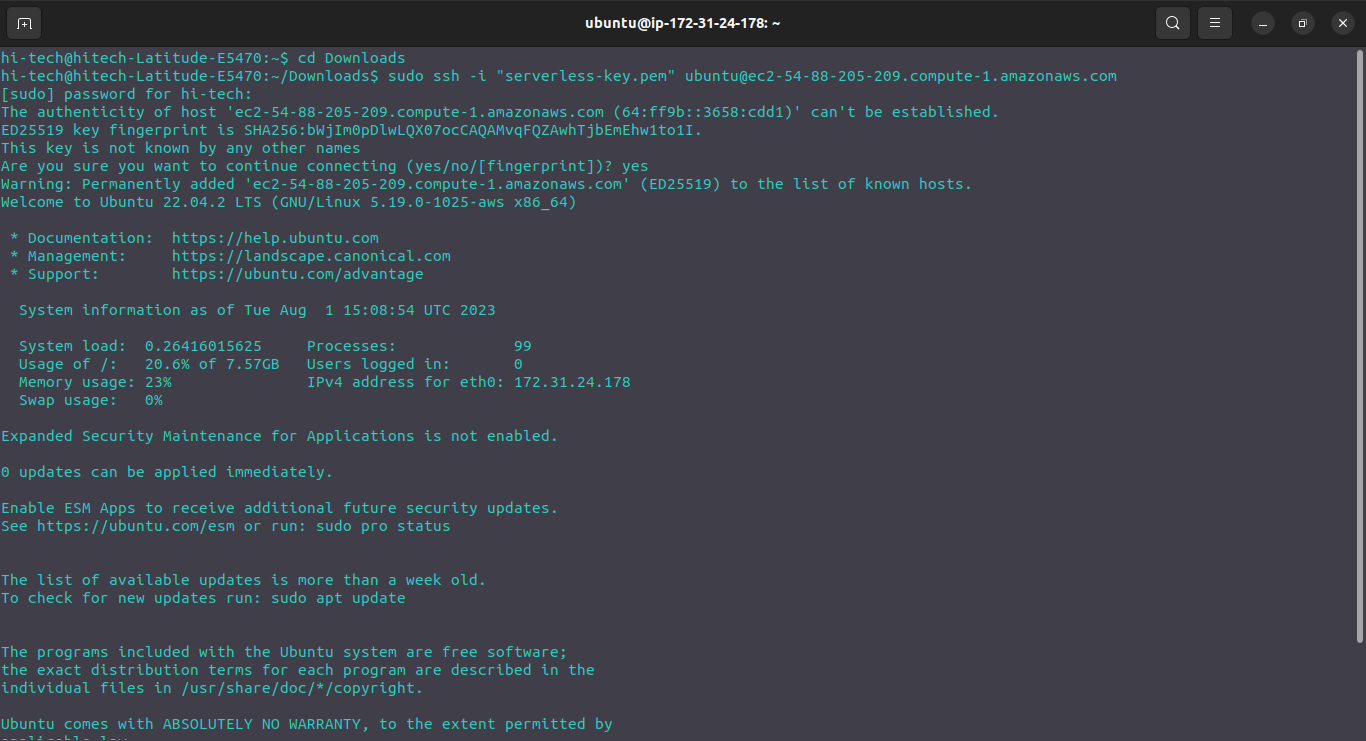
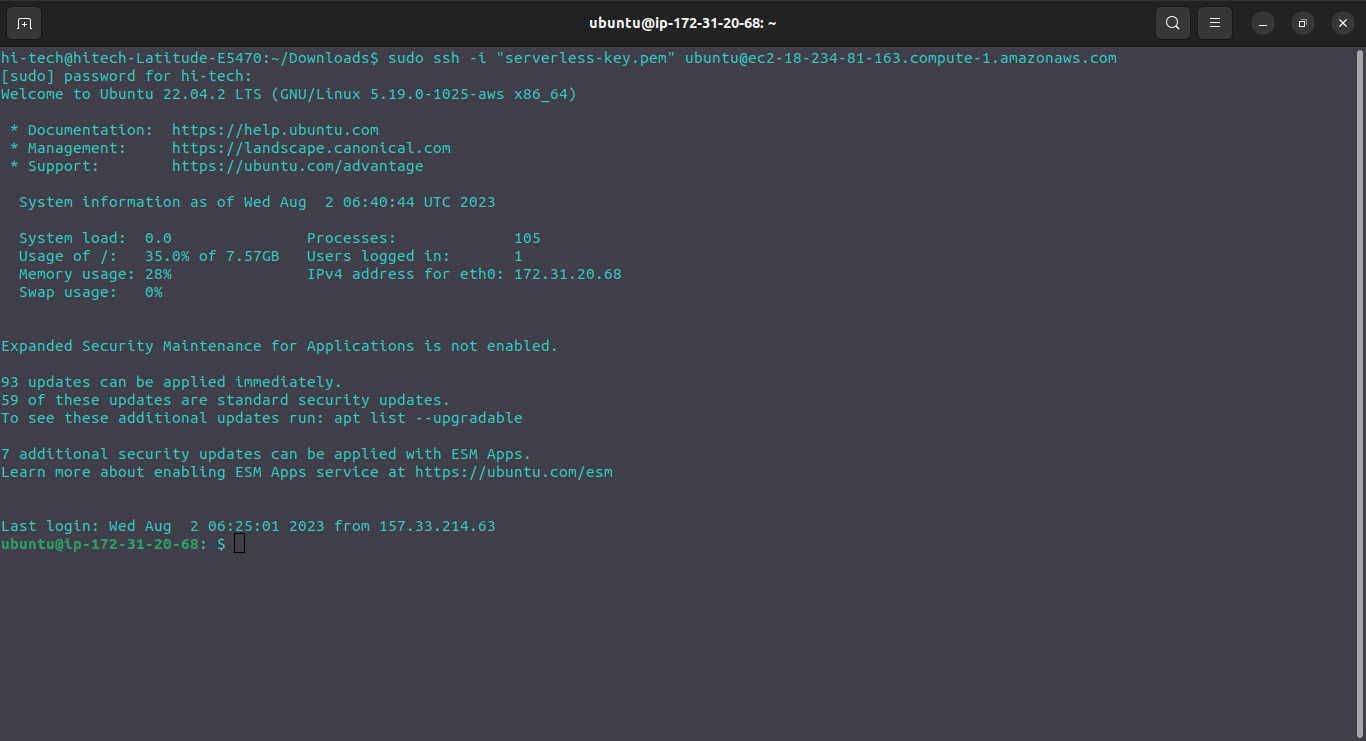
Note: Before going to further steps it is recommended to setup your AWS EC2 server also, though it is not that necessary but it will make the further processes easy.

Step 8: Install Serverless CLI
Before Installing serverless CLI it is mandatory to install Node.js and npm.
To install Node.js and npm from scratch on Ubuntu, you can use the NodeSource repository, which provides up-to-date and officially supported packages. Here are the commands to install Node.js and npm on Ubuntu:
First, update the package index and install some prerequisites:
 sudo apt update
 sudo apt install curl
Install Node.js using the NodeSource setup script (choose one of the supported versions mentioned in the output you provided, e.g., Node.js 16 "Gallium" or Node.js 18 LTS "Hydrogen" - it's recommended to use a supported version):
 # For Node.js 16 "Gallium" (Recommended)
 curl -fsSL https://deb.nodesource.com/setup_16.x | sudo bash -

 # For Node.js 18 LTS "Hydrogen" (Recommended)
 curl -fsSL https://deb.nodesource.com/setup_18.x | sudo bash -

 # Note: If you want a different version, replace "16" or "18" with the desired version number.
After running the setup script, install Node.js and npm:
sudo apt-get install -y nodejsConfirm the installation by checking the Node.js and npm versions:
 node -v
 npm -v
That's it! You should now have Node.js and npm installed on your Ubuntu system.
Remember that using the latest LTS (Long-Term Support) version of Node.js is recommended for most use cases, as it provides stability and security updates for an extended period. If you want to install a different version, you can check the NodeSource repository mentioned in the output you provided for more details on the available versions.
With your account set up, it's time to install the Serverless CLI on your local machine. Follow the installation instructions provided on the Serverless Framework website.
Onboard using the Serverless Framework
If you are a Serverless Framework user, you can onboard to Serverless Console from the CLI.
Upgrade to version 3.24.0+
  npm install -g serverless
  #Run this command to add the AWS Account integration.

  serverless --console
  #You'll need to deploy the function if you haven't already.

  serverless deploy
  #Next, you'll need to instrument the newly deployed function from the browser.
Next, you'll need to instrument the newly deployed function from the browser.
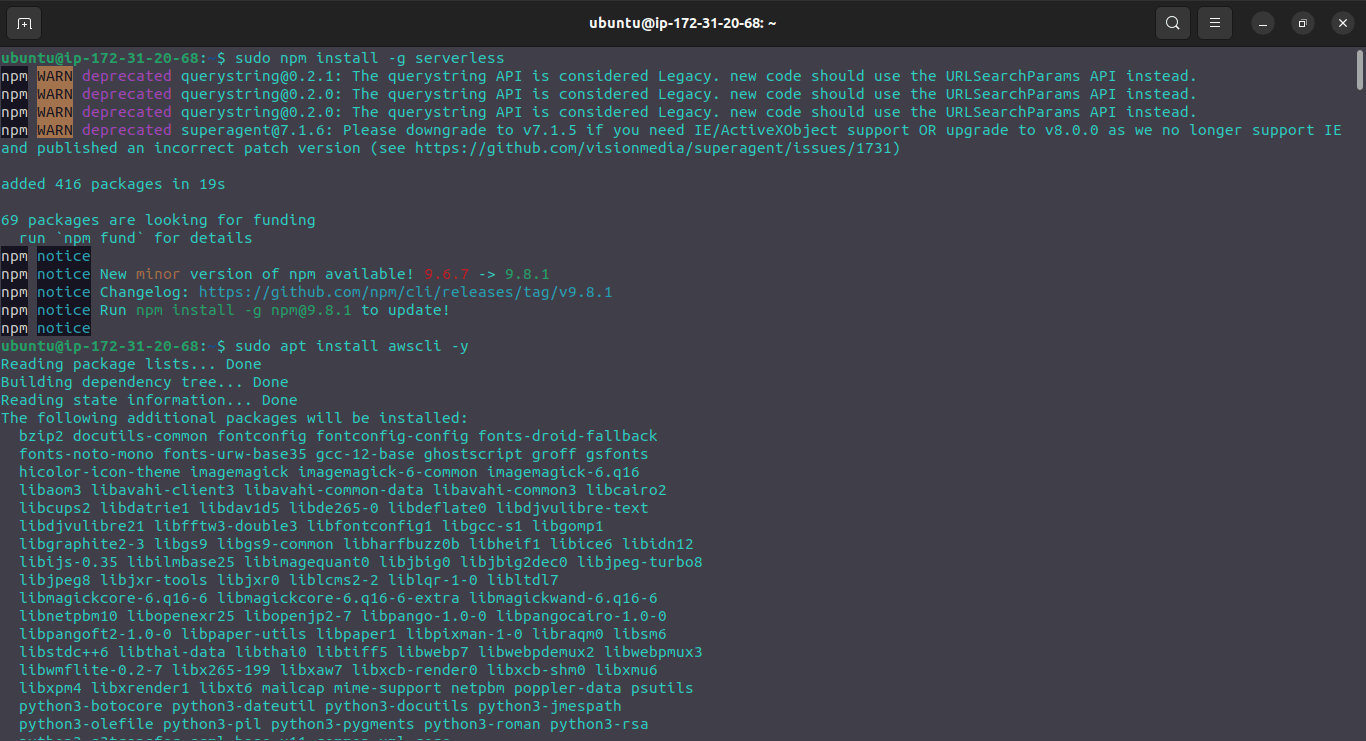
Here You can see we Installed awscli also, it is for the beterment of the project.
Step 9: Log in to Serverless Framework CLI
Open your terminal and use the
"sls login"command to log in to Serverless Framework CLI. You'll be prompted to enter your Serverless Framework credentials.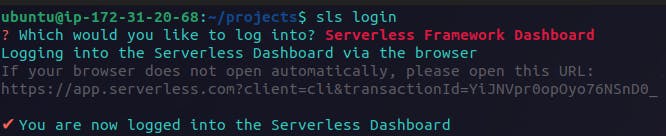
Step 10: You're Now Enchanted! 🪄
Congratulations! You've successfully set up your Serverless Framework account. You're now ready to wield the power of serverless magic and embark on your serverless development journey.
Conclusion: Embrace the Magic of Serverless Framework 🔮
As you conclude this chapter, you've successfully set up your Serverless Framework account and gained access to the enchanting world of serverless development. With your magical key in hand, you are now equipped to explore the vast possibilities of a Serverless Framework and craft your extraordinary AWS Serverless Mega Project, Taskmaster App. In the upcoming chapters, we'll delve deeper into the architecture, AWS setup, and event-driven magic. Get ready to unleash your serverless spells and weave AWS magic like never before! 🧙♂️🌟
Chapter 2: 📦 Fetching the Magic: Cloning Taskmaster App from GitHub
In this chapter, we will dive into the heart of Taskmaster App development by fetching the source code from GitHub. With the magic of Git and GitHub, you'll obtain the foundation of our AWS Serverless Mega Project, ready to be enchanted with the power of a Serverless Framework.
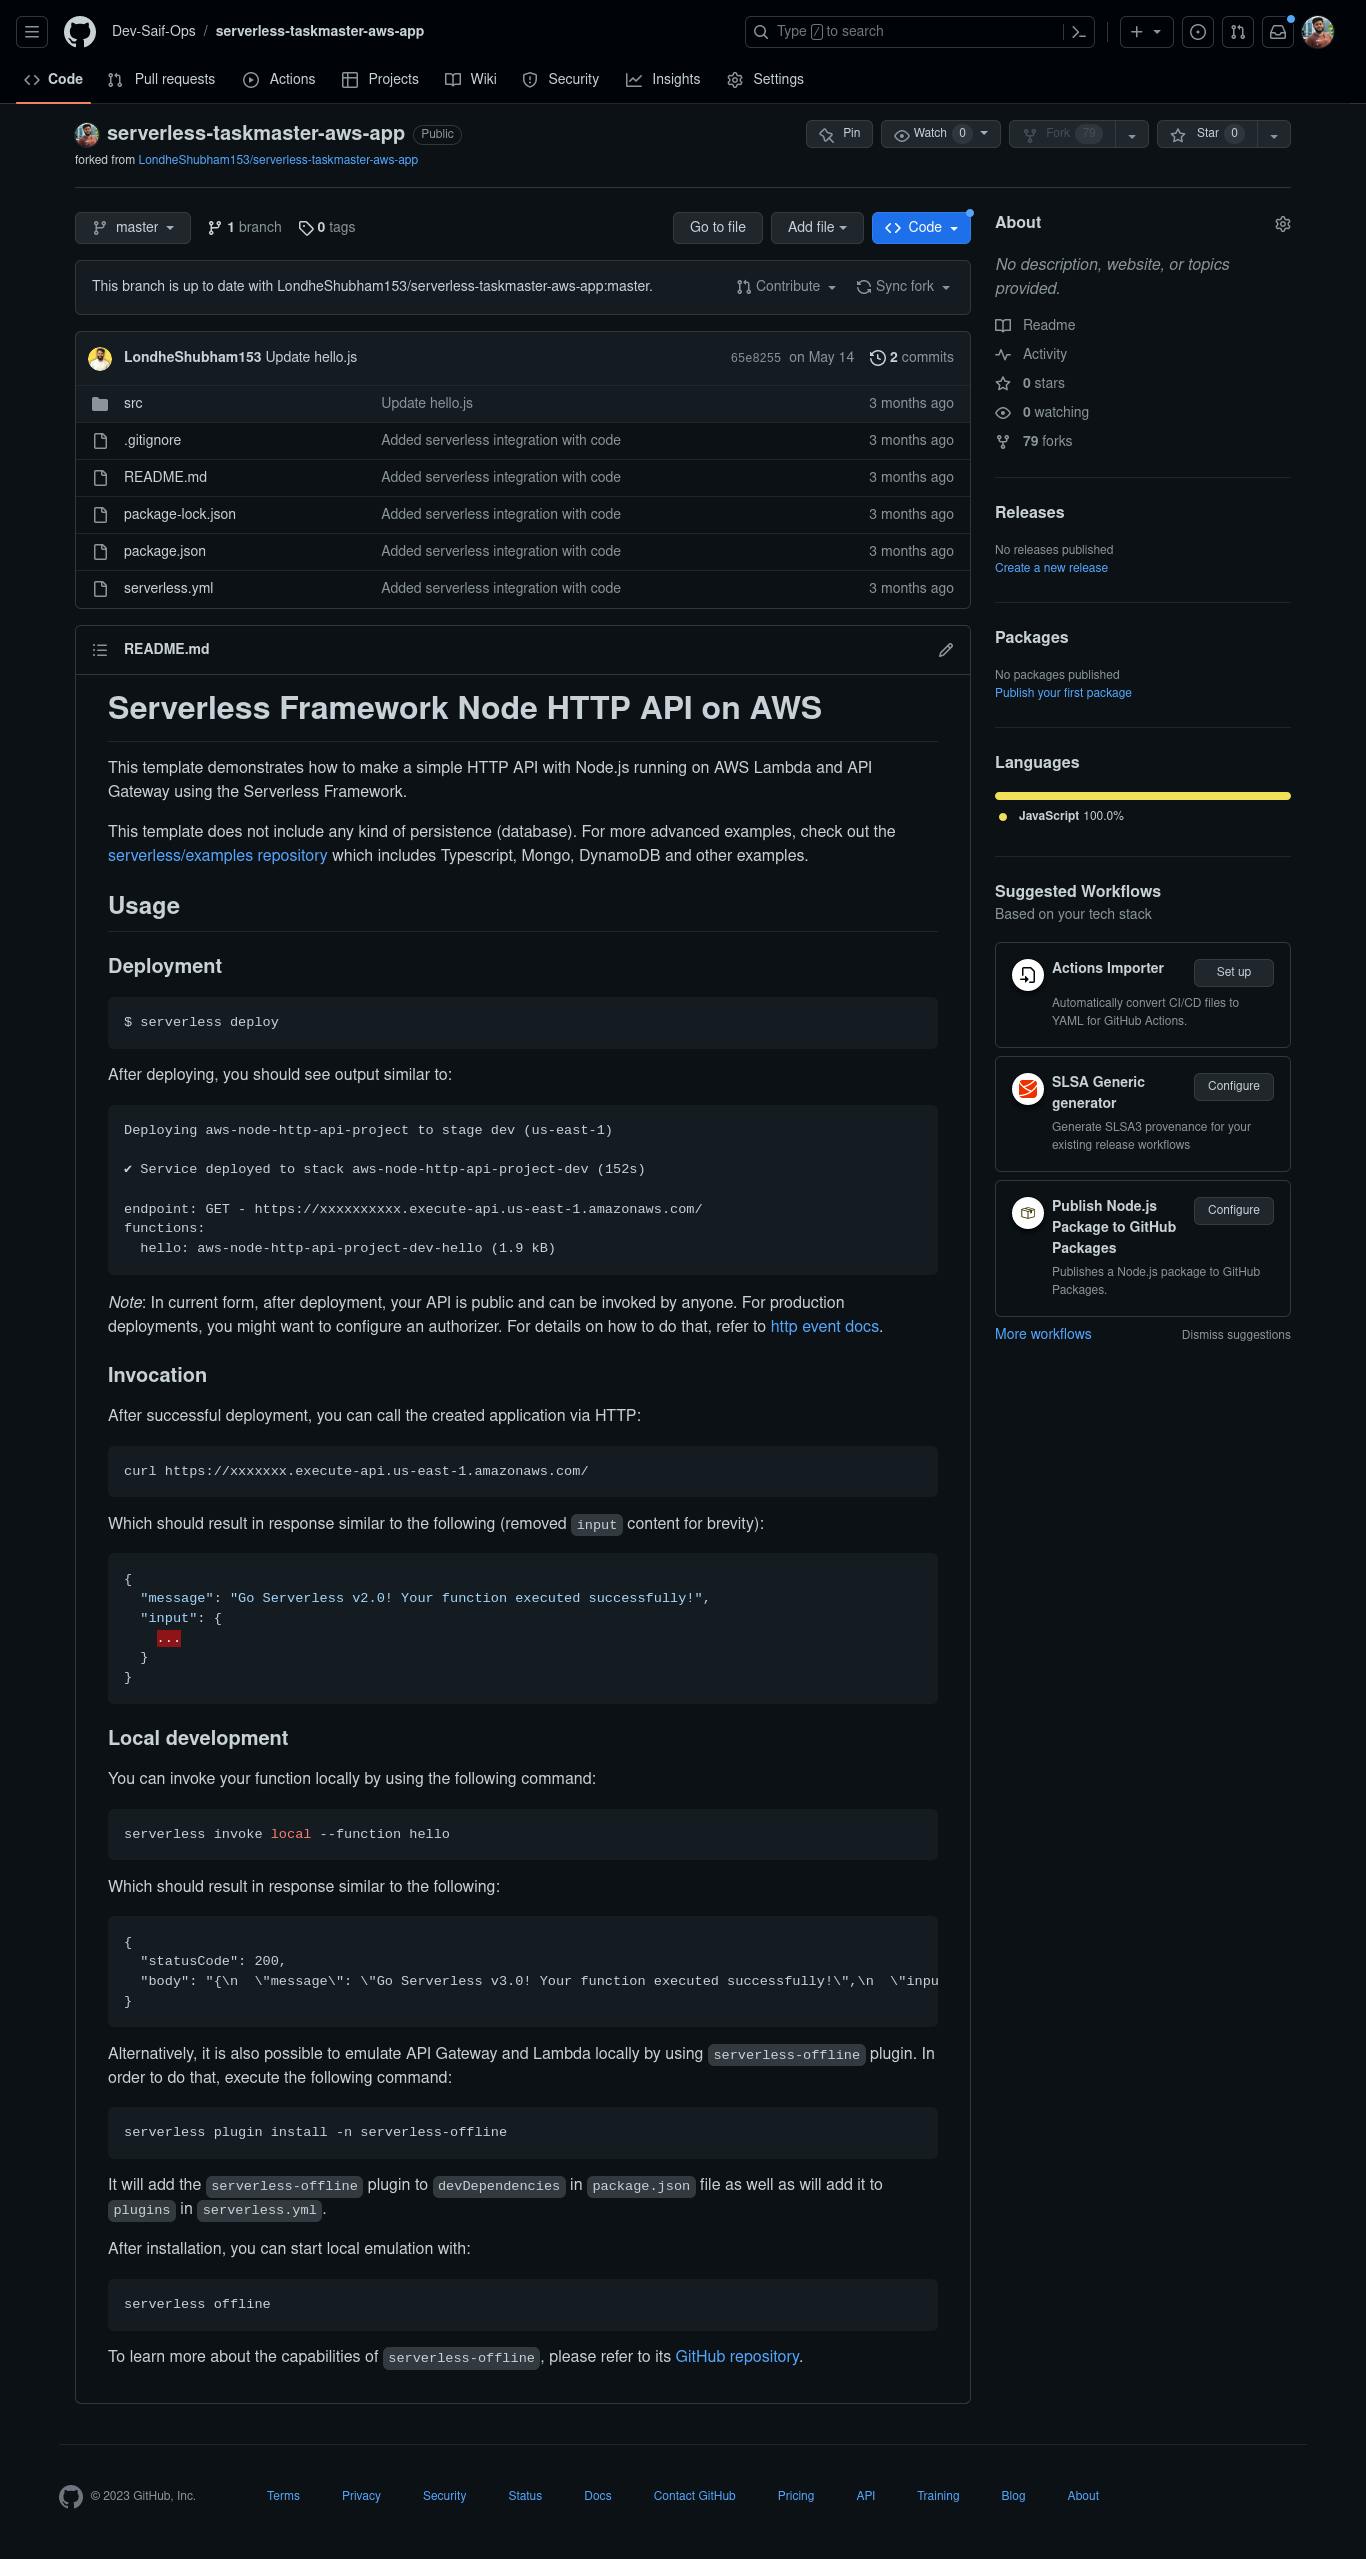
2.1 Introducing Taskmaster App: Your Enchanting Project 🏰
Before we embark on this magical journey, let's introduce Taskmaster App, an extraordinary tool for task management and organization. Taskmaster App leverages the enchanting power of AWS services, Lambda functions, and API Gateway to deliver a seamless task management experience.
2.2 Setting Up Git: Your Version Control Spell 🪄
To harness the magical powers of Git, you'll need to ensure it's installed on your local machine. Follow our guide to set up Git and configure your name and email to identify your spell-casting contributions.
2.3 Cloning Taskmaster App Repository: Fetching the Enchantment 🔮
With Git at your fingertips, it's time to summon Taskmaster App from the depths of its GitHub repository. Follow these steps to clone the repository to your local machine:
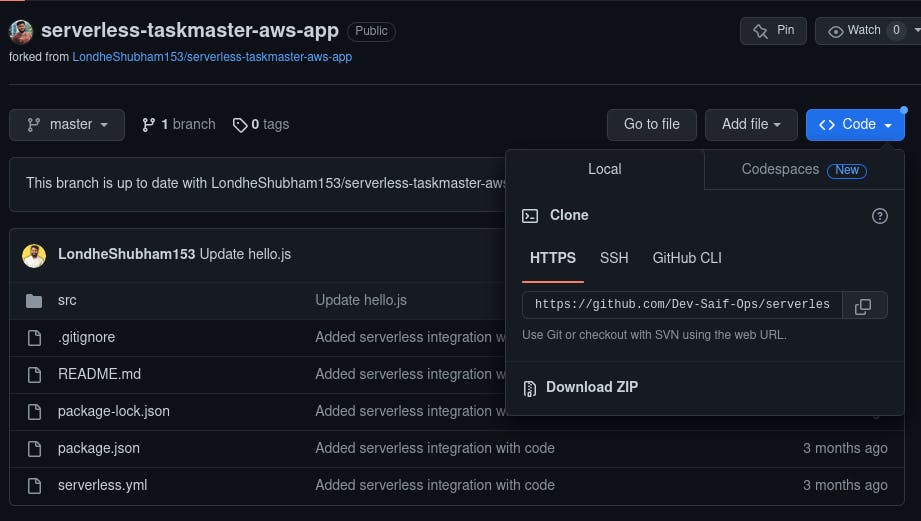
Step 1: Obtain the Repository URL
Visit the Taskmaster App repository on GitHub (Repository URL). Click the "Code" button and copy the repository URL.
Step 2: Open Terminal or Command Prompt
- Open your terminal or command prompt on your local machine.
Step 3: Navigate to Desired Directory
- Use the "cd" command to navigate to the directory where you want to store Taskmaster App on your local machine.
Step 4: Clone the Repository
- Enter the following command in your terminal to clone the Taskmaster App repository:
git clone <repository_url>
Replace "<repository_url>" with the URL you copied in Step 1.
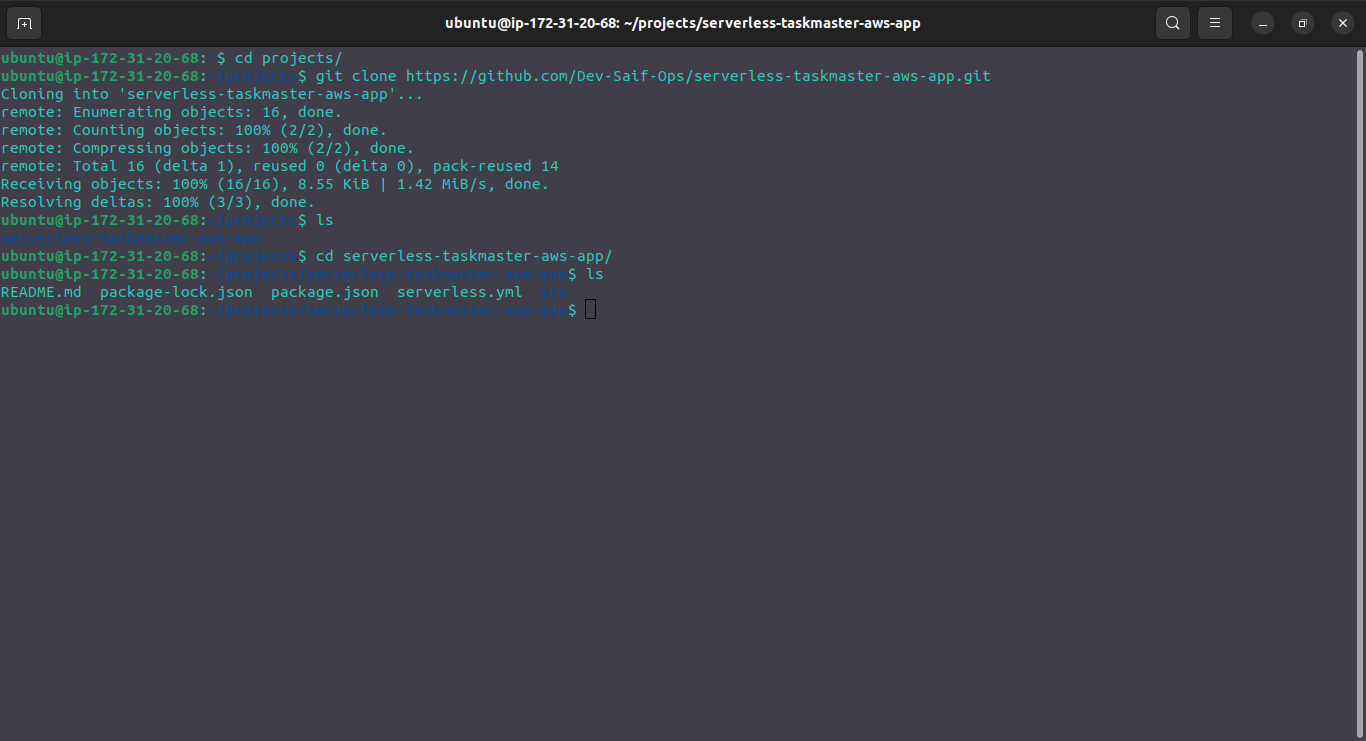
Step 5: Fetch the Magic
- Git will work its enchantment, fetching the Taskmaster App source code from GitHub and creating a local copy in your chosen directory.
2.4 Exploring the Taskmaster App Code: Unveiling the Enchantment 🌟
With Taskmaster App's code in your possession, it's time to explore the magical incantations that bring this application to life. Open your favorite code editor and begin your journey into the heart of Taskmaster App's architecture and serverless spells.
Conclusion: The Enchantment Begins 🔮
In this chapter, you've successfully cloned Taskmaster App from GitHub, bringing the first traces of enchantment to your local machine. With the power of Git and GitHub, you are now equipped to contribute to the magic and unleash the full potential of the Taskmaster App. In the following chapters, we'll dive deeper into AWS infrastructure setup, Lambda functions, API Gateway, DynamoDB, and the orchestration of event-driven spells. Embrace the magic of serverless development, for the true enchantment of the Taskmaster App, is just beginning! 🧙♂️
Chapter 3: ⚡ Unleashing the Spells: Running Taskmaster App with Serverless Framework
In this chapter, we'll wield the true power of a Serverless Framework to run the Taskmaster App on the AWS cloud. Prepare to unleash your serverless spells as we deploy Lambda functions, set up API Gateway, and witness the magic of Taskmaster App coming to life!
3.1 The Magic of Serverless Framework: A Quick Recap 🌟
Before we dive into running Taskmaster App, let's recap the magic of Serverless Framework. It simplifies serverless development by abstracting away infrastructure complexities, allowing you to focus on your code. With Serverless Framework, you can easily deploy serverless applications to the cloud, configure AWS resources, and enjoy cross-cloud compatibility.
3.2 Installing Dependencies: Preparing Your Enchanted Environment 🧙♂️
Before running Taskmaster App, let's ensure you have all the required dependencies installed on your local machine. We'll guide you through installing Node.js, npm packages, and any other prerequisites needed to power the magic of the Taskmaster App.
3.3 Serverless Framework Configuration: Unlocking the Serverless Spell Book 📚
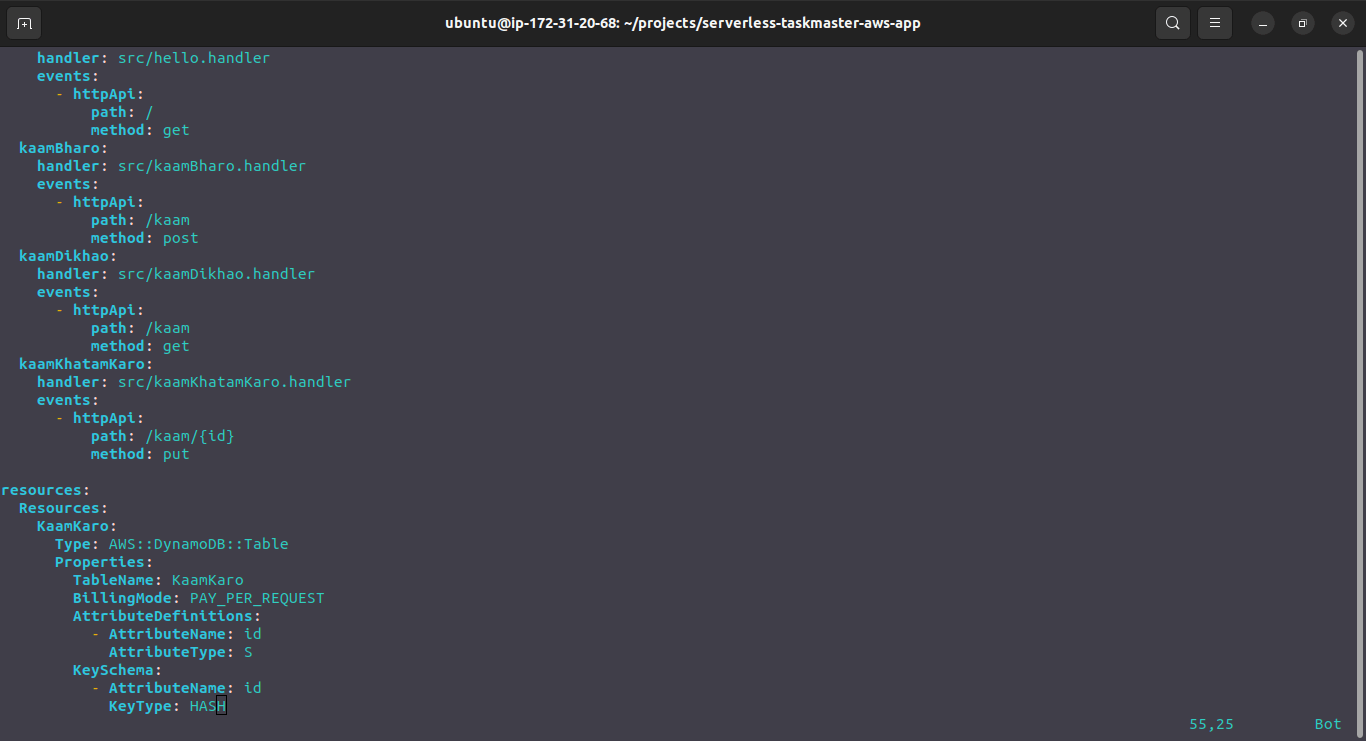
As with every magical adventure, preparation is key. We'll explore the serverless.yml file, your spell book for defining the AWS resources and configuration for Taskmaster App. Customize this configuration to fit the needs of your enchanted project.
The First Step of this process is that we have to make a serverless.yml file on our own, as DevOps Engineer is our work and duty, The example of the serverless.yml file is as follows:
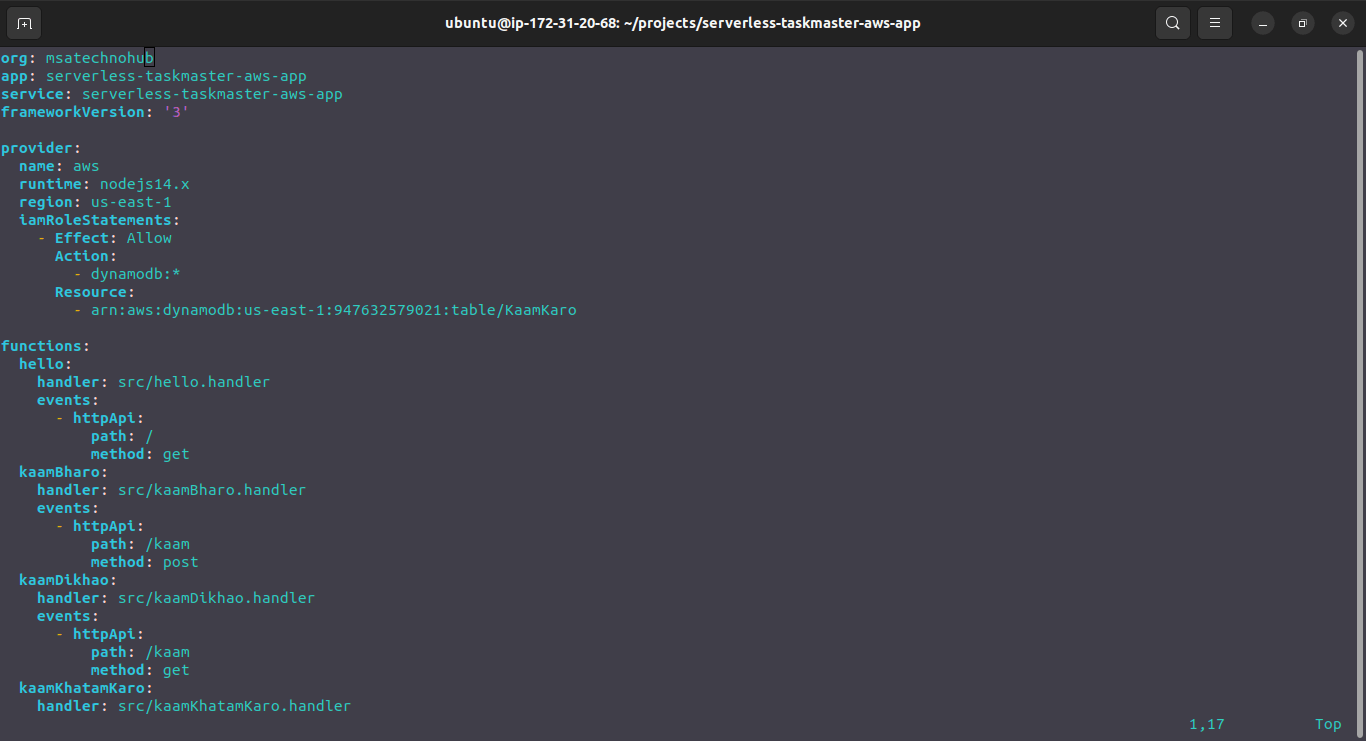
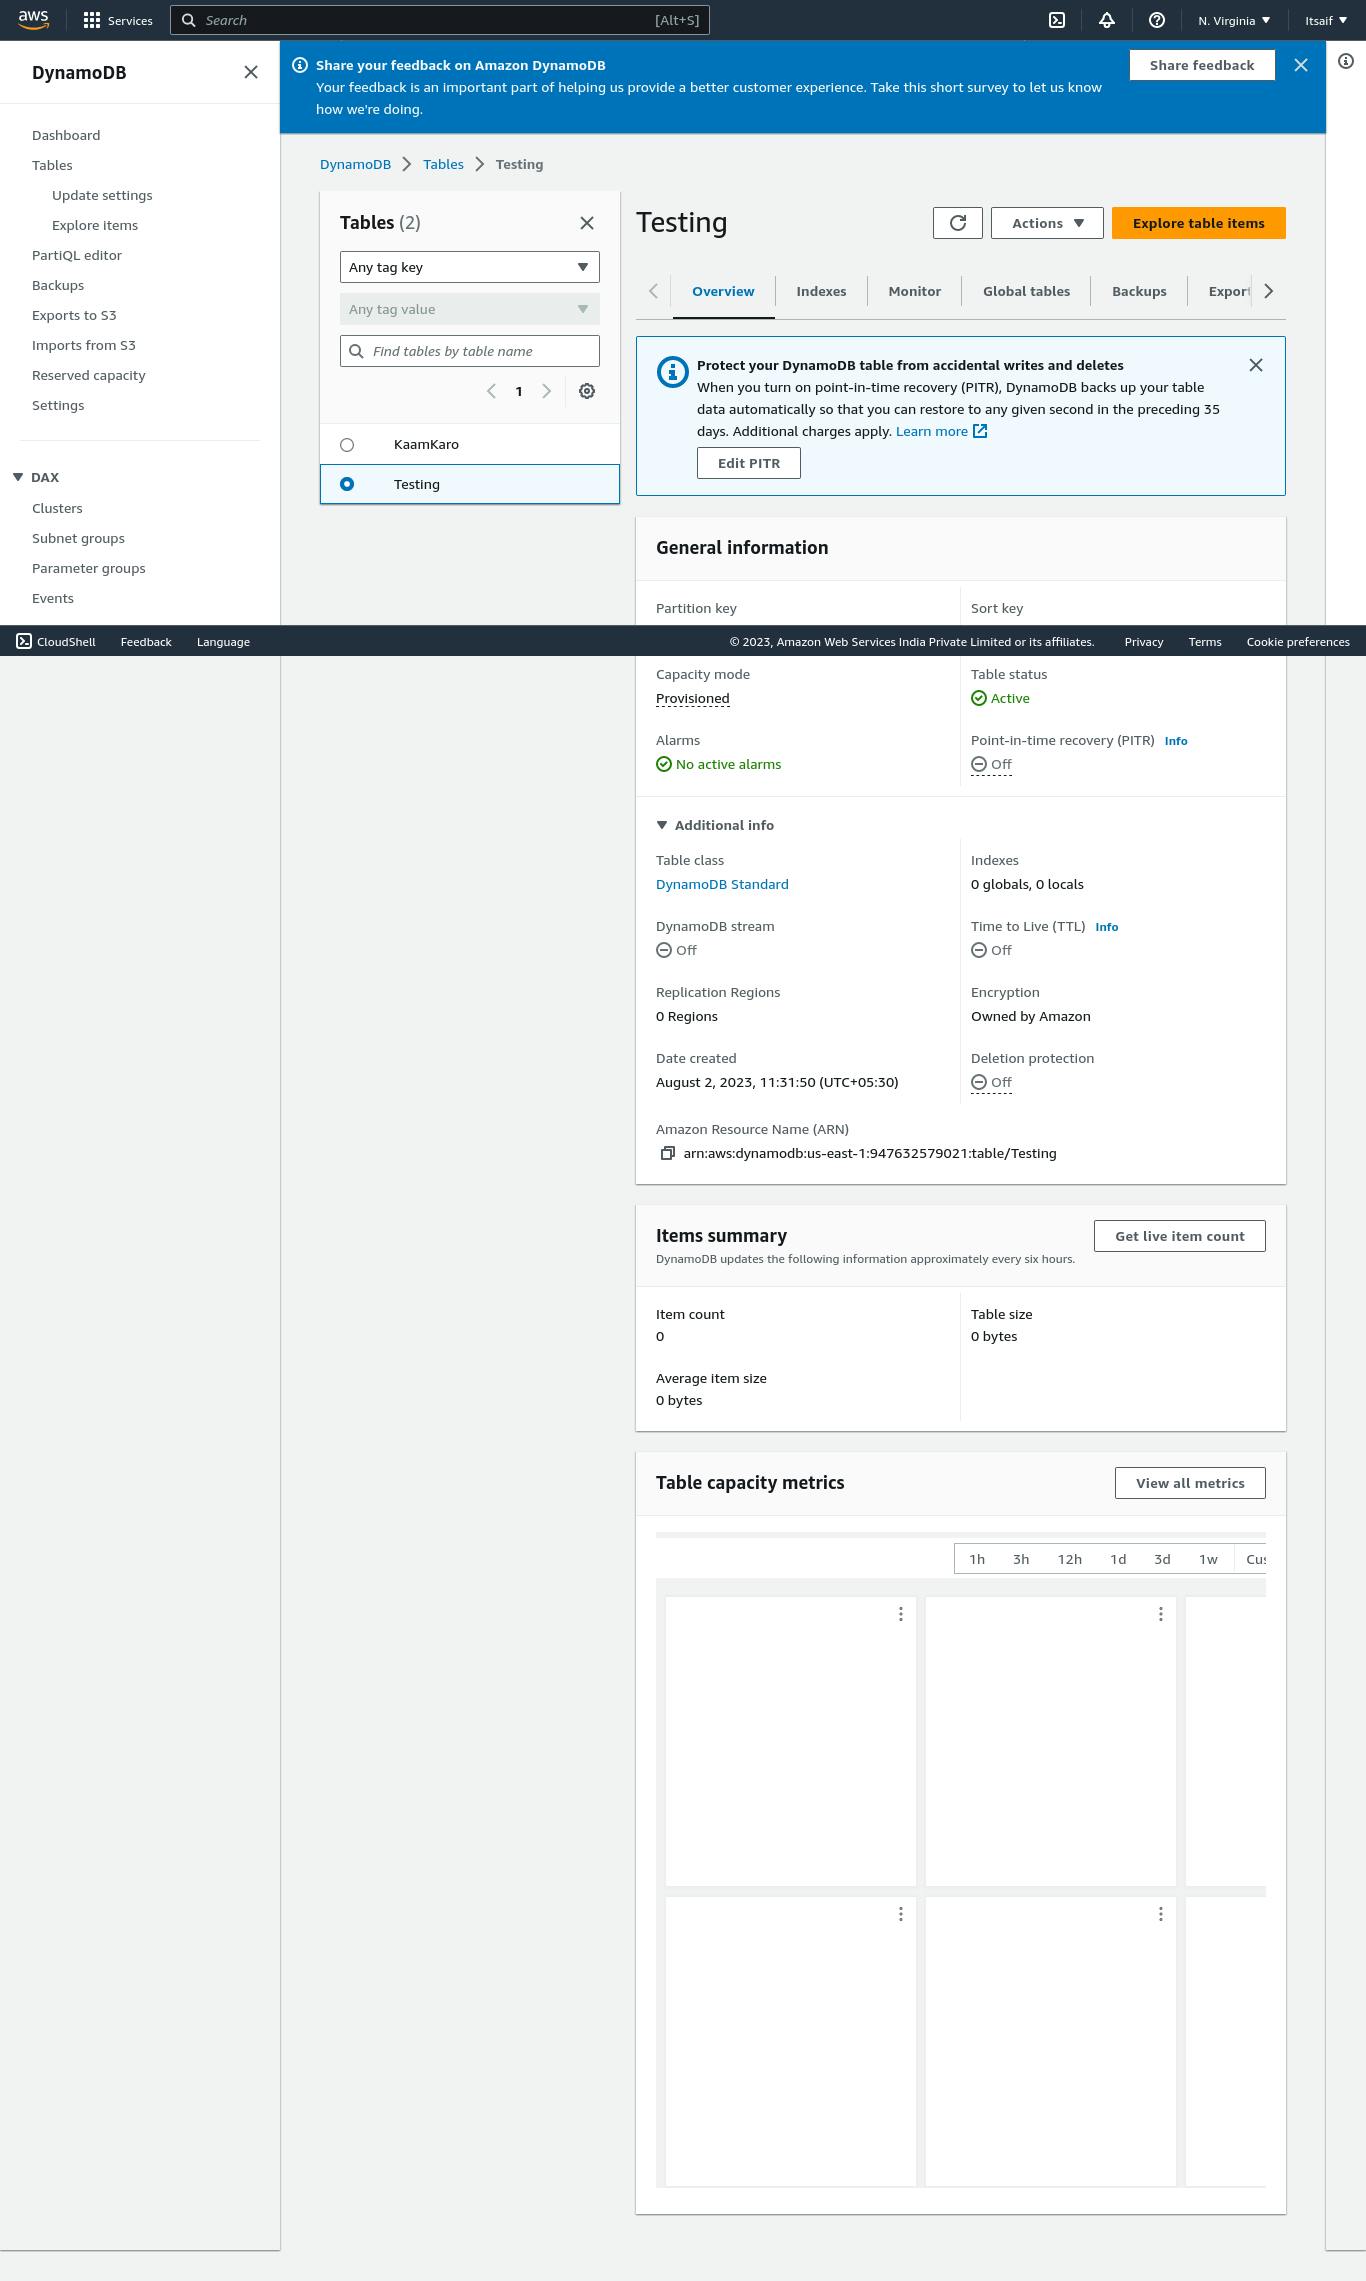
Here You can see in the first Image in provider:Resource there is the thing with -arn, this is the unique Amazon Resource name which we have to provide from Amazon Dynamodb.
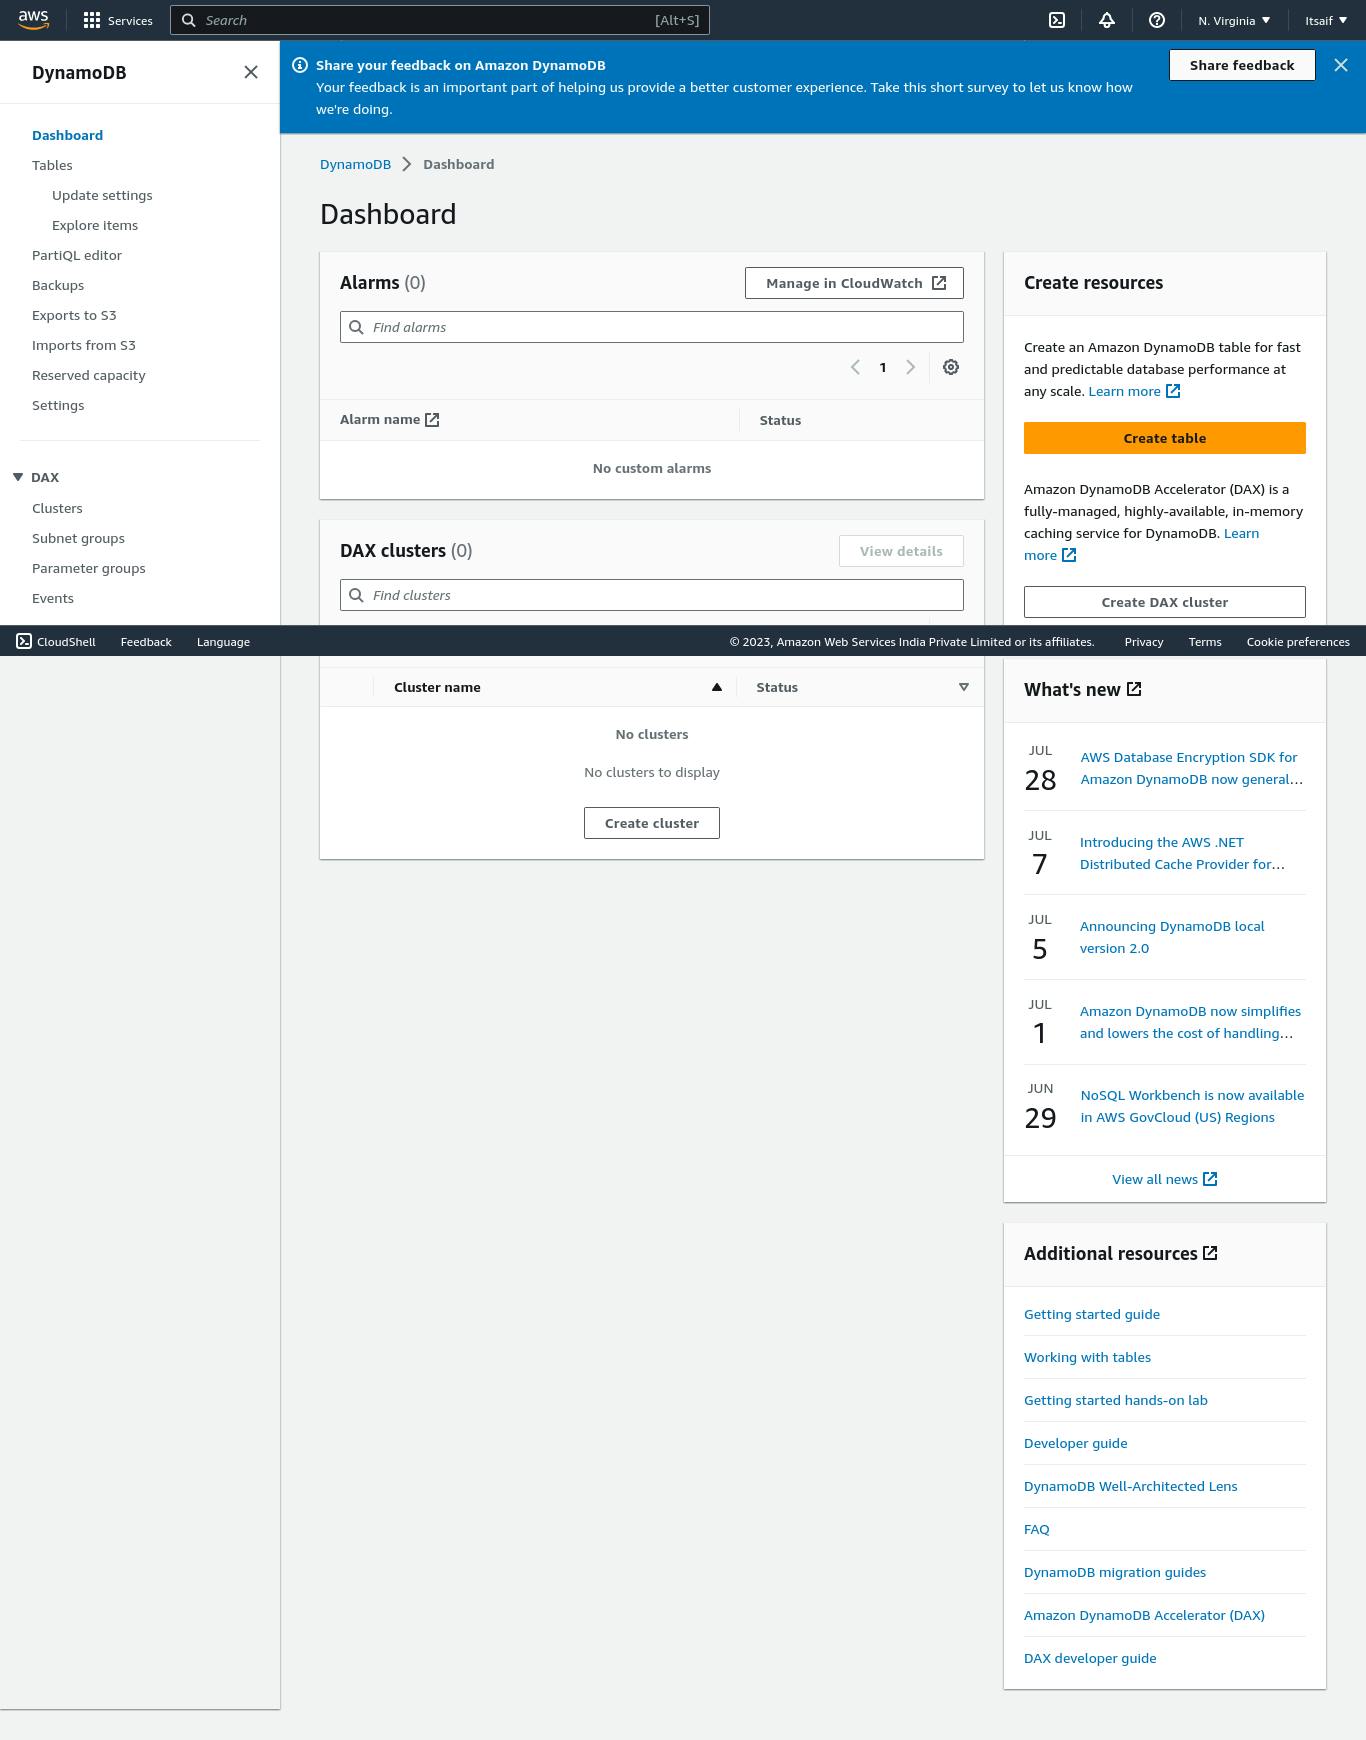
The Steps are:
Create a Testing table in Dynamodb for example.
Now once it created click on it, go on the additional info and copy the ARN from there.
- Once You got the key Copy and paste it in the serveless.yml Resource and save that file.
3.4 Deploying the Enchantment: A Single Command Away 🔮
With the incantations ready, it's time to deploy Taskmaster App to the AWS cloud. Follow this simple step to unleash your spells:
Step 1: Open Terminal or Command Prompt
Open your terminal or command prompt on your local machine.
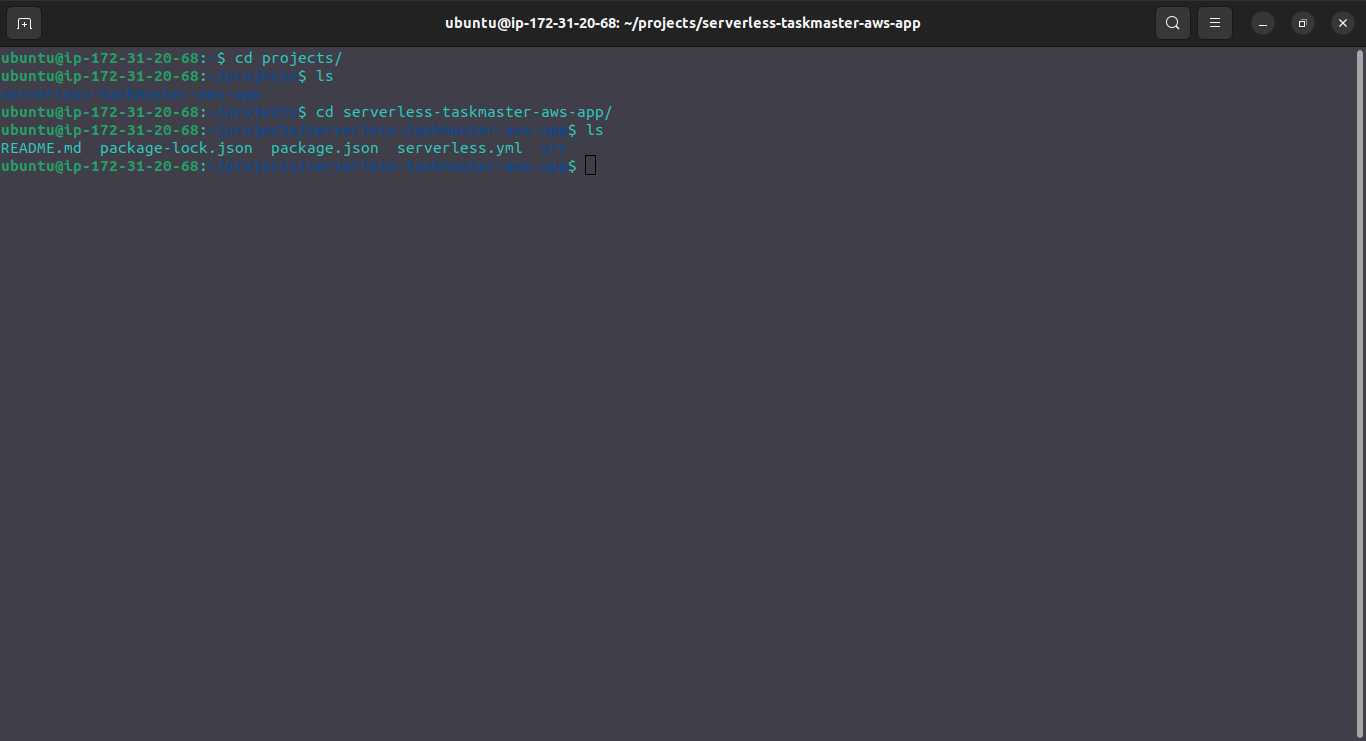
Step 2: Navigate to Taskmaster App Directory
Use the "cd" command to navigate to the Taskmaster App directory you cloned earlier.
Step 3: Deploy the Magic
First Login again into your Serverless Dashboard By using the following command:
sls login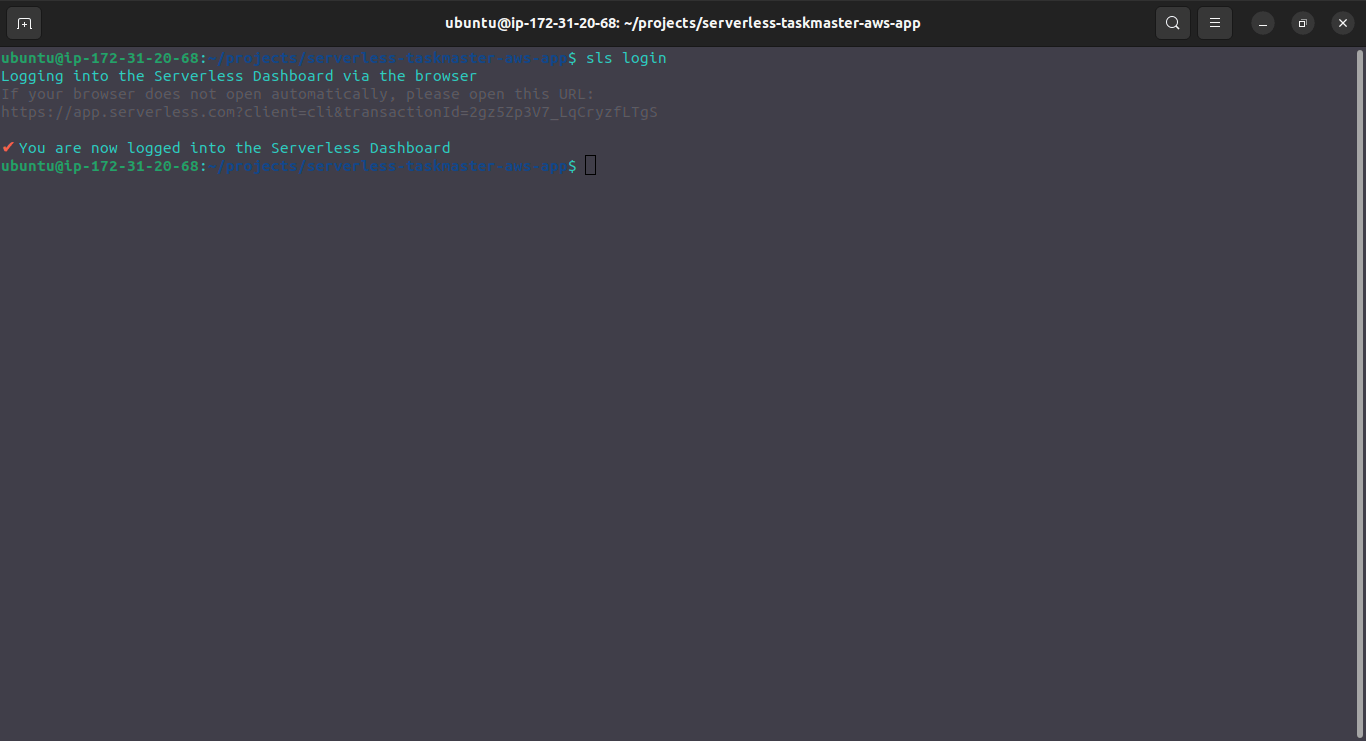
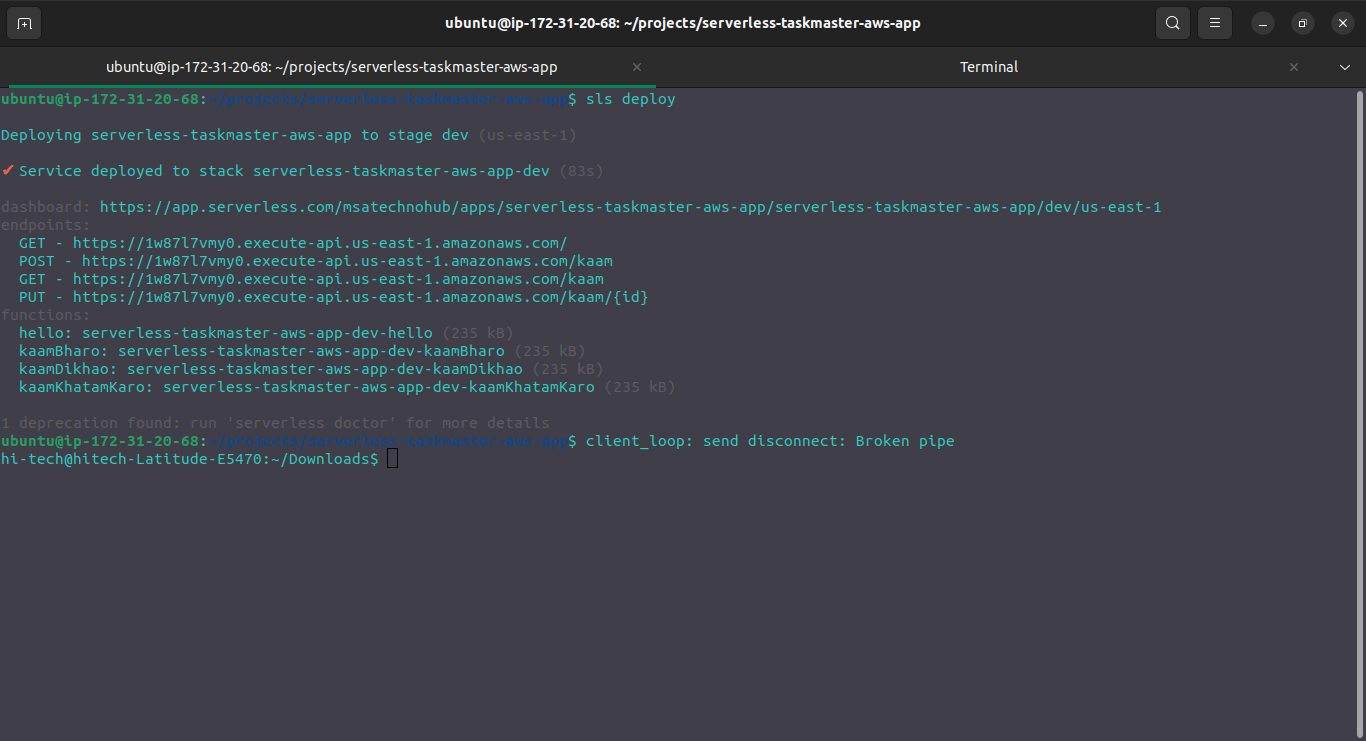
Enter the following command in your terminal to deploy Taskmaster App using Serverless Framework:
sls deploy
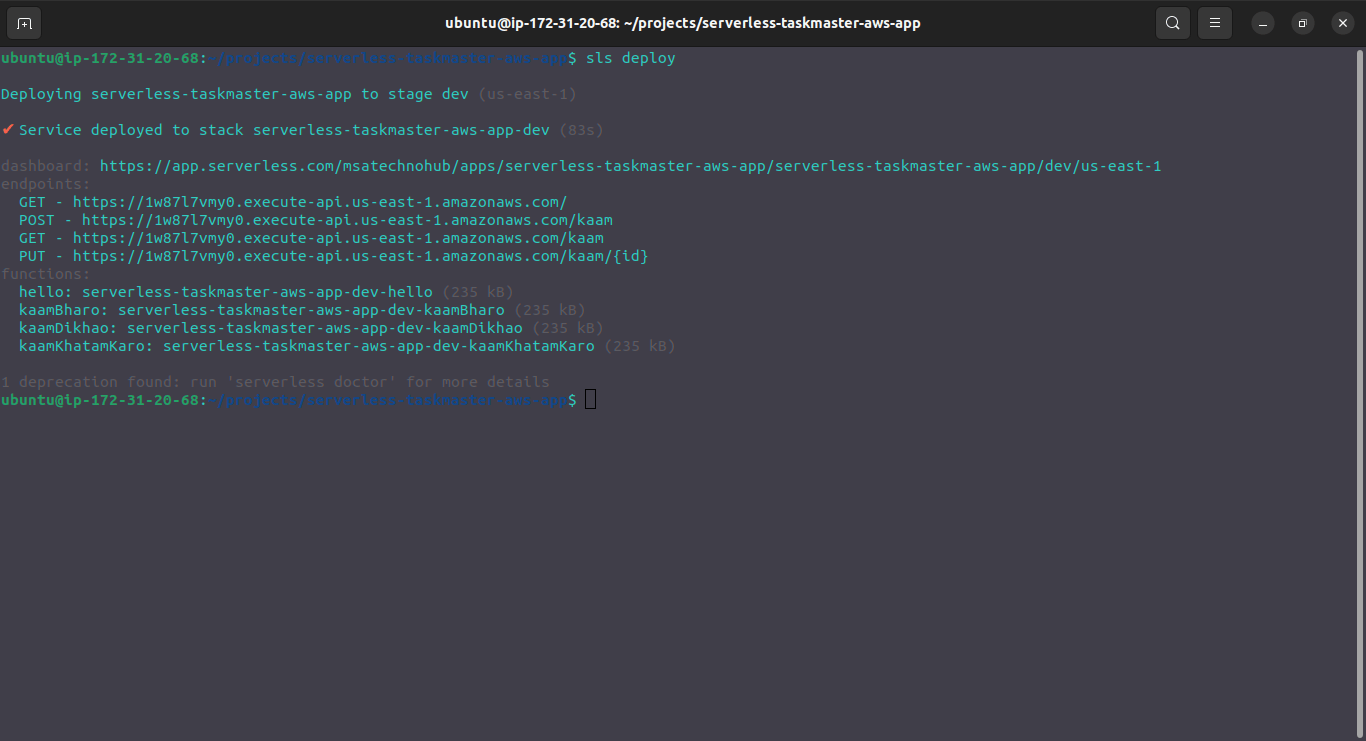
Congratulations! 🎉 Your Application Is Successfully deployed. 🚀
Witness the magic unfold as Serverless Framework works its charm, deploying your Lambda functions, API Gateway, and other AWS resources to bring Taskmaster App to life.
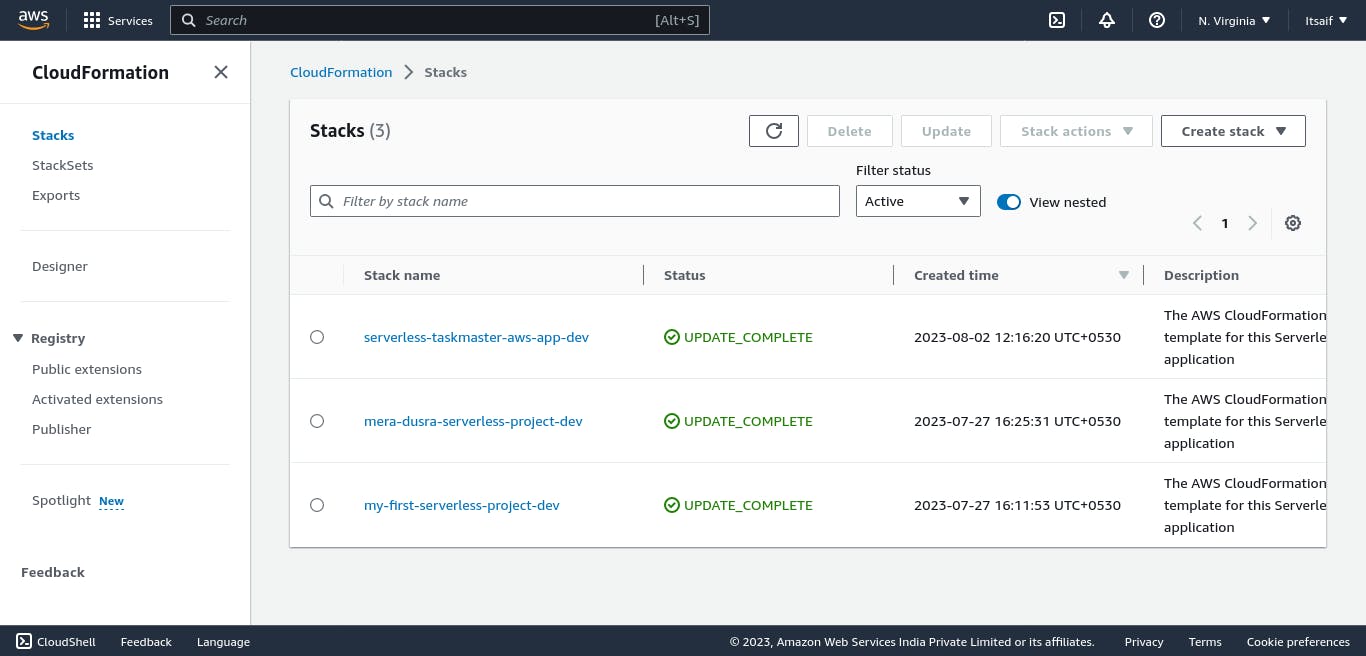
3.5 Exploring Your Enchanted App: Unveiling the AWS Magic 🏰
With Taskmaster App deployed to the AWS cloud, it's time to explore your enchanted creation. Serverless Framework has orchestrated the infrastructure, and your serverless spells are ready to be invoked.
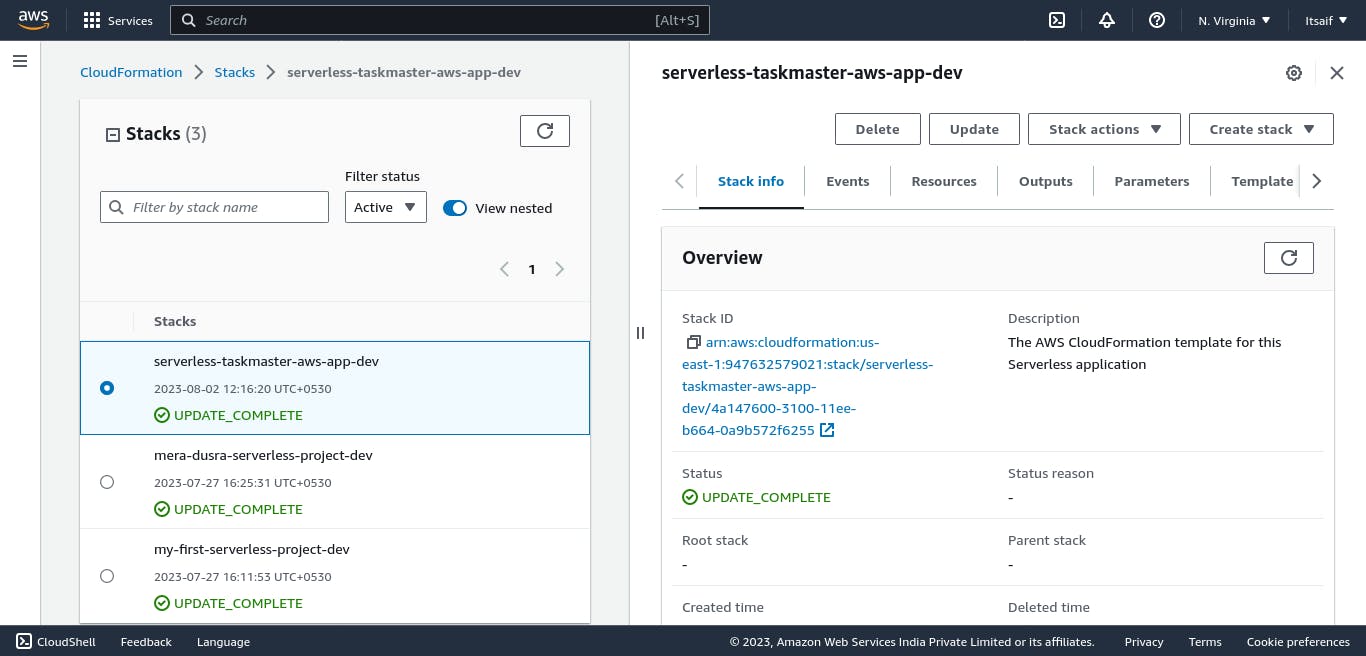
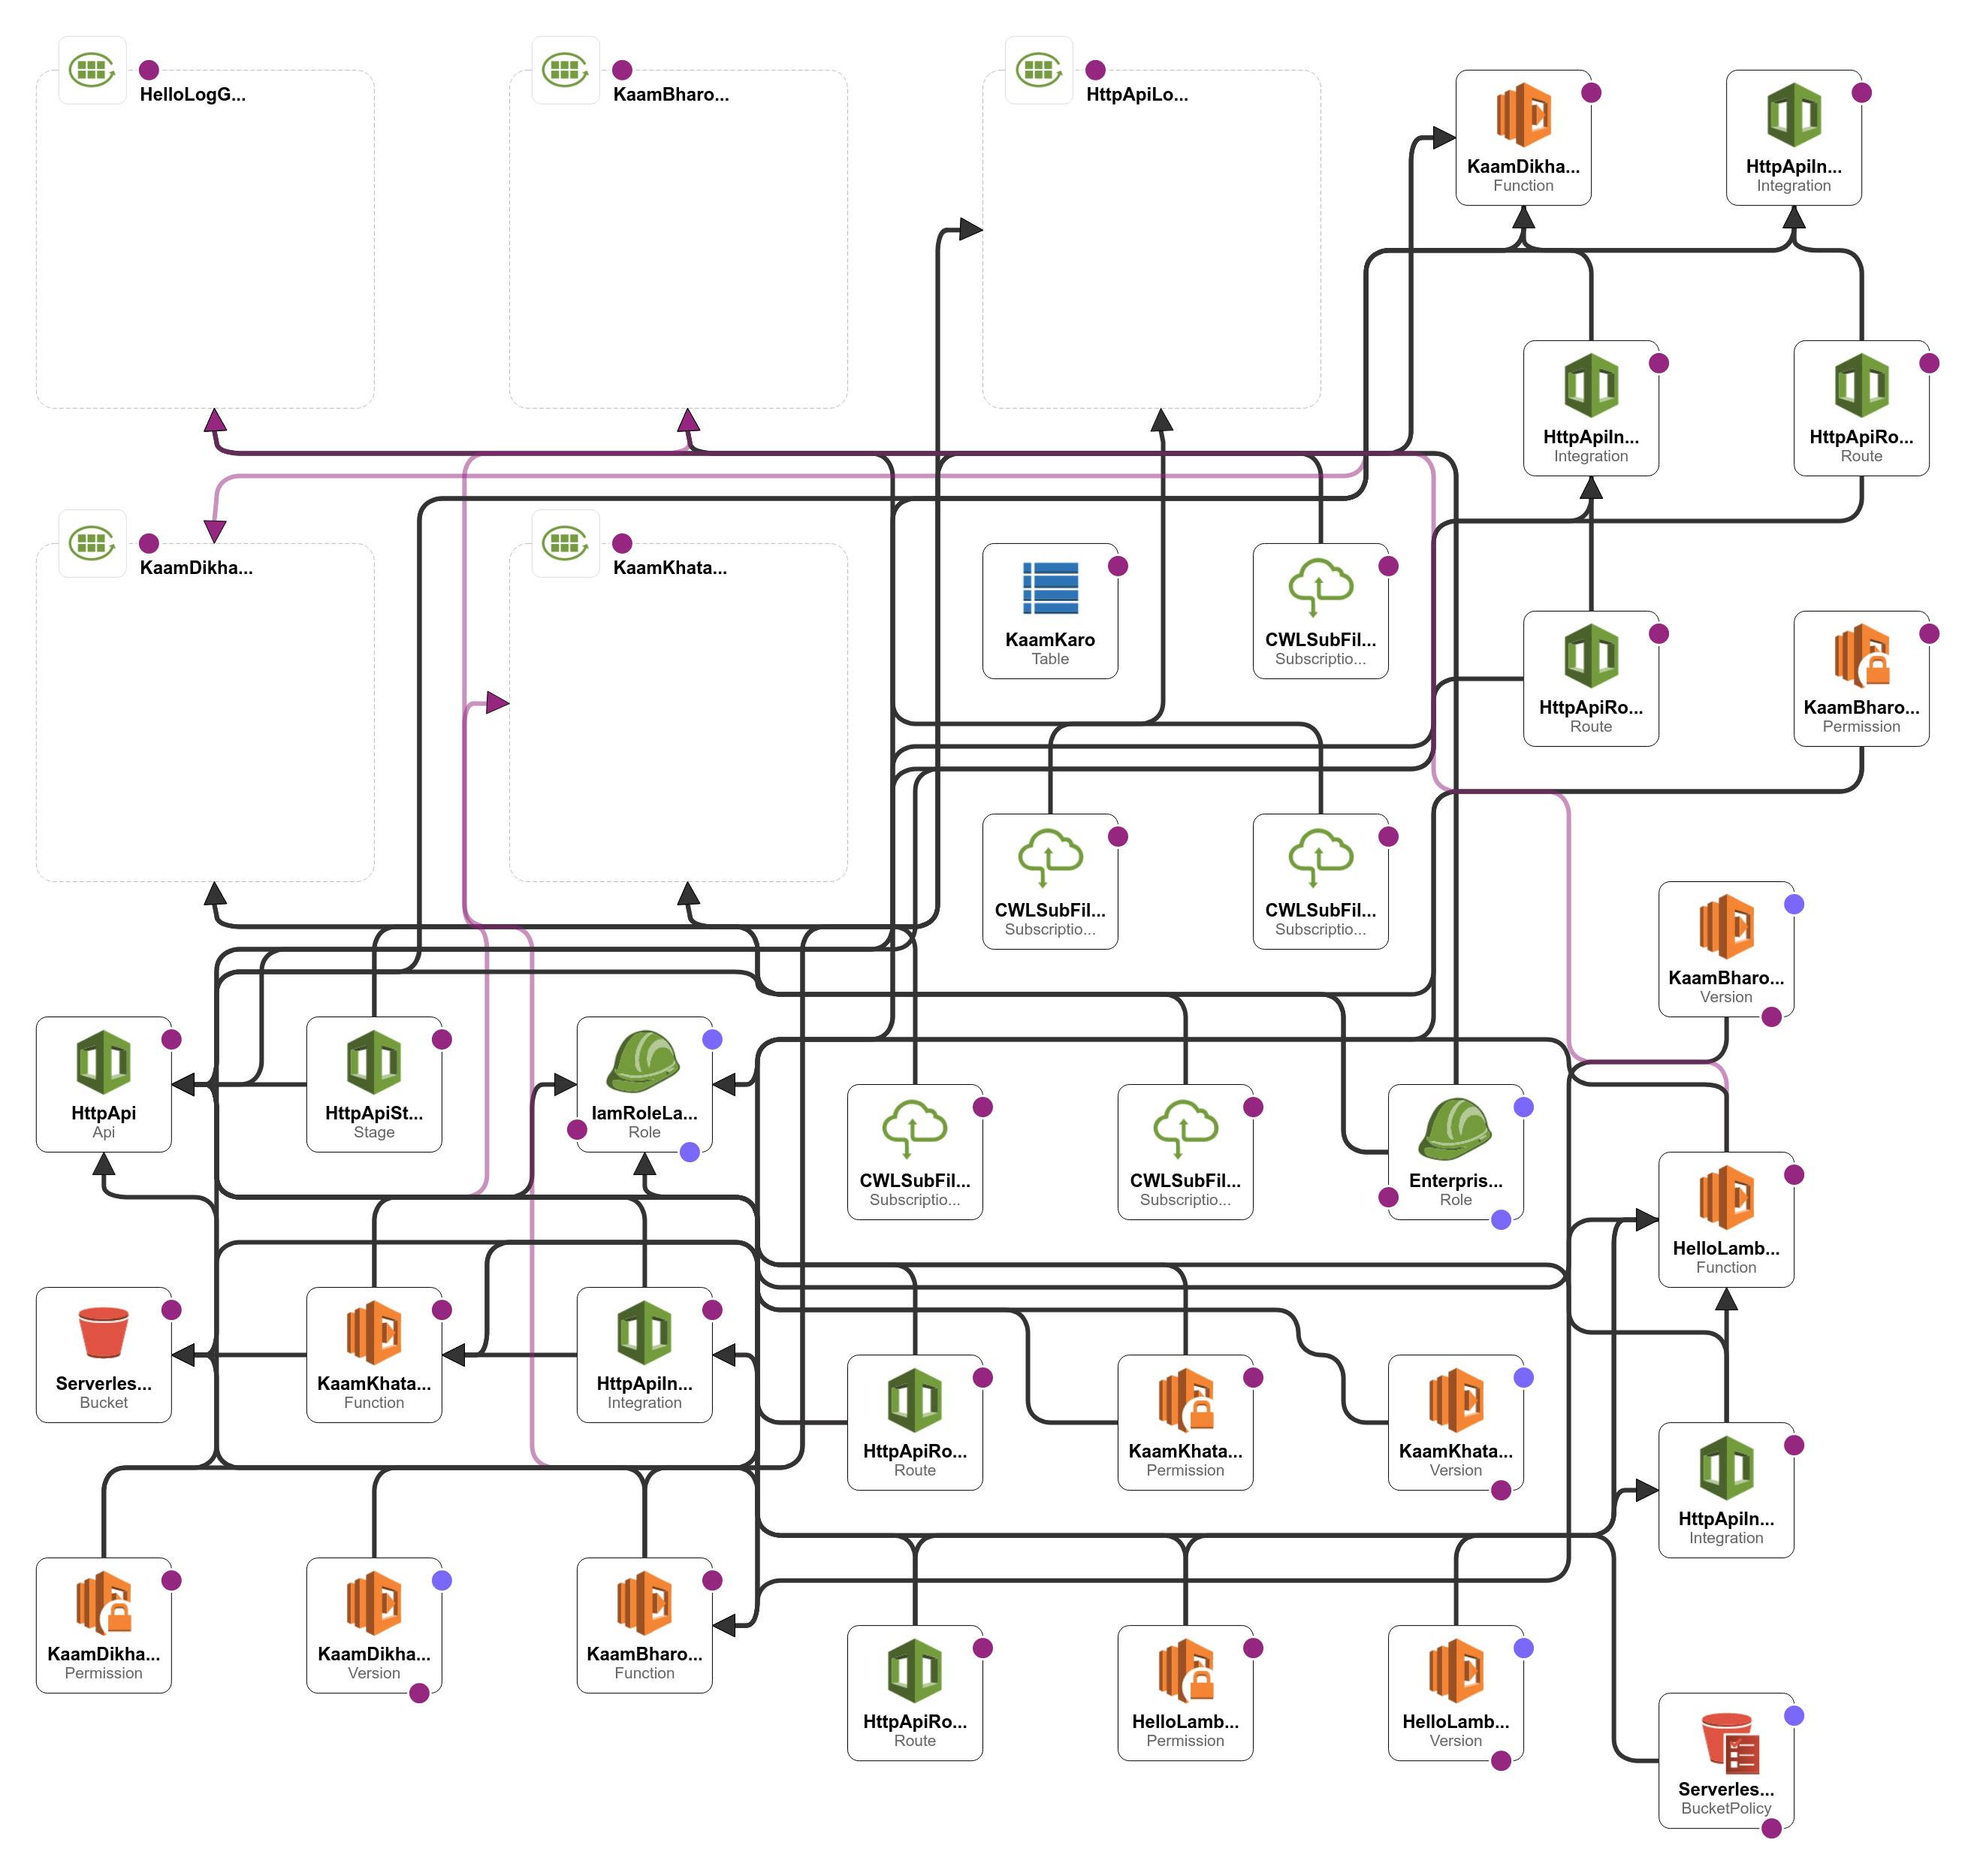
- For that go to clouFormation Stack and click on your Apllication.
Click on Update.
Click ON Edit Template in Designer and then Veiw in Designer.
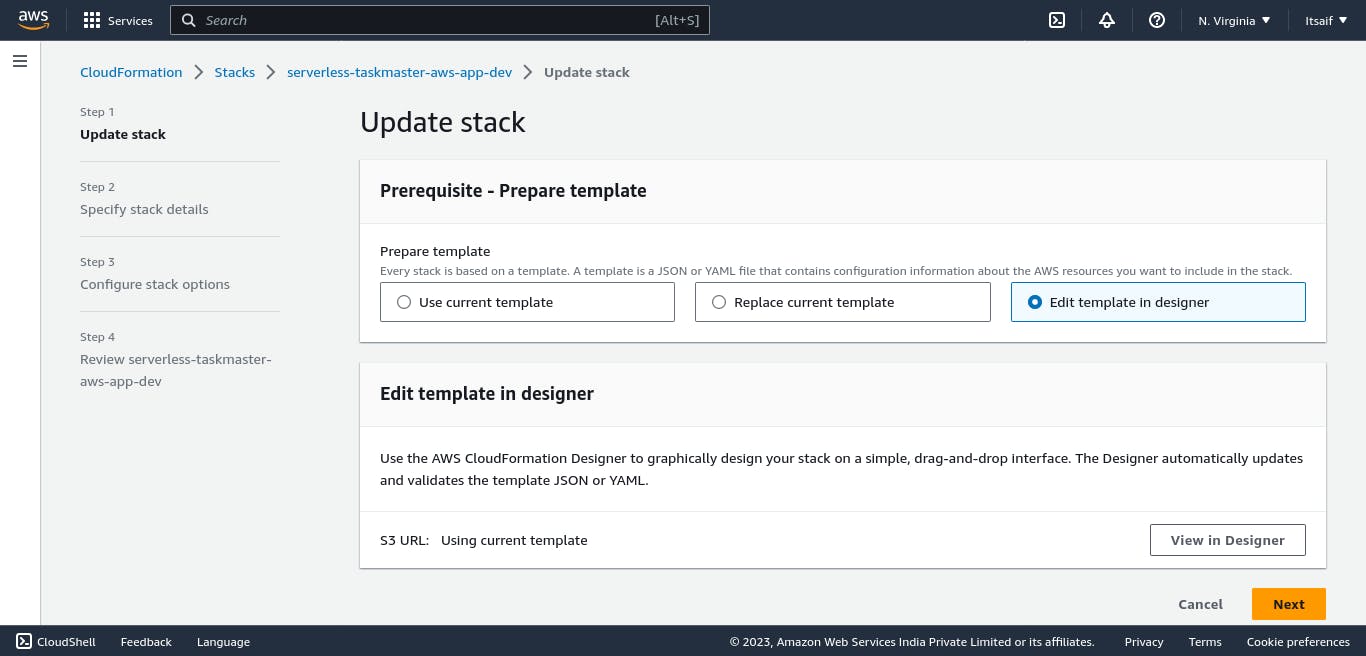
And BOOOOOOOM 💥💥💥 your Amazing Stack Diagram is Ready...... 🎉🎉🎉
Conclusion: Embrace the Enchantment 🌌
Congratulations! In this chapter, you've unleashed the power of Serverless Framework to run Taskmaster App on the AWS cloud. The AWS magic is now at your fingertips, and Taskmaster App stands tall as a testament to your serverless sorcery.
In the next chapters, we'll dive deeper into the heart of the Taskmaster App, exploring event-driven magic, integrating DynamoDB for data storage, and building an API Gateway to connect with the outside world. Embrace the enchantment, for the journey into the world of AWS Serverless Mega Projects has just begun! 🚀🧙♂️
Chapter 4: 🧪 Testing the Enchantment: Postman Meets Taskmaster App
In this chapter, we'll put our newly crafted Taskmaster App to the test using the powerful Postman tool. Prepare to witness the magic of serverless APIs as we interact with Taskmaster App and validate its capabilities.
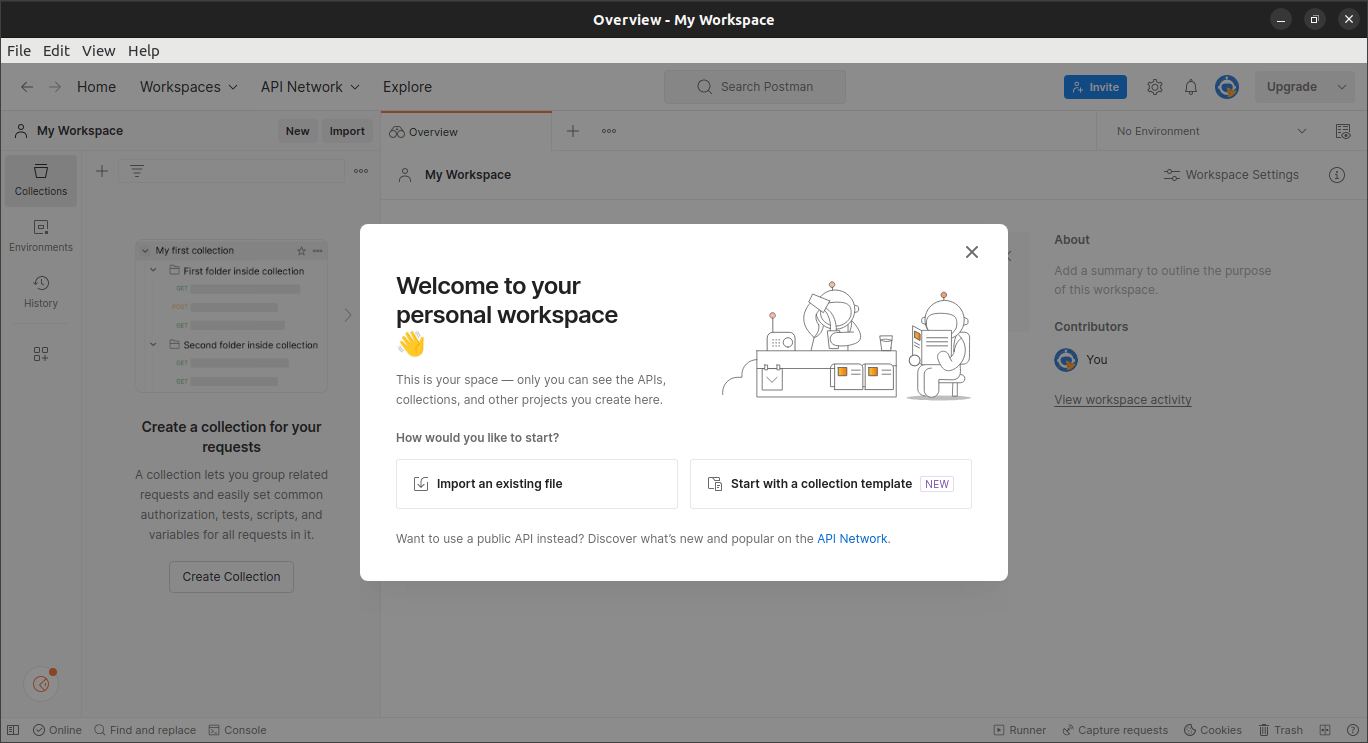
4.1 Introducing Postman: Your Testing Wand 🪄
Before we begin our testing journey, let's meet Postman, an essential tool for API testing and development. Postman will be your trusty wand as we cast spells to interact with Taskmaster App's API endpoints.
Complete the Installation of Postman in your system, If you are using UBUNTU here are the Methods:
Method 1: Using Snap (Recommended) Snap is a package management system that comes pre-installed with most modern versions of Ubuntu. You can use Snap to install Postman easily.
Open a terminal by pressing
Ctrl + Alt + T.Update your package list:
sudo apt update
- Install Postman using Snap:
sudo snap install postman
Method 2: Using cURL If Snap is not available or not your preferred method, you can use cURL to download and install Postman.
Open a terminal by pressing
Ctrl + Alt + T.Install cURL if you don't have it already:
sudo apt install curl
- Download the Postman tarball using cURL:
curl -LJO https://dl.pstmn.io/download/latest/linux64
- Extract the downloaded tarball:
sudo tar -xzf Postman*.tar.gz -C /opt
- Create a symbolic link to make Postman executable system-wide:
sudo ln -s /opt/Postman/Postman /usr/bin/postman
Method 3: Using wget Similar to cURL, you can use wget to download and install Postman.
Open a terminal by pressing
Ctrl + Alt + T.Install wget if you don't have it already:
sudo apt install wget
- Download the Postman tarball using wget:
wget https://dl.pstmn.io/download/latest/linux64 -O postman.tar.gz
- Extract the downloaded tarball:
sudo tar -xzf postman.tar.gz -C /opt
- Create a symbolic link to make Postman executable system-wide:
sudo ln -s /opt/Postman/Postman /usr/bin/postman
Once you've completed one of these methods, you should have Postman installed on your Ubuntu system. You can now open Postman either by searching for it in your applications or by typing postman in the terminal.
4.2 Obtaining API Endpoint URLs: Unveiling the Magic Links 🔗
To put Taskmaster App to the test, you'll need the API endpoint URLs. We'll show you how to retrieve these enchanting links after deploying Taskmaster App with Serverless Framework.
To obtain the API Endpoint URLs go to your Terminal and get it from there.
Copy the URL and paste it in the Postman, You will get your Result.
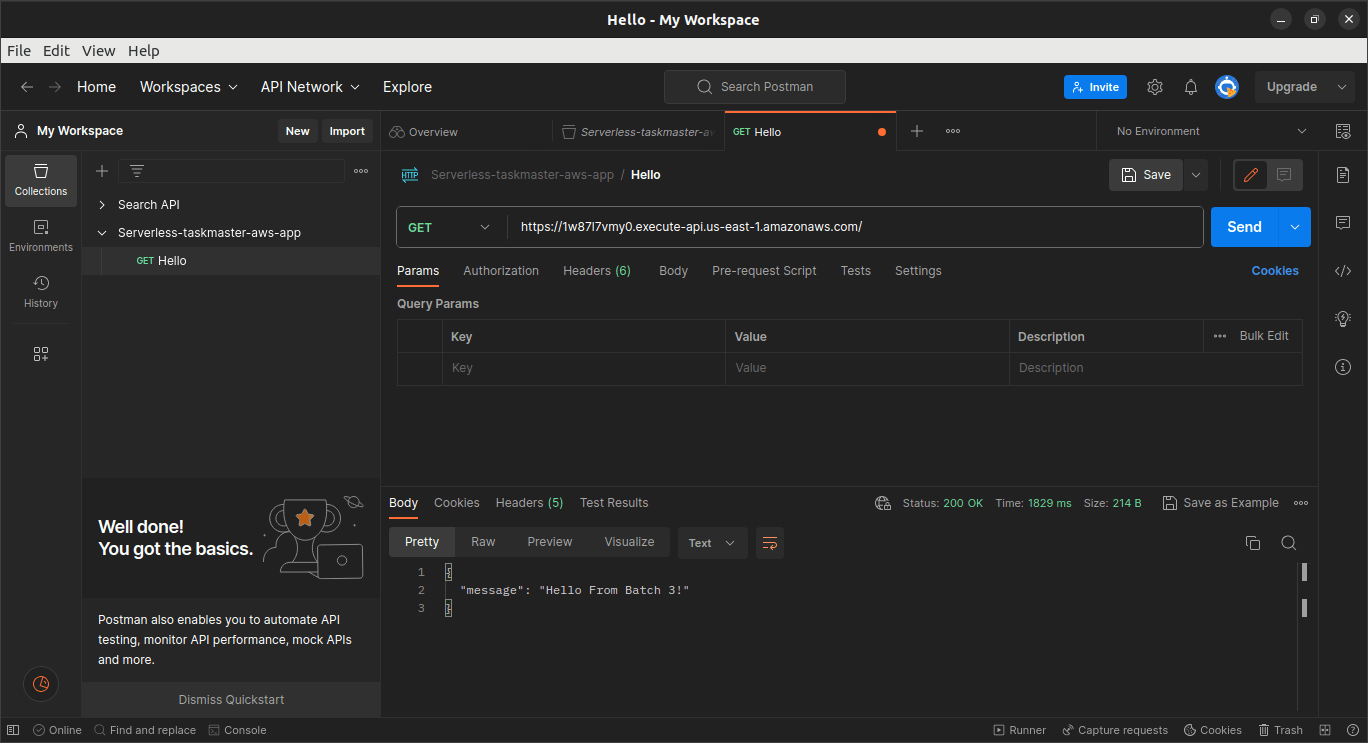
Same Way You can Continue for further URLs.
Conclusion: Embrace the Power of Testing 🚀
Congratulations! In this chapter, we've tested Taskmaster App using Postman, ensuring its magical capabilities are shining bright. Postman has proven to be an invaluable tool for API testing, allowing us to validate the effectiveness of our serverless spells.
In the upcoming chapters, we'll continue our journey by integrating DynamoDB for data sorcery, orchestrating event-driven magic, and automating the CI/CD process. The magic of the Taskmaster App is now validated and ready to charm its users. Let's press onward and take our AWS Serverless Mega Project to even greater heights! 🎉🧙♂️